
 Accounting
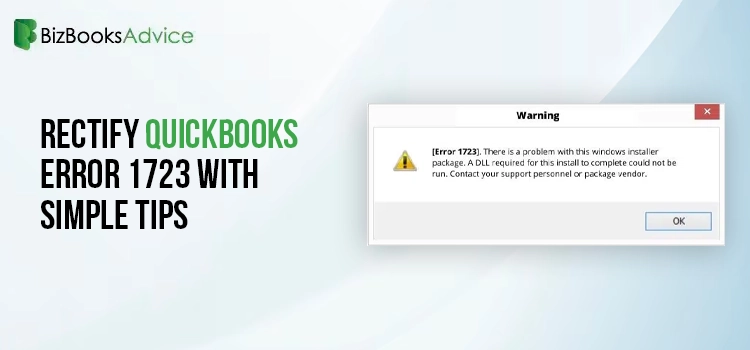
Windows Installer Package is basically a database-like file that holds all the essential requirements to install, maintain, and uninstall software on the Windows PC. Similarly, QuickBooks also requires the Windows installer package for the smooth installation of the software. Slighter damage in the Windows installer might give rise to QuickBooks Error 1723 and prevent the users from installing the software. However, when the error pops up, it flashes the error message stating, “There is a problem with this Windows installer package.” So, read this informative guide and find the best solutions to rectify Error Code 1723 in QuickBooks.
Possible Causes Behind Error Code 1723 in QuickBooks
Every time users confront Error Code 1723 in QuickBooks, it might occur for the following reasons. So, let’s read about all of them to get better information.
- One major cause behind the QuickBooks Error Code 1723 is damage within the Windows installer package.
- Secondly, this issue may appear if the temp folder permissions aren’t configured appropriately.
- You might be working on the old Windows operating system, which is creating trouble installing the latest QuickBooks application.
- Sometimes, the issue may arise when the user doesn’t have enough admin permissions to install QuickBooks software.
- Your system isn’t compatible enough to install the latest version of QuickBooks Desktop on your PC.
Effective Solutions to Fix QuickBooks Error Code 1723 Quickly
To fix the QuickBooks Error Code 1723 quickly, you must implement the solutions in the same manner given below. Read all the solutions below closely and resume installing the QuickBooks application without any interference.
Solution 1: Allot Proper Administrative Rights to the User Account
At times, trying to install QuickBooks without any admin rights is one of the probable root causes behind QuickBooks Desktop error 1723. Therefore, it is essential to allot proper admin rights to the user account to rectify the issue.
- Primarily, the users must tap on the Windows icon and then choose the Control Panel from the right side.
- Afterwards, double-tap on the User Account and pick the account that requires administrative privileges.
- Next, you must choose the Change the Account Type and then hit the Computer Administrative option.
- After this, opt for the Change Account Type and relaunch your PC.
- Thereon, you must sign in to your account and try to update the QuickBooks Desktop again.
- If you notice that the QuickBooks Install Error 1723 is still interrupting, try another solution.
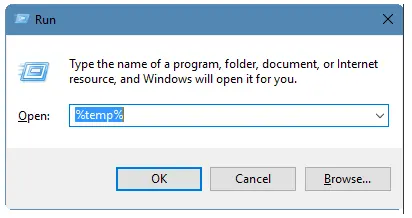
Solution 2: Modify the Permissions in Windows %Temp% Folder
- Begin the process by pressing the Windows Logo key to bring up the Start menu.
- After that, mention “%temp%” in the search console of the Start menu and hit the Enter key.
- Eventually, the Temp folder launches on your computer screen.
- Following this, choose the Properties tab from the list of options available.
- Now, browse to the Security tab from the Properties window and tap the Edit menu.
- Next, highlight your Windows username. Then, select the Full Control checkbox located right beneath the Allow Column.
- Afterward, hit the OK tab twice and try to install the QuickBooks Desktop again.
Solution 3: Correct the Installation Issues With the Install Diagnostic Tool
To configure a damaged or incomplete installation of the QuickBooks application, you must run the QuickBooks Install Diagnostic Tool . This tool will diagnose and repair all installation issues swiftly, allowing users to continue the QB installation process smoothly.
Read More- QuickBooks Tool Hub
Solution 4: Try to Run the System File Checker Tool
The system file checker tool in QuickBooks scans and then configures the issues with the system files to fix them. Therefore, to solve QuickBooks Error 1723, you must run the system file check tool by implementing the steps below.
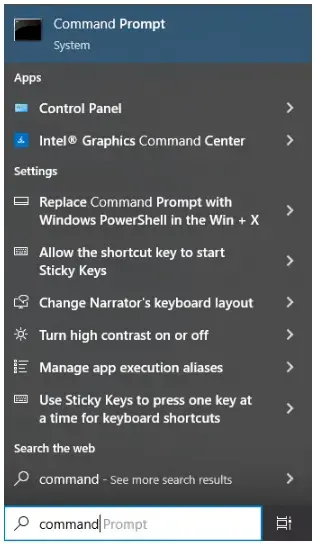
- The first and foremost step is to launch the Start menu and insert “Command Prompt” in the search panel.
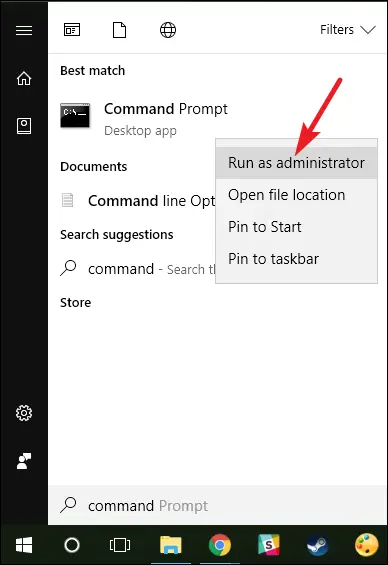
- Afterwards, you must right-click on the Command Prompt icon and then choose the Run it As Administrator option.
- Now, if prompted, you have to input the password correctly.
- Next, once you get the Command prompt screen, give “SFC/Scannow” and press the Enter key.
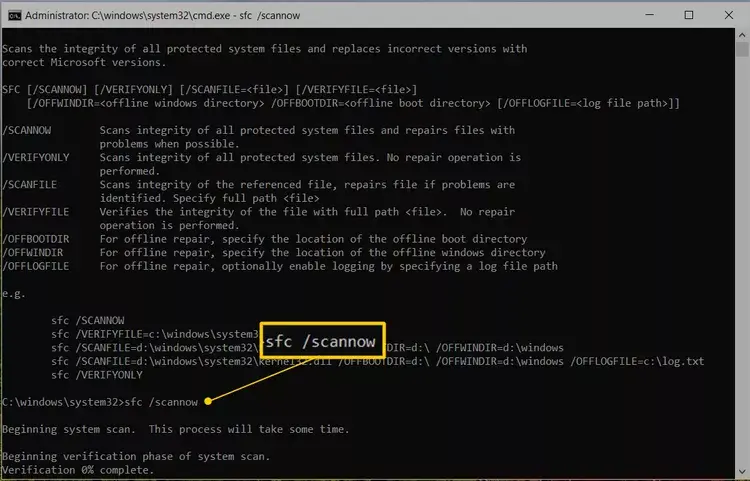
- Thereon, allow the System File Checker Tool to diagnose and rectify the issue affecting the system.
Solution 5: Get the Most Current Version of Windows
There are certain scenarios when the users might end up with QuickBooks Error Code 1723 while running the older Windows operating system. Therefore, to update the Windows operating system, you must follow the steps below.
- Initially, launch the Start menu and then move to the Settings option.
- Afterwards, you must look for the Windows Updates and verify if any new update is available.
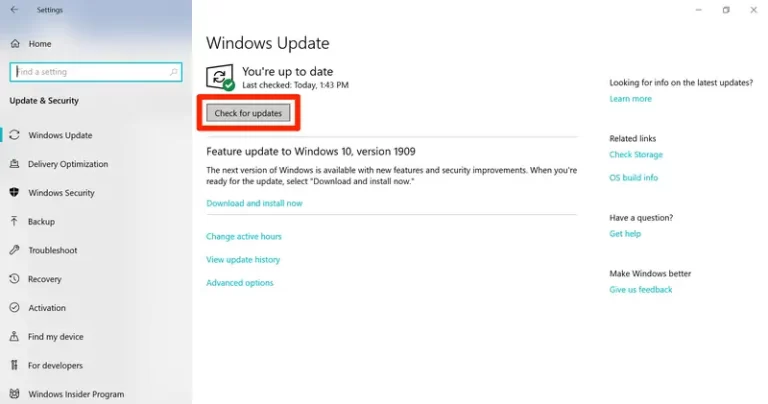
- If you find any new Windows Update available, hit the Download and Install tab.
- Moreover, you must verify that no other application is open and that you have already created a backup of your entire system.
- Click on the screen to install the latest Windows updates as per the instructions.
- Conclude the process by installing the QuickBooks Desktop again on the new Windows operating system.
Solution 6: Configuring the Damages Within the Windows Components Manually
Issues with the Microsoft Windows components like .NETFrameowrk or MSXML files might create trouble while installing the latest QuickBooks Desktop. So, to resolve the issue, you must repair both .NETFramework or the MSXML files using the below steps.
A. Checking the .NETFramework
If you see that the .NETFramework 4.5 checkbox isn’t marked, then do as follows:
- Initially, you must mark the checkbox to enable .NETFramework 4.5 or the higher version.
- After that, hit the OK tab to save the changes accurately.
- Thereon, relaunch your system after making the necessary changes.
If you notice that the .NET Framework 4.5 checkbox is previously marked
- Firstly, mark the checkbox to disable the .NET Framework 4.5. Make sure that you don’t switch it on.
- When the changes are done, hit the OK to implement them.
- Next, you must relaunch your Windows PC. Once you log in again, resume the steps for turning on .NET Framework 4.5.
Review the NET Framework 3.5 SPI
If the .NET Framework 3.5 SP1 checkbox isn’t marked, then do the following:
- Initially, you must circle the checkbox to turn on .NET Framework 3.5 SP1.
- After making the necessary changes, tap on OK to save them.
- Complete the process by relaunching your Windows PC.
Now, if the .NET Framework 3.5 SP1 checkbox is already checked:
- Begin the process by marking the checkbox to turn off .NET Framework 3.5 SP1. You must not switch it back on here.
- When all the necessary changes are made, click OK to save your changes.
- Thereon, you must relaunch your computer.
- Now, when you log back into the Windows device, perform the same steps given above to enable .NET Framework 3.5 SP1 again.
B. Registering the MSXML DLL Files
- For the 64-bit operating system, try registering MSXML files using the following steps.
- Primarily, you must launch the Start menu and insert “cmd” in the search console.
- Afterwards, right-click on the CMD and choose Run as Administrator tab.
- When you are on the Command Prompt window, mention “cd\windows\syswow64” and hit the Enter key.
- After that, insert regsvr32 MSXML6.dll and hit the Enter key to execute.
- Complete the entire process by installing QuickBooks Desktop again.
- For the 32-bit operating system, register MSXML with the following commands.
- Initially, launch the Run command and press Windows+R on your keyboard.
- Now, open the Command Prompt window, insert regsvr32 MSXML6.dll, and press Enter.
- Once you are done applying the steps, try installing QuickBooks again.
Solution 8: Installing QuickBooks Desktop Via Selective Startup Mode
Installing the QuickBooks Desktop application through selective startup mode will help block third-party apps from blocking the software’s installation. To do so, follow the instructions below.
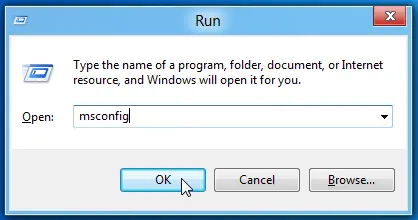
- Primarily, you must launch the Run command window and then insert “msconfig” in the search console.
- Afterwards, opt for the Selective Startup and Load system services from the General tab.
- Now, switch to the Services tab and opt for the Hide all Microsoft Services option.
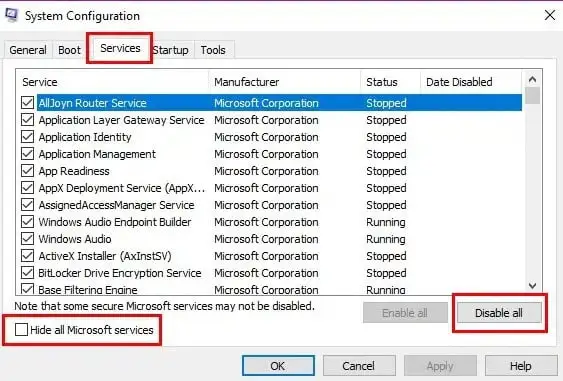
- Thereon, choose Disable All and then keep the checkbox of hiding all Microsoft Services unmarked.
- Next, you must opt for the Windows Installer from the provided list of services.
- Furthermore, hit the OK tab and choose the Restart option from the System Configuration screen.
- Complete the entire process by installing the QuickBooks Desktop again to see if the issue still exists.
Conclusion!!
QuickBooks Error 1723 often appears on the screen while installing or uninstalling the application due to issues with the Windows Installer package. However, with the help of the above-given troubleshooting methods, you can easily rectify this error. Thus, you can install the QuickBooks application smoothly without any interference. Furthermore, if you are experiencing any issues while installing QB Desktop, you must contact our professionals for a quick resolution.
