Setup QuickBooks Database Server Manager & Access Multi-User Mode

- By Jonathan Browns
- Dec 24, 2025
- Accounting
- 7 min read
Setting up the QuickBooks Database Server Manager is necessary for businesses that require multiple users to work on the same project simultaneously. This built-in feature lets QuickBooks host company files on a server. Thus, it ensures secure communication between workstations.
In this post, we have provided the steps to download, install, and run the QuickBooks Database Server Manager.
What is QuickBooks Database Server Manager?
The QuickBooks Database Server Manager is a utility tool that enables users to share data files with other computers over the network. Also, it allows you to monitor the multi-user network and gives you access to work together in QuickBooks Desktop from multiple computers. However, if you have set up a network, then you require the QuickBooks Database Server Manager running to access your data files easily.
Steps to Setup QuickBooks Database Server Manager
You need to set up QuickBooks Database Server Manager 2024 to run the company files easily in a multi-user environment. Use the instructions given below for setting up the QBDBMgrN.
A. Get the QuickBooks Database Server Manager Download
The Database Server Manager is already a part of the QuickBooks Desktop file. So, to download it, all you require is to download and update QuickBooks Desktop, and it will automatically update the Database Server Manager.
B. Install Database Server Manager
Once you download the Database Server Manager QuickBooks, you need to get it installed on your server computer. This is basically the computer that hosts the data files. Wondering how to install QuickBooks database server manager? Then, perform the stepwise instructions given below.
Note: If you are an accountant or someone who hosts multiple versions of QuickBooks Desktop on your network, then you need to install them in order. For that, you have to install them first and end up with the latest version.
- Exit from the open programs on your server computer, consisting of QuickBooks.
- After this, launch the install file that you have recently downloaded. You will get the downloaded setup file named Setup_QuickBooks.exe.
- Thereon, act as per the instructions given on the screen.
- Now, you must pick the install type between the Custom or Network Options and hit the Next option. Make sure not to hit the Express option.
- Note: With the Express option, you can easily install the QuickBooks Desktop over the latest version of QB Desktop. Herein, you may require the latest version for comparison as well as for the troubleshooting process.
- Furthermore, select the suitable option for network setup and hit the Next tab. By performing both of the following options, you can install the Database Server Manager. If QuickBooks Desktop is previously installed on the server computer, it may overwrite any existing company data.
- If you wish to run the Database Server Manager and QuickBooks Desktop on a server computer, opt for the “I’ll be using QuickBooks Desktop on this computer, AND I’ll be storing our company file here so it can be shared over our network. It is strongly suggested to opt for this option.
- On the other side, if you only want to run Database Server Manager on your server PC, go with the “I will not be using QuickBooks Desktop on this computer.”
- Furthermore, do as per the instructions given on the screen. Once all is set, hit the Install option. As a result, Windows may prompt you for permission.
Important Tip: QuickBooks prepares a new Windows user for each version of Database Server Manager. All you require is to assign QBDataServiceUserXX enough permissions to access the folders holding data files.
C. Configure the Database Server Manager
If you wish to access the default settings, then skip this section and proceed further.
- Initially, move to the Settings tab and insert “Services” in the search panel.
- Thereon, you must access the QuickBooksDBXX services.
- Afterwards, browse to the General tab followed by the Service Status. If you see that it’s not set as either Started or Running, hit the Stop option.
- Now, go to the Startup Type and click the Automatic option.
- Thereon, browse to the Logon tab and hit the Local System account option.
- Furthermore, head to the Recovery option and tap on the Restart the Service by clicking on the following options:
- First failure
- Second failure
- Subsequent failure
- At last, move to the General option and tap on the Start menu to restart the Database Server Manager.
D. Set up Your Firewall Permissions
If you still haven’t already, then review your Windows firewall permissions. Herein, you must verify that you have enough Database Server Manager permissions to run on your server computer.
How to Run the QuickBooks Database Server Manager With Quick Steps?
Perform the instructions given below to access the QuickBooks Database Server Manager on your server computer.
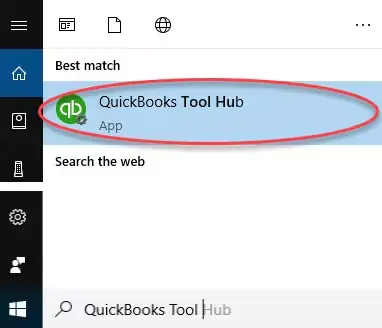
Step 1: Download & Install QuickBooks Tool Hub on Server PC
Before running the QBDBMgrN, make sure that you have setup the latest version of QuickBooks Tool Hub.
Step 2: Run the Latest Version of QuickBooks Database Server Manager
The server computer is the one that holds the QuickBooks data file. Whereas the other computers are the ones that are linked to your network and your workstations. Furthermore, use the steps below to run the QuickBooks Database Server Manager.
- To begin with, launch the QuickBooks Tool Hub and from there tap on the Network Issues tab.
- After this, hit the QuickBooks Database Server Manager tab. If you notice that QuickBooks isn’t present on your server, then it might ask you to do so.
- Thereon, choose the Start Scan option when you get the company file folders. If you couldn’t find it, tap on the Browse option and look for the location where the data file is placed. Then, go with the Start Scan option.
- Consequently, the QBDBMgrN will eventually start configuring your firewall permissions. When done with the scanning part, hit the Close tab.
- Finally, access the QuickBooks application on each workstation and move to the File menu > Switch to multi-user mode.
How to Use QuickBooks Database Server Manager With Easy Steps?
Once you install the QuickBooks Database Server Manager, you can easily scan for your company files from other computers over the network. Also, it helps you and others on your network to work together in QuickBooks Desktop via multiple computers.
First Step: Scan Your Folders
Before scanning the files, it’s essential to scan the folders holding them. All you need is to scan the folders once.
- Access your server computer hosting the data files and click the Start menu.
- After this, insert “Database” in the search bar and launch the QuickBooks Database Server Manager.
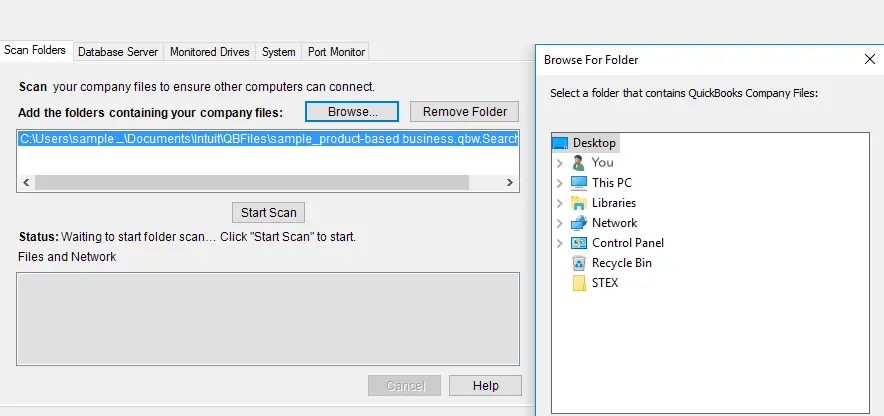
- You must browse to the Scan Folders tab and click the Browse option. Later on, pick the folders that contain the data files (QBW).
- Move to the OK tab once it’s finished.
- Conclude the process by hitting the Start Scan option.
Once the scanning process is over, you will see that the folders will reflect in the QuickBooks company files found section. From there, you can easily access the data files from these folders via other computers over the network.
Second Step: Monitor Your Drives
Once the scanning is done, the drive with the folders will reflect within the Monitored Drives tab. You need to choose the drive for monitoring these folders. Doing so, you won’t have to re-scan the folders if you change or transfer the company files into them.
- Initially, browse to the Monitored Drives tab.
- Afterwards, tick-mark the checkboxes for the hard drives holding the data files.

Third Step: Manage the Database Server Manager
You will get two different tabs in QuickBooks Database Server Manager, which allows everything to run accurately.
- By accessing the System tab, you can get to know where the Database Server Manager is installed on your computer.
- The second one is the Database Server tab, which provides you with the real-time status of the tool and who it’s linked with.
What to Do If You Can’t Open Database Server Manager?
If your QuickBooks Database server manager stops or fails to open, then you can restart it on your server computer. Perform the steps below for your current setup.
A. If you have installed QuickBooks Desktop & Database Server Manager
- Initially, launch QuickBooks on your server computer.
- After this, hit the File menu and head to the Open or Restore Company.
- Thereon, move to the Open a company file option and then access your data file. Later on, hit the Next option.
- Choose the checkbox of Open file in multi-user mode and hit the Open tab.
- Later on, you must log in to your company file.
- Furthermore, hit the File menu and then click the Close Company/Log off option. As a result, it will shut down the data file on your server.
- Afterwards, launch the Start menu and type “Database” in the search console. Then, you can easily launch the QuickBooks Database Server Manager.
If you notice that everything is working great, then you are all set to go. Whereas, if the error message pops up, go through the steps instructed below.
B. If you have only installed QuickBooks Database Server Manager
- Under this process, tap on the Start menu and choose the Control Panel.
- After this, launch the Administrative Tools menu and hit the Services tab from the available list of options.
- Thereon, right-click on the QuickBooksDBXX service and then hit the Restart option. Note: Herein, the XX year of your Database Server Manager.
If you only install the QuickBooks Database Server Manager
- Under this process, hit the Start menu and launch the Control Panel.
- After this, launch the Administrative Tools option and from there pick the Services from the options available
- Once you get it, right-click on the QuickBooksDBXX Service and choose the Restart option.
If you see that the Database Server Manager doesn’t restart, then relaunch your server PC.
Conclusion
So, we conclude this post and hope that now you can easily set up the QuickBooks Database Server Manager on your device. Thus, it will let you run the company file in multi-user mode without any hindrance. Furthermore, if you still require any additional help, then have a one-to-one conversation with our BizBooksAdvice professionals.
Frequently Asked Questions (FAQ’s):-
Question 1: What does QuickBooks Database Server Manager let you do?
Ans. By running the QuickBooks Database Server Manager, you can easily share your data file with other computers over the network. However, you also require the QBDBMgrN to run the company file in multi-user mode.
Question 2: Where is QuickBooks Database Server Manager located?
Ans. You can find the QuickBooks Database Server Manager within the QuickBooks installation folder on your server computer, which is basically C:\Program Files\Intuit\QuickBooks(Year) or C:\Program Files (x86)\Intuit\QuickBooks(Year).
Question 3: What system requirements do you need to run the QuickBooks Database Server Manager?
Ans. To run the QuickBooks Database Server Manager uninterruptedly, you need a 64-bit version of Windows OS. Also, you need a 2.4 GHz + processor and RAM up to 8GB for 1-5 users. The disk space should be 2.5 GB, along with an SSD recommended.
Question 4: What if QuickBooks Database Server Manager is not running?
Ans. If the QuickBooks Database Server Manager isn’t running, then the users won’t be able to access the data files in a multi-user environment.
Question 5: How do I restart QuickBooks Database Server Manager?
Ans. To relaunch the QuickBooks Database Server Manager, open the Administrative Tools option. After this, head to the Services option, right-click on the QuickBooksDBXX service. Then, opt for the Restart option to complete.
About The Author

Jonathan Browns
Jonathan Brown is a trained QuickBooks professional with 10 years of experience in the accounting sector. Moreover, he is passionate about helping businesses reduce the stress of managing accounts. Also, he is proficient in assisting entrepreneurs and small business owners to use QuickBooks and enhance their accounting experience.

QuickBooks Desktop, Payroll or Enterprise
Advanced Support for QuickBooks Desktop, Payroll & Enterprise Solutions
From payroll tax setup, direct deposit issues to Enterprise performance tuning and Desktop upgrades - our QuickBooks experts provide accurate and stepwise assistance. Get dependable support designed to minimize downtime and maximize efficiency.
Recent Posts
-
This QuickBooks Company File Needs to Be Updated: A to Z Guide
-
Renew QuickBooks Subscription: Desktop & Online Renewal Guide
-
QuickBooks Online Login: Sign in to Access Your QB account
-
Change EIN in QuickBooks: Complete Guide for Desktop, Online & Payroll
-
How to Fix QuickBooks Error 15241 During Payroll Update