Fix QuickBooks Error 1603 While Installing QB Desktop

- By Jonathan Browns
- Sep 18, 2025
- Accounting
- 7 min read
To run the QuickBooks Desktop application smoothly, it is essential to set up on your workstations. But, sometimes, the users might strike QuickBooks Error 1603 while attempting to install the QuickBooks Desktop program. In other instances, this error is also discovered when you try to launch the QuickBooks after its installation. It might occur because of the damage in the installation files or issues with the Windows Installer. However, this issue strikes during the initial setup of the QuickBooks program, so it is crucial to sort it soon to resume your ongoing tasks.

Herein, this write-up, we will give you an insight information regarding the potential causes of QuickBooks Error Code 1603 and the troubleshooting methods to fix them. So, let’s have a quick glimpse at this blog.
Error 1603 is an installation issue that prevents the users from installing the QuickBooks application. It might happen due to the damage in the Microsoft .NET Framework, C++, or MSXML components. However, upon the arrival of this error, the following error messages come into view that says:
- Error 1603: There was a problem installing Microsoft .NET Framework [version]
- Error 1603: The update installer has encountered an internal error
Reasons Why QuickBooks Installation Error 1603 Appears
The QuickBooks Installation Error 1603 itself suggests that it may appear during the initial installation of the QuickBooks program. However, there are several other factors which might give rise to this error. So, let’s read all the possible root causes discussed below to get a better insight into the issue.
- Problems with the installation or damage in the Microsoft .NET Framework might give rise to the QuickBooks Error Code 1603.
- Another reason may be corruption in the QuickBooks Installation file.
- Third-party applications or Windows Firewalls are preventing users from installing QuickBooks due to security purposes.
- Insufficient Windows administrator permissions may also prevent users from QuickBooks installation.
- Not operating the Windows version updated as per the recently launched version.
- Your system isn’t compatible enough to install the latest version of the QuickBooks Desktop.
Simple Tricks to Address 1603 Fatal Error During Installation QuickBooks
If you are encountering a 1603 fatal error during the installation of QuickBooks, then don’t worry and follow the solutions described below. Read all the solutions listed below closely and apply the solutions as per the cause of the error.
Solution 1: Begin Operating the Install Diagnostic Tool
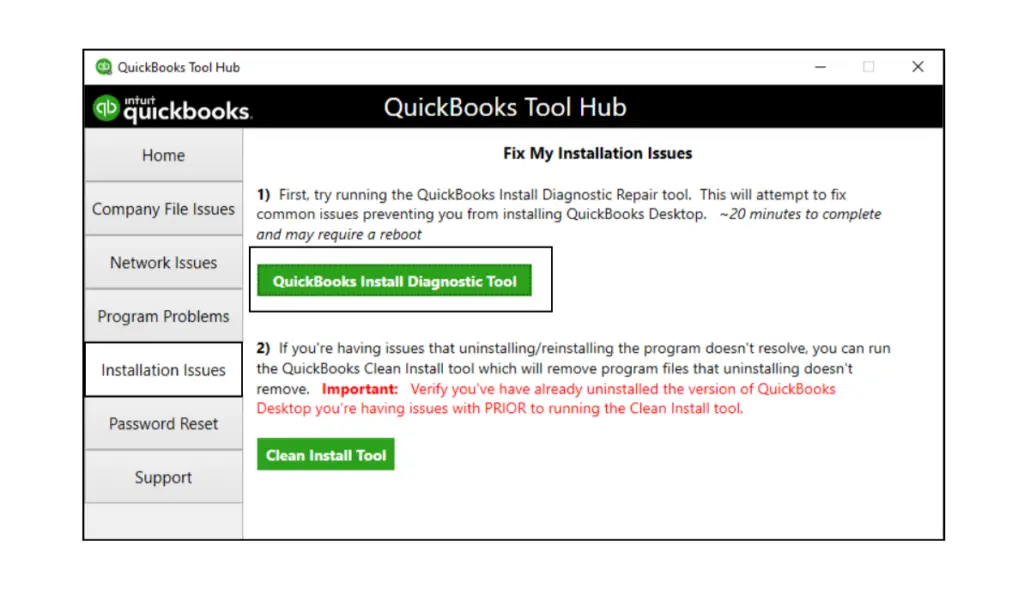
QuickBooks Install Diagnostic Tool is a great utility that helps to address the damaged or corrupt installation of the QuickBooks program. However, by running the Install Diagnostic Tool, you can fix the QuickBooks Update Error 1603 easily. Thus, it will allow you to install the QB Desktop again without any interruption.
Solution 2: Begin Installing the Latest Windows Updates
Most often, the users might results in QuickBooks Installation Error 1603 while running the older version of Windows. Therefore, to avoid installation issues in the future, make sure that you are working on the latest Windows updates. Implement the below steps to get the Windows updates installed.

- Begin the process by clicking on the Start menu and then the Settings option.
- After this, you must choose the Windows Update option.
- Now, it will immediately start downloading the latest Windows update. If your Windows is already updated, then it will flash the message stating, “You Are Up-To-Date.”
- Afterwards, try installing the QuickBooks Desktop and see if the QuickBooks Error Code 1603 is still bothering you.
Read More:- QuickBooks Tool Hub
Solution 3: Using the Selective Startup Mode For Installing QuickBooks

Installing the QuickBooks Desktop in selective startup mode will block the interruption of third-party antivirus programs. Thus, it ensures the smooth installation of the QB application and helps you resolve the Error 1603 QuickBooks Desktop.
Step 1: Move to the Selective Startup Mode
To ensure that no other apps are interrupting while installing QuickBooks, you must use the selective startup mode.
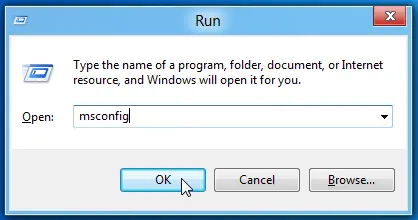
- Primarily, launch the Run window and add msconfig in the search console.
- After that, you must move to the General tab and tap on the Selective Startup and Load System services.
- Thereon, head to the Services tab and circle the checkbox of the “Hide All Microsoft Services” tab.
- Now, hit the Disable All and make sure that you won’t unmark the Hide All Microsoft Services.
- Following this, choose the Windows Installer option from the available list of options.
- Afterwards, tap on the OK tab and then choose the Restart option from the System Configuration window.
Step 2: Uninstall or Install the QuickBooks Desktop Application
- Initially, try installing the QuickBooks Desktop application once again.
- After this, bring up the Run Command window and insert “msconfig” in the search panel.
- Thereon, move to the General tab and tap on the Normal Setup tab.
- Now, hit the OK tab and then the Restart option from the System Configuration window.
Solution 4: Resolving the Issues With Windows Components Manually
As discussed above, sometimes the damage or corruption in the Windows components, such as MSXML or .NET Framework, might interrupt the QB installation. So, to get rid of the issue, you must repair the Windows components manually by applying the below steps.
A. Rectifying the MS .NET Framework issues
Follow the instructions given below to review and then repair the MS .NET Framework issues.
Users of Windows 10 and the latest version
- shut down all the open programs on your workstation.
- After that, open the Start menu and mention Control Panel in the search area to open it.
- When the Control Panel window opens up, head to the Programs and Features.
- Following this, choose the Uninstall a Program tab.
- Now, pick the Turn Windows Features on or off option.
- Thereon, start looking for the .NET Framework from the list of options available.
Now, you must start reviewing the settings for both .NET Framework 4.5 and .NET Framework 3.5 SPI.

Review the .NET Framework 4.5 (or later)
If you haven’t selected the .NET Framework 4.5 (or later) checkbox in advance.
- Initially, you must circle the checkbox to enable the .NET Framework 4.5 (or later).
- After that, hit the OK tab to save the necessary changes successfully.
- Thereon, relaunch your Windows PC.
Read More:- QuickBooks Error 1723
If you have already marked the checkbox of .NET Framework 4.5 (or later)
- Firstly, mark the checkbox to disable the .NET Framework 4.5 (or later). Make sure that you don’t switch it on.
- After that, hit the OK tab to restore the relevant changes.
- Now, relaunch your PC and then move further.
- Once you login back to Windows, apply the steps given on the screen to enable the .NET Framework 4.5 once again.
Review the .NET Framework 3.5 SP1.
If you see that the .NET Framework 3.5 SPI checkbox is selected.

- Primarily, you must mark the checkbox to enable the .NET Framework 3.5 SPI.
- After this, tap on the OK option to save the necessary changes.
- Now, relaunch your Windows PC.
If you see that the .NET Framework 3.5 SPI Checkbox is previously chosen.
- Start the process by choosing the checkbox to enable the .NET Framework 3.5 SPI. You don’t have to switch it on.
- Afterwards, click the OK and then save the necessary changes done.
- Now, relaunch your PC to complete the process.
- Once you login back to Windows and perform the steps to switch on .NET Framework 3.5 SPI again.
- If you are still receiving an error while switching on or off the .NET Framework, you can communicate with our IT experts.
Fix the Damages With The Microsoft MSXML Components
Follow the below-given instructions to repair the damages present in the MSXML components.
A. 64-bit operating system for the registration of the MSXML components
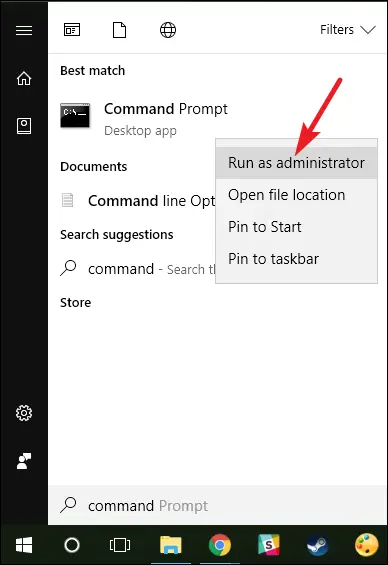
- To begin the process, hit the Start menu and mention cmd in the search area.
- After this, right-click on the CMD and opt for the Run as Administrator option.
- Now, mention cd\windows\syswow64 in the command prompt window and hit the Enter key.
- Thereon, insert regsvr32 MSXML6.dll and then hit the Enter key to move further.
- At last, try installing the QuickBooks Desktop application to see if the QuickBooks 1603 error still exists.
B. 32-bit operating system for the registration of the MSXML components
- Primarily, launch the Run window and then mention cmd in the search console.
- When you are on the C: Prompt screen, mention regsvr32 MSXML6.dll and hit the Enter key.
- After that, start installing the QuickBooks Desktop on your PC.
Read nore:- Windows Firewall is Blocking QuickBooks
Solution 5: Establish Or Add a Windows User With Administrator Rights
Adding a Windows user with admin rights might help you resolve QuickBooks Error Code 1603 by ensuring full system access. Thus, it helps you install or update QuickBooks Desktop by avoiding the issues caused due to restricted user rights. Follow the below-given steps to generate a Windows user with admin rights for Windows 10.

- To begin with, hit the Start menu and then insert Settings in the search area.
- After this, pick the Accounts option and choose the Family and Other Users.
- Now, move to the Other Users tab and tap on the Add someone else option.
- Next, if you wish to generate a local account, then do as follows.
- You must choose the I don’t have this person’s sign-in information from the bottom.
- Afterward, browse to the Add a User without a Microsoft account menu.
- Next, you must input a username and then generate a password.
- Now, pick the security questions and provide the appropriate answers for them.
- You have to pick the new local account entry to expand the menu.
- Afterwards, choose the AddChange Account Type option.
- Then, tap on the Administrator option by clicking on the drop-down menu.
To allow the admin rights in Windows 8, 8.1, 10, or Server 2012 versions, perform the below steps.
- In the beginning, launch the Run window and add Control Panel in the search box.
- After this, opt for the User Accounts and then hit the Manage Another Account tab.
- Now, you must double-tap on the QBDataServiceUser and head to the Change the account type.
Solution 6: Verify that QuickBooks is Updated to the Latest Version
To ensure and install the latest QuickBooks updates, you must implement the below steps closely.
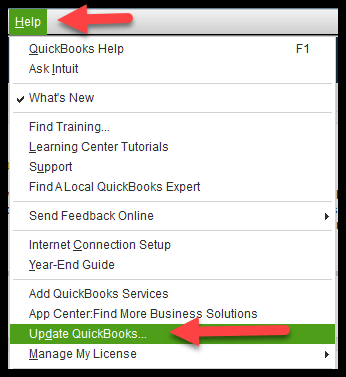
- Primarily, launch the Start menu and tap on the Help menu.
- Afterwards, switch to the Update QuickBooks option and then click the Update Now tab.
- Now, circle the checkbox next to the Reset Update and remove all the old update downloads.
- When you are all sorted, tap on the Get Updates option to commence with the download process.
- Once you are all sorted downloading the QuickBooks, relaunch the application.
- Thereon, if prompted, then give the consent for installing the latest QuickBooks version.
Conclusion
QuickBooks Error 1603 is a complex issue that might appear while installing the QuickBooks application. Thus, it interrupts the users from accomplishing their ongoing business operations. So, by following the solutions given above in this post, you can address this issue smoothly. Furthermore, if you are still having any trouble installing the QB application, then connect with our QB professionals for help.
frequently asked question
Question 1: What is the reason behind the QuickBooks Desktop update not installing issue?
Users often experience QuickBooks Desktop update not installing issues due to unstable network connectivity, interruption due to firewall, or corrupt installation files. This issue may also caused by the background running applications or incorrect system date and time.
Question 2: Why is my QuickBooks Desktop update taking longer time?
Most often, the QuickBooks Desktop update process gets stuck in the middle due to multiple factors like poor internet connection and improper permissions. It may also appear because of the problems with the Windows updates.
Question 3: How can you prevent QuickBooks Error 1603 from occurring in the future?
To prevent the QuickBooks Error 1603 from occurring in the future, you must take care of the following points.
- It is mandatory to perform the backup of the company file to prevent the data from any loss or damage.
- Check that your system meets the basic requirements to run the QuickBooks Desktop application.
- Verify that the Windows Firewall isn’t creating issues while installing QuickBooks.
Question 4: From where do I find my QuickBooks license number?
You can find the QuickBooks license number by logging into the Customer Account Management Portal (CAMP). Once you access the account, tap on View details, and it will present you with the license number and product number.
Question 5: What should I do to install QuickBooks Desktop on a new computer?
To install the QuickBooks Desktop on a new computer, access the main website of Intuit and download the program file. Now, search for the file, double-tap on it, select the installation file, and follow the on-screen guidelines to complete the installation.
About The Author

Jonathan Browns
Jonathan Brown is a trained QuickBooks professional with 10 years of experience in the accounting sector. Moreover, he is passionate about helping businesses reduce the stress of managing accounts. Also, he is proficient in assisting entrepreneurs and small business owners to use QuickBooks and enhance their accounting experience.

QuickBooks Desktop, Payroll or Enterprise
Advanced Support for QuickBooks Desktop, Payroll & Enterprise Solutions
From payroll tax setup, direct deposit issues to Enterprise performance tuning and Desktop upgrades - our QuickBooks experts provide accurate and stepwise assistance. Get dependable support designed to minimize downtime and maximize efficiency.
Recent Posts
-
How to Create QuickBooks Portable Company File Easily?
-
QuickBooks Payroll Not Withholding Taxes? Here’s What to Do
-
QuickBooks View My Paycheck: Access Pay Stubs & Payroll Info
-
QuickBooks Error 15103: Understanding Causes & How to Fix It
-
QuickBooks Not Connecting to Server: A Troubleshooting Guide