How to Reconcile in QuickBooks Online- A Complete Step-by-Step Guide

- By Jonathan Browns
- Nov 27, 2025
- Accounting
- 7 min read
Understanding how to reconcile in QuickBooks Online is essential for maintaining accurate financial records. Reconciliation ensures your QuickBooks transactions match your bank statements. By entering the ending balance, reviewing each transaction, and matching them carefully, you can confirm your accounts are correct and identify discrepancies before they become bigger issues.
What Does Reconciliation in QuickBooks Mean?
Reconciliation is a process of matching your bank or credit card balance with the one available in QuickBooks Online. Moreover, when you tally the transactions, ensure that the difference between the QuickBooks and bank transactions is $0.00.
Key Things to Keep in Mind Before Reconciling Your Accounts
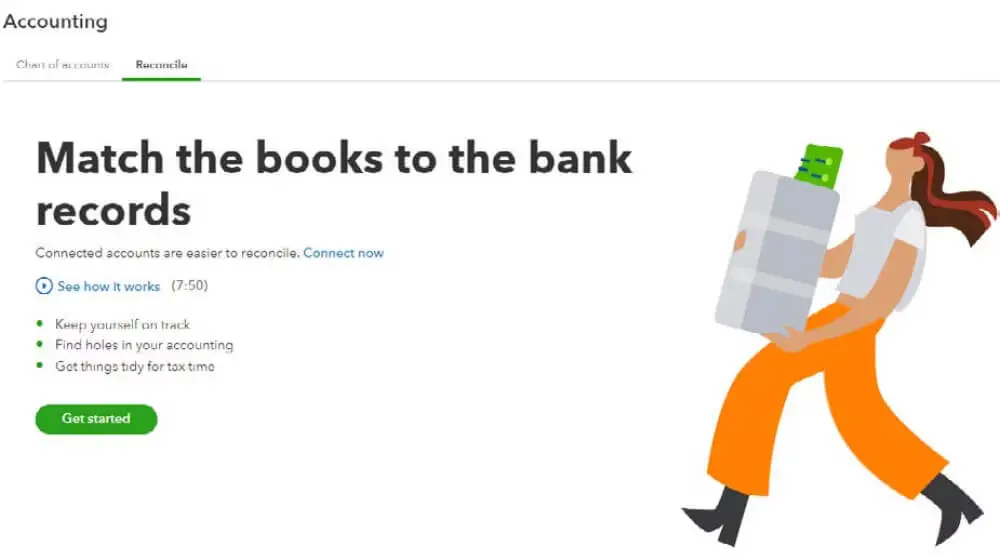
Are you wondering how to reconcile in QuickBooks Online for the first time? In that case, start checking for the opening balance. You must verify that the opening balance tallies with the balance on your real bank or credit card to QBO the day you choose to start tracking transactions. After having the monthly statements ready, you can proceed further with the reconciliation part.
How to Easily Reconcile Accounts in QuickBooks Online
Wondering how to reconcile bank account in QuickBooks Online? Carry on with the step-by-step instructions for matching the bank account with the QBO seamlessly.
1. Choose Your Bank Account To Reconcile
You can begin the reconciliation process after having your monthly bank or credit card statement ready. If you wish to reconcile for more than one month, you can do so by reconciling one statement at a time, beginning with the oldest statement.
- If you are reconciling for the first time, then tap on the Get Started tab.
- Tap on the Gear icon in the upper-right corner of the screen.
- Click on the Reconcile tab by clicking the drop-down arrow.
- With this it will launch the Reconcile page in QuickBooks Online.
- Pick the account that you wish to reconcile by clicking the Account drop-down arrow.
- Also, verify that the account you choose tallies with the account you want to reconcile your bank or credit card statement.
2. Begin With the Reconciliation Process
If your accounts are linked to online banking, check that you compare and organize all the downloaded bank transactions accurately.
Important Tip: In case you get a pop-up regarding the previous reconciliation, fix it before moving further. For that, opt for We can help you fix it.
- Start checking your Beginning balance. Herein, ensure that the beginning balance in QBO tallies with the one mentioned on your statement.
- Now, add the Ending Balance and Ending Date as given on your bank or credit card statement. There are some financial institutions that call the ending balance a new balance or a closing balance.

- Thereon, start checking your Last Statement ending date. It is the end date of your last reconciliation. Your current bank statement will begin after this day.
- Finally, when you are all set, tap on the Start Reconciling option.
3. Check and Then Tally Your Bank Transactions
Once you add the statement date and ending balance, you will get a list of transactions that you want to check and tally. Review each one of the transactions to ascertain that it tallies with the transactions on your bank or credit card statement. Herein, you can highlight the transactions as Cleared or Add New Transactions that might be missing.
If all your transactions come directly through your financial institution, then the process of reconciling becomes easy. In certain instances, you will notice that some accounts are already balanced. If not, the process is the same, but it may take more time than normal.
- Determine the first transaction listed on your statement.
- Thereon, start locating the same transaction from your QuickBooks Reconciliation screen.
- Now, do the comparison between the two transactions. If they won’t tally, then tick-mark the amount in QuickBooks. It will denote it as reconciled.
- If your transaction isn’t listed on your statement, but it is present in QuickBooks, no need to mark the checkbox next to it.
- Start doing the comparison of each transaction on your statement with the one present in QuickBooks.
- If you are confident and have a match, but there is a minor detail that isn’t right, like the payee. In that case, choose the transaction in QuickBooks to get a view and choose the Edit tab. Herein, you can make the necessary changes so that the details tally with your statement.
4. Complete the Reconciliation
After checking and matching all the transactions, QuickBooks will start computing the difference between your records and your bank or credit card statement. If you get the difference amount as zero, it shows that the account is reconciled successfully. Otherwise, if the difference isn’t zero, start checking your transaction once again to spot the discrepancies.
Once you reach the end of your transactions, the difference between your statement and QuickBooks must be CA $0.00. If it’s not, then tap on the Finish Now tab.
If the difference isn’t CA$0.00 or you won’t be able to get transactions that must be available in QuickBooks, see if everything is fine and fix it. Follow the steps to enter the transactions that aren’t present in QuickBooks.
- Start searching for those transactions you see on your bank statement, but are not available in QuickBooks.
- If you find any of those transactions, click and then open it.
- Afterwards, start verifying the Deposit To or Payment Account. Ensure that the transactions are mentioned in the correct account. You must pick a different account as required.
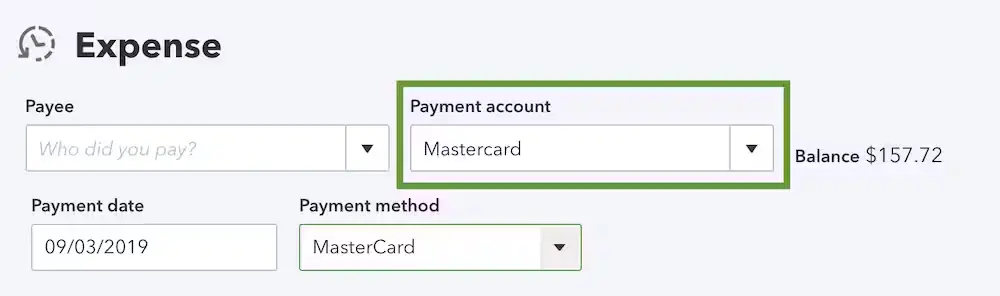
- Once all the changes are made, tap on the Save and Close option.
- Now that you have verified QuickBooks, verify if there are any missing transactions. Mention any of the transactions that you find on your bank statement but not in QuickBooks as new sales receipts or expenses.
- At last, when the difference amount is CA $0.00, you’ve accomplished the reconciliation process.
5. Check Your Past Transactions
If you want to check your past transactions, start running a reconciliation report to check your work.
- Tap on the Settings tab and then choose the Reconcile tab.
- After this, click on the History By Account option.
- Now, select the drop-down arrow to pick the Account and date range. Otherwise, you can print or export your reconciliation reports if you wish to share them.
How to Unreconcile an Account in QuickBooks Online with Simple Steps
The QBO Accountant users can access the Undo Reconciliation feature for reconciling the earlier transactions without manually editing individual transactions from within the register.
- Firstly, tap on the Accounting tab from the left menu.
- Choose the Reconcile tab and click the History by account option.
- Now, select the Account you want to reconcile and set a date range by clicking on the drop-down list.
- Start looking for the reconciliation on the list.
- Tap on the View report option to launch the Reconciliation Report.
- Thereon, start looking for any discrepancies and changes your client wants to make.
- Once you are all set, click on the drop-down ▼ in the Action column, and then tap on Undo.
- Finally, hit the Yes tab and then select Undo to confirm.
Steps to Reconcile Undeposited Funds in QuickBooks Online
Complete the following steps to review and manually reconcile the Undeposited Funds in QuickBooks Online.
- Select the Accounting menu from the QuickBooks Online application.
- Tap on the Charts of Accounts option.
- Start looking for the Undeposited funds on the list.
- Choose the View Register option.
How to Reconcile Accounts Receivable in QuickBooks Online?
Use the steps below to reconcile accounts receivable and payables by comparing report totals with your balance sheet.
- Firstly, move to the Reports menu.
- Now, write either the Accounts Receivable Ageing Summary or Accounts Payable Ageing Summary report in the search panel.
- Begin comparing the data.
- Then, manually start adjusting any differences by checking individual invoices and payments.
- At last, start checking bills and payments to reconcile discrepancies manually.
How to Reconcile Previous Months in QuickBooks Online?
Go through the step-by-step instructions to reconcile previous months in QuickBooks Online.
1. Undo Previous Reconciliation
If the previous month’s reconciliation has some errors, undo the reconciliation as discussed earlier to start from scratch.
2. Reconcile a Specific Previous Month
Once you undo the previous year’s reconciliation, use the following steps to reconcile for each month.
- To begin with the reconciliation, move to Accounting and then the Reconcile tab.
- Choose the bank/credit card account by clicking on the drop-down menu list.
- Now, set up the month by using the steps below:
- Edit the Statement date to the end date of the previous month.
- Provide the Ending Balance from your bank statement for that month.
- Then, choose the Start Reconciling option.
- Begin matching the transactions with these steps.
- QuickBooks Online reflects uncleared transactions for the period.
- Tally with your bank statement by reviewing the payments, including missing transactions.
- Now, choose ” Finish Now when the difference between the accounts is $0.
- Start reviewing the Reconciliation Summary and then print the reports for records.
- At last, repeat the same steps for the next month’s beginning balance.
Conclusion
By now, we hope that you can easily reconcile in QuickBooks Online and keep your bank statements with the ones in QuickBooks matched. Thus, it helps you take informed business decisions based on the financial statements. If you still find any issues in reconciling your bank accounts, then connect with our BizBooksAdvice professionals for better results.
Frequently Asked Questions (FAQ’s)
Question 1: When should you reconcile your accounts in QuickBooks Online?
Ans. It is suggested to reconcile your accounts in QuickBooks Online every month. By doing so, it will help the businesses in identifying the errors that you can fix then and there only. Thus, it prevents any further discrepancies faced in managing the books of accounts.
Question 2: Does QuickBooks Online automatically reconcile?
Ans. No, QuickBooks Online doesn’t provide the feature to reconcile automatically. It imports the bank feeds and suggests transaction that matches, but you have to manually check and mark the transactions as cleared.
Question 3: How do I know if my QuickBooks is reconciled?
Ans. Every time you are done with the reconciliation, QBO will automatically prepare a reconciliation report for that particular session.
Question 4: How to view a reconciliation report in QuickBooks Online?
Ans. Follow the steps below to view a reconciliation report in QuickBooks Online.
- Insert the Reconciliation Report in the Find report name in the search panel.
- Choose the Reconciliation Reports menu and click the Account fr the reconciliation report that you wish to view.
- Tap on the Report period and select the reconciliation dates.
- At last, choose the View Report option.
Question 5: How to export a reconciliation report to Excel?
Ans. For manually exporting a reconciliation report to Excel, use these steps.
- Firstly, mark the information on the report.
- Right-click and then copy the information.
- Launch the Excel application, right-click, and then paste the information.
- Do the adjustments with the column widths for the format of Excel’s report to show all the details.
Related Posts-
QuickBooks Online Payroll Subscription: A Detailed Guide
Invite Accountant to QuickBooks Online With Easy Steps
Easy Way to Create and Send Purchase Orders in QuickBooks Online
About The Author

Jonathan Browns
Jonathan Brown is a trained QuickBooks professional with 10 years of experience in the accounting sector. Moreover, he is passionate about helping businesses reduce the stress of managing accounts. Also, he is proficient in assisting entrepreneurs and small business owners to use QuickBooks and enhance their accounting experience.

QuickBooks Desktop, Payroll or Enterprise
Advanced Support for QuickBooks Desktop, Payroll & Enterprise Solutions
From payroll tax setup, direct deposit issues to Enterprise performance tuning and Desktop upgrades - our QuickBooks experts provide accurate and stepwise assistance. Get dependable support designed to minimize downtime and maximize efficiency.
Recent Posts
-
How to Troubleshoot QuickBooks Error PS038 During an Update?
-
Troubleshooting QuickBooks TLS Security Portal Errors Instantly
-
Fixing QuickBooks Script Error (Easy Troubleshooting Guide)
-
How to Create QuickBooks Portable Company File Easily?
-
QuickBooks Payroll Not Withholding Taxes? Here’s What to Do