How to Resolve QuickBooks Error 2277 – With Data Backup

- By Jonathan Browns
- Oct 04, 2025
- Accounting
- 7 min read
Backing up data is mandatory to keep sensitive company details safe and secure, especially for businesses. QuickBooks also provides the Intuit Data Protect feature to create the backup of the data file. But, sometimes, users might discover QuickBooks Error 2277 while creating the backup of the data files. The users mainly confront this issue due to the interruption of the Windows Firewall. So, overcoming the issue to regain the backup process to keep your data secure is important.
Do you find it difficult to generate the backup of the company file due to the occurrence of QuickBooks Error 2277? Ring us at +1-866-408-0444 and have a conversation with our highly-certified professionals for immediate resolution.
How Will You Describe IDP Backup Error 2277?
Most often, the users might end up with the IDP backup error 2277 while attempting to backup the data file. It could occur due to the damage or corruption in the data file. However, upon the arrival of the error, the users might receive the following error message on their computer screen stating:
“Intuit Data Protect Backup Failed: Firewall or connection issue“
However, if you are also struggling with the backup error in QuickBooks, you must continue reading this post for quick resolution.
Read More- QuickBooks Error 80004
Why Do Users Come Across QuickBooks Backup Failed Error 2277?
To provide you with in-depth knowledge about the QuickBooks Backup failed Error 2277, let’s quickly look at its root causes. Let’s begin!
- The storage of excessive junk and temporary files might be one of the reasons that trigger QuickBooks Error Code 2277.
- Sometimes, it may occur due to the problems associated with installing Intuit Data Protect.
- You haven’t installed the most recently launched version of the QuickBooks Desktop application.
- In other cases, it may happen when you haven’t completed the backup process.
- You might also encounter this error when you can’t accomplish the data backup in QuickBooks due to an interrupted internet connection.
- The users might also end up with Error 2277 in QuickBooks because of corrupted QuickBooks or data files.
How Can I Determine the Appearance of Error 2277 in QuickBooks?
The users can easily recognize the occurrence of Error 2277 in QuickBooks with the help of the following indications. So, you must read all of them carefully to understand better.
- You will get the error message on your computer screen on the occurrence of the IDP backup error 2277.
- Upon the arrival of the error, you may experience the sluggish performance of your Windows operating system.
- In other instances, you may observe the sudden freeze of the QuickBooks Desktop application.
- Sometimes, the users may face difficulty generating the backup of their QuickBooks data files.
Learn More- QuickBooks Error Code 195
Top Solutions to Fix QuickBooks Error Code 2277
Are you struggling while generating the data file backup due to QuickBooks Error Code 2277? Fret not!! Instead, read the tried and tested solutions to overcome the issue. Consequently, it will help you continue backing up the QuickBooks data file without any interruptions.
1. Remove the Excessive Cookies and Cache Files From Your Browser
Sometimes, the storage of unwanted cookies and cache files of the web browser interrupt the users from creating backups. As a result, it might lead to IDP Backup error 2277. So, to fix the issue, you must remove the excessive storage space by following the instructions below.
- Begin the process by opening the Internet Explorer on your device.
- After this, select the Tools menu > Internet Options to go further.
- For instance, if you can’t find the Tools option, press the Alt key to present the hidden tabs on the screen.
- Next, go to the General tab, and you must pick the Delete option beneath the Browsing History section.
- Furthermore, mark the following checkboxes: “Temporary Internet files and website files, Cookies and website data, History, Form data, and InPrivate Filtering” option.
- Unmark the “Preserve Favorites and website data” checkbox in the next step.
- Later on, hit the Delete button to erase the items from the lists.
- Afterwards, go to the Content tab, choose the Clear SSL State, and hit OK.
You may also read- Unexpected Error in QuickBooks
2. Pick the IDP Diagnostic Tool To Fix the Issue
Another best way to overcome the error 2277 while backing up company data is using the IDP Diagnostic tool. So, to run this tool, you must carry on with the instructions outlined below.
- To begin the process, tap the System Tray icon from the Windows desktop and then right-click on the IDP icon.
- After this, you must opt the About Intuit Data Protect to proceed further.
- Thereon, press the Ctrl + F2 keys together, and it will instantly run the Intuit Data Protect (IDP) Diagnostics tool on your device.
- When you notice the IDP tool on your screen, pick the Run Diagnostics option.
- As a result, you will notice the tool will commence diagnosing the issues.
- For instance, if the tool prompts you to access the IDP files, you must give the proper rights to allow the diagnosis without any issues.
- However, if you have a security application from a third-party manufacturer, go to the official website for the information.
- C: >> Program Files(X86) >> Common Files >> Intuit >> Data Protect >> IntuitDataProtect.exe
- C: >> Program Files(X86) >> Common Files >> Intuit >> Data Protect >> IbuEnghost.exe
- C: >> Program Files(X86) >> Common Files >> Intuit >> Data Protect >> QBIDPServices.exe
3. Mention the Intuit Domains as Trusted Websites in Internet Explorer
Including QuickBooks as a trusted website in Internet Explorer might allow users to conduct the backup. Thus, it helps you prevent the IDP backup error 2277.
- In the first place, restart the Internet Explorer and hit the Tools option from the top-right corner.
- Afterwards, navigate to the Internet Options > Security tab and unmark the checkbox of Enable Protected Mode.
- Thereon, go with the Trusted Sites option and hit the Sites option.
- Also, verify that you have unmarked the checkbox of “Require server verification (https) for all sites in this zone”.
- Next, you must include the following domains and hit the Close button to move further.
- *.backup.com
- *.intuit.net
- *.intuit.com
- Next, you must tap the Privacy tab and pick the option represented as Sites.
- Later on, you must mention the following address in the Address of Website box.
- Finally, go with the “Allow each time you add the web addresses” option and then hit OK to restore the necessary changes.
4. Listing the Windows Firewall Ports
The firewall ports safeguard your system from unwanted threats, and IDP generates the connection with the internet via HTTP ports 80 and 443.
- First of all, hit the Windows key on your keyboard and click the Control Panel by typing the same into the search panel.
- After this, navigate to the System and Security > Windows Firewall > Advanced Settings option.
- Thereon, from the Advanced Settings window and then pick the Inbound Rules option.
- In the next step, hit the New Rule option from the right of the window.
- You are supposed to include the following ports in the respective text fields and click the Next button.
- Incoming Port : 80
- Outgoing Ports: 443, 551
- Furthermore, follow the instructions given on the screen to add Windows Firewall ports.
- After the Inbound Rules, you must carry on the Outbound Rules steps.
Read More:- Windows Firewall is Blocking QuickBooks
5. Install the Newly Available QuickBooks Desktop Updates
To install the updated version of the QuickBooks Desktop to rectify QuickBooks Error 2277 you must perform the stepwise instructions below.
- Begin the process by launching the QuickBooks Desktop on your device.
- After this, right-click on the QBDT icon and choose the Run as Administrator option.
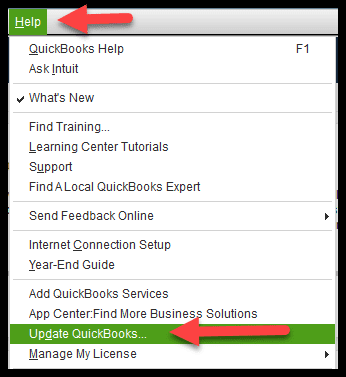
- Next, navigate to the Help menu to get the Update QuickBooks Desktop option.
- Furthermore, browse the Update now > Reset updates > Get Updates.
- Consequently, it will prompt QuickBooks to erase all the updates that you have installed already. Later on, download the updates once again on your device.
- Conclude the process by opening the QuickBooks application once again on your device.
Conclusion
We hope you can now easily overcome the QuickBooks Error 2277 smoothly and resume backing up your company file without interruption. If you still have any doubts, then connect with our bizbooksadvice professionals at +1-866-408-0444 to get a quick resolution to the query. They will look into the root cause of the error and will offer you with the permanent solutions to remove the issue quickly.
Frequently Asked Questions (FAQ’s)
1. What is QuickBooks Error 2277 and what causes it?
QuickBooks Error 2277 typically occurs during backup operations and is connected to issues with Intuit Data Protect (IDP). Common triggers include: corrupted or incomplete company files, outdated QuickBooks versions, browser cache or cookies interfering, firewall or antivirus software blocking backup ports, or Intuit not trusted in browser settings. Sometimes the backup file’s path or file size also contributes to the problem.
2. How do I fix QuickBooks Error 2277 using the IDP Diagnostic Tool?
Run the Intuit Data Protect Diagnostic Tool:
- Right-click the IDP icon in the Windows system tray → choose About Intuit Data Protect → press Ctrl + F2 → click Run Diagnostics.
- If issues are detected, add these files to your firewall/antivirus exceptions:
- IntuitDataProtect.exe
- IbuEnghost.ex
- QBIDPServices.exe
3. What manual steps can I take if the diagnostic tool doesn’t resolve the error?
Clear browser cache and cookies (particularly in Internet Explorer),
- Open firewall ports: create inbound/outbound rules for ports 80, 443, and optionally 551 to allow backup traffic.
- Update or repair QuickBooks: run as Administrator, check for updates via Help → Update QuickBooks Desktop, or repair via Control Panel’s Programs & Features.
Run QuickBooks File Doctor or Verify/Rebuild Data utility to detect and repair corrupted company files.
4. Do I need to contact support to fix Error 2277, or can I do it myself?
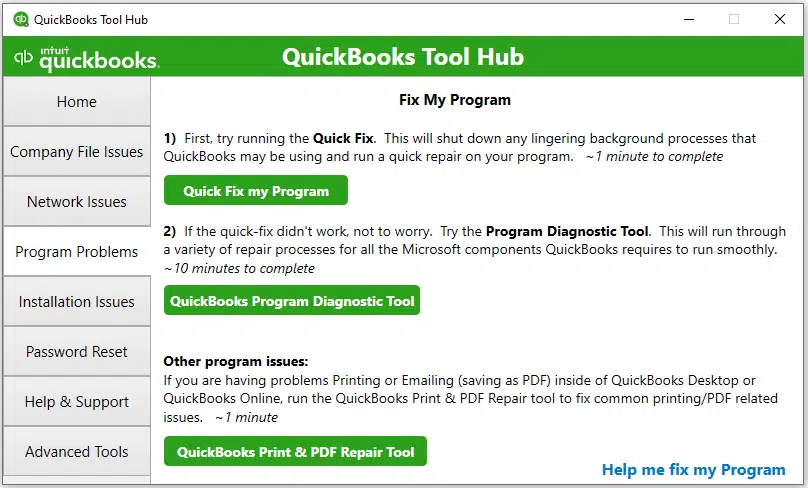
In most cases, you can resolve Error 2277 on your own by using the QuickBooks Tool Hub and adjusting firewall settings. However, if the error persists after trying these solutions, it’s recommended to contact QuickBooks Support for deeper troubleshooting or assistance with data file recovery.
Related Posts-
Learn How the QuickBooks Connection Diagnostic Tool Works
QuickBooks Install Diagnostic Tool: End Installation Issues
Use the QuickBooks Tool Hub 1.6.0.8 & Fix Common QB Issues
QuickBooks Utility Application Keeps Popping Up? Fix It Now
About The Author

Jonathan Browns
Jonathan Brown is a trained QuickBooks professional with 10 years of experience in the accounting sector. Moreover, he is passionate about helping businesses reduce the stress of managing accounts. Also, he is proficient in assisting entrepreneurs and small business owners to use QuickBooks and enhance their accounting experience.

QuickBooks Desktop, Payroll or Enterprise
Advanced Support for QuickBooks Desktop, Payroll & Enterprise Solutions
From payroll tax setup, direct deposit issues to Enterprise performance tuning and Desktop upgrades - our QuickBooks experts provide accurate and stepwise assistance. Get dependable support designed to minimize downtime and maximize efficiency.
Recent Posts
-
Fix QuickBooks Error PS032 | QB Payroll Update Error
-
How to Fix QuickBooks Error 12031 (Network Timeout Issue)
-
QuickBooks Error PS036: Causes, Fixes, and Prevention
-
Converting from QuickBooks Desktop to QuickBooks Online: A Complete Guide
-
Tried Everything? Here’s How to Fix QuickBooks Error Code 80070057