How to Migrate from QuickBooks Desktop to Online – Step-by-Step Guide

- By Jonathan Browns
- Jun 29, 2026
- Accounting
- 7 min read
As technology advances, seamless access to financial data from anywhere in the world has become essential. QuickBooks Online enables users to work remotely with ease, offering the flexibility and convenience of cloud-based accounting. Migrating from QuickBooks Desktop to Online allows businesses to streamline operations and enhance accessibility. In this guide, we’ll walk you through the key steps to ensure a smooth and efficient migration process.
Benefits of Converting QuickBooks Desktop to Online
The users can experience the following benefits after converting QuickBooks Desktop to Online. So, let’s study all those advantages in detail to enhance the accounting experience.
No Worries of Generating Backup-
Backup plays a crucial role in saving the crucial company’s data before getting into the wrong hands. With QuickBooks Online, you don’t have to schedule the backup as it generates the backup automatically. Thus, it keeps your data safe and secure to safeguard it from unauthorized access.
Promotes the Collaboration-
Now, with the Online version in QuickBooks, it gets more convenient to collaborate the work amongst multiple users at the same time. So, now your entire team can work on the same project sitting anywhere across the globe at one time.
Improves the Security and Safety-
Another great benefit of migrating to the QuickBooks Online edition is that it improves data security by storing every data on the cloud. As a result, only authorized users can access the financial data.
Advanced Integration Capabilities-
Now, using the QBO application you can easily integrate with a wide range of business applications which will eventually improve the versatility.
Precautions Before Moving QuickBooks Desktop to Online
For the seamless migration process, it is important to remember certain key factors in mind when problems converting QuickBooks desktop to online.
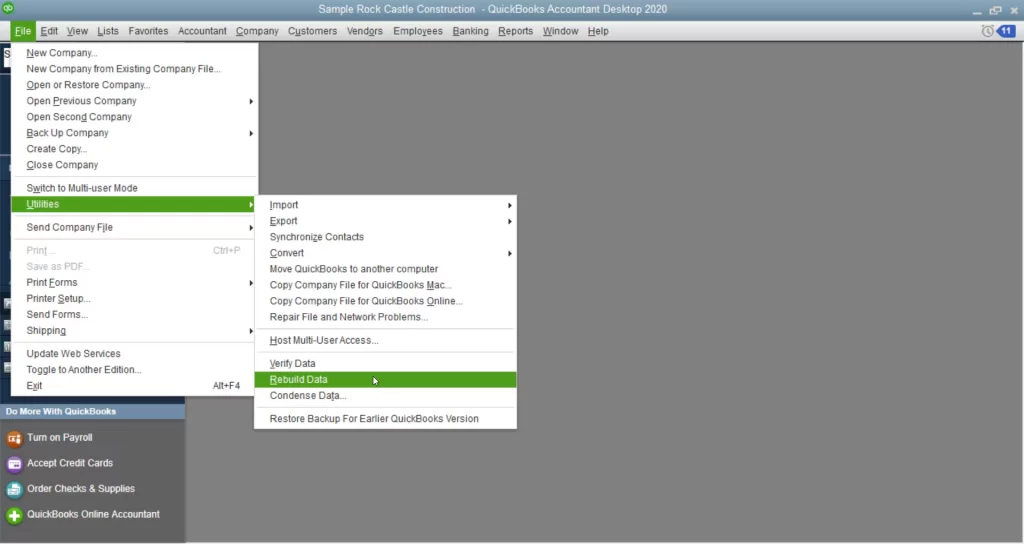
1- Don’t Forget to Backup Your Company File
If you want that you data won’t lost or damage then don’t avoid to take the backup of your company file. Below, we have provided with the steps to perform for the seamless backup process.
- Primarily, you must move to the File menu > Create backup option followed by the Switch to Single-User Mode.
- From the upcoming window, choose the Local Backup option followed by the Next tab.
- Now, you must switch to the Local Backup Only section and go with the Browse option. Then, you are required to save the backup of your company file at a safe place.
- Next, you need to run the test to verify that your backup file is appropriate before you save it.
- Afterwards, you must hit the OK tab when you’re ready to proceed further.
- Once you are done, choose the Save it Now option followed by Next.
- As a result, it will display a confirmation message when the backup is complete.
2- Download & Install the Latest Updates of the QuickBooks Desktop
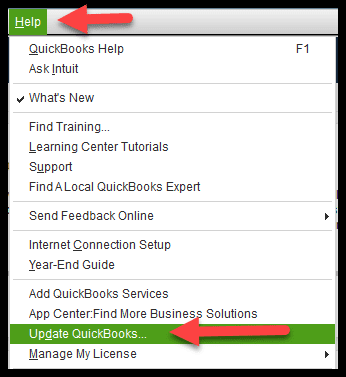
- In the initial phase, you must skip to the Help menu and click the Update QuickBooks Desktop from the expanded list of options.
- After that, choose Update Now > Get Updates > Close tab to proceed.
- When you are done, navigate to the File menu and hit the Exit menu.
- After doing this, relaunch the QuickBooks Desktop to wind up with the process.
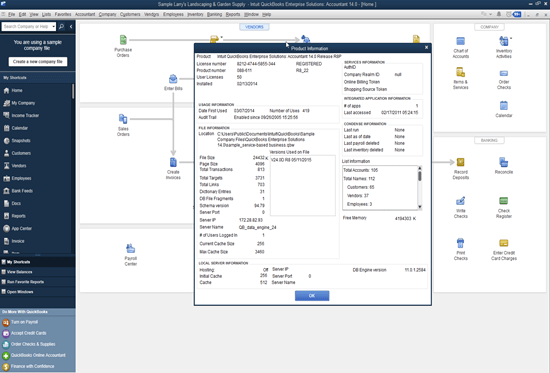
3- Verifying Your Total Targets
Next, you must verify the total number of targets. Within the QuickBooks Desktop application you can access the Product Information window to obtain the details about total target.
Also Read: Windows Firewall is Blocking QuickBooks
4- Built A New QuickBooks Online Account
It is essential for the users to have a valid QuickBooks Online account so that they can work remotely and get their financial tasks done.
Manually Migrate QuickBooks Desktop File to Online
In this blog section, we have provided the stepwise instructions for all the QuickBooks Desktop versions to migrate data to the online edition.
Key Functions for QuickBooks Desktop Pro & Premier Users
- Primarily, you must sign in to your company file to access the proper admin rights that you require while importing.
- Afterwards, switch to the Company menu, and from there, click the Export Company File to QuickBooks Online tab.
- When you are done, simply browse to the Get Started tab and then hit the Select Destination tab.
- At last, after completing the above steps, simply log in to your QuickBooks Online account.
Users Of QuickBooks Desktop Enterprise
- In the first place, login to your company file with the proper administrative rights.
- Then after this, you must skip to the Product Information window with the help of the F2 key.
- When you are on the Product Information screen, hit the Ctrl + B + Q and then hit the OK tab situated at the middle of the page.
How to Monitor Inventory in QuickBooks Desktop Easily?
- In the beginning, hit the Yes tab and then mention the starting date.
- On the other side, you must tap the No option if you wish to set up new items ahead in the QuickBooks Online application.
- After the successful conversion process, you will instantly receive an email regarding the same. Later on, choose the Complete Your Setup tab from the email to go further.
- Then again login to your QuickBooks Online account and launch the data file that you wish to open.
Know More: QuickBooks Portable Company File
How to migrate data from QuickBooks desktop to online
Alternatively, you can also use the Online Tool to migrate from QuickBooks desktop to online mac. For the successful migration process, you must use the stepwise instructions outlined below.
Phase 1: Began Opening the Online Tool in QuickBooks
- First of all, it is mandatory to choose the appropriate option that best fit your QuickBooks version.
- QuickBooks Pro/Premier
- QuickBooks Enterprise
- QuickBooks For Mac
- When you are done making the correct choice, hit the Get Started tab and enter into the Intuit account with the help of accurate login credentials.
Phase 2: Attempt to Upload Your Company File
Now that you have chosen the correct QuickBooks version, it’s time to upload the data file.
- In the earlier phase, move to the Select File tab and start searching for the supported QuickBooks file you need to shift.
- Once the file is chosen, navigate to the Open tab and begin uploading the file.
- Alternatively, you can also drag and drop the QuickBooks file for uploading it.
- After uploading, it will immediately start auto- update QuickBooks Desktop to the latest release and then skip to the QBO application.
- In the end, use the on-screen guidelines thoroughly to migrate to the QuickBooks Online application.
Key Functions of QuickBooks Desktop Built-In Migrator Tool
To run the Migrator tool built-in QuickBooks Desktop, you must follow the detailed instructions given below.
Phase 1: Consider Making the Arrangement of the Company File
There are certain key points that you must consider before you migrate QuickBooks Desktop to Online Edition.
Checking of the Company File Size and Data-
To switch to the QuickBooks Online application, you need to fulfill a specific target for importing the data. Therefore, to accomplish that certain target you must switch to the Product Information window. From that screen, you must ascertain that the total targets should not be less than 750, 000. Besides this, if you discover that there are any issues related to the file size, then you need to condense the file size.
Ascertain That the QuickBooks Desktop is updated to the newly launched version
Before you proceed with the migration process, it is important to ensure that the application is updated to the latest version. If it is not updated, then get it updated for a seamless migration process.
When you are the QuickBooks Desktop Payroll User, proceed with the following steps.
- In the first place, it is necessary to deactivate the employees who are not part of your organization any longer and are yet not paid.
- Also, the users must keep the thing in mind that you need to hold on for at least 2-3 working days after running the payroll to shift the data. With this, you can get the surety that all the paychecks-related details are transferred to the Online application. Besides this, you also need to ensure that you have migrated the data smoothly until the next payroll.
Phase 2: Let’s Commence Moving Your QuickBooks Desktop File to QuickBooks Online
- If you start running the QuickBooks version which is older than 2018, then you can run the online tool for the data migration.
- Otherwise, you may also use the QuickBooks company file restoration tool for the upgradation of the file.
- On the other hand, if you are operating an older version of the QuickBooks application or don’t have access to it, you can download the trial version.
Step-By-Step Guidelines To Apply By the QuickBooks Desktop Pro or Premier Users
- Under this process, you are first required to sign in to the data file with proper admin rights that needs to be imported.
- Next, you must switch to the Company menu > Export Company File to QuickBooks Online.
- You are supposed to hit the Choose Online Company option followed by the QBO company with whom it needs to be replaced.
- Now that you are done applying the steps illustrated above click the Continue tab.
- With this, you can now monitor the inventory in QuickBooks Desktop with the help of the instructions given below.
- You must press the Yes tab and then list the “As of Date”.
- Alternatively, you can also move ahead with the No option for setting up of the new items in the QuickBooks Online application.
- Now, you are required to input “Agree” in the empty area and then move to the Replace button.
- Once you are done with the above steps, choose the “Yes, go ahead and replace the data” option followed by the Replace tab.
Phase 3: Let’s Start Running the QuickBooks Online Application
After the successful migration of the QuickBooks Desktop to Online, you must implement the stepwise instructions outlined below.
- Now, users are able to connect to their bank or credit card accounts smoothly.
- Moreover, you can also establish and send the invoices to your customer.
- After that, you can now easily monitor the bills and pay them using the QuickBooks Online application.
What Data You Can’t Migrate from QuickBooks Desktop to Online?
Unfortunately, there is certain data that you won’t be able to migrate from QuickBooks Desktop to Online. Below, we have described all of the information.
- Due to certain security reasons, you won’t be able to transfer the bank or credit card details. You are advised to transfer that information manually.
- Moreover, it also won’t allow you to move the three different types of currencies to the QuickBooks Online application.
Conclusion
That wraps up this guide on migrating from QuickBooks Desktop to Online. With these steps in hand, you should be able to complete the transition smoothly and keep your business running without a hitch.
Frequently Asked Questions (FAQ’s)
Does the inventory work similarly in both QBO and QuickBooks Desktop?
When you run inventory in the QuickBooks Desktop application, the average cost method is used to compute the inventory costs. On the other hand, the online application uses the FIFO method.
Will my accounting data remain safe on the cloud?
Yes, the data stored on the cloud server in the QuickBooks Online application remains safe and secure. The cloud server uses enhanced security features to keep the data safe and prevent it from getting into the wrong hands.
What benefits can you use after migrating to QBO?
After migrating from QuickBooks Desktop to Online, users can take advantage of the following benefits.
- Multiple users can work on the same project in different locations simultaneously.
- You can easily track down your income and expenses by linking your bank or credit card account with QBO.
- You are not required to prepare the manual backup of your company file.
What data doesn’t transfer from QuickBooks Desktop to Online?
You won’t be able to transfer the memorized transaction groups to the QBO application because the groups don’t exist there.
Is there any deadline for migrating the company data to a new QBO account?
Yes, you have a time limit of 60 days from the day you have generated your QBO account to migrate your QuickBooks Desktop data. Within this period, you can migrate the data as many times as you wish. But, after completing this time limit, you won’t be able to migrate the data.
About The Author

Jonathan Browns
Jonathan Brown is a trained QuickBooks professional with 10 years of experience in the accounting sector. Moreover, he is passionate about helping businesses reduce the stress of managing accounts. Also, he is proficient in assisting entrepreneurs and small business owners to use QuickBooks and enhance their accounting experience.

QuickBooks Desktop, Payroll or Enterprise
Advanced Support for QuickBooks Desktop, Payroll & Enterprise Solutions
From payroll tax setup, direct deposit issues to Enterprise performance tuning and Desktop upgrades - our QuickBooks experts provide accurate and stepwise assistance. Get dependable support designed to minimize downtime and maximize efficiency.
Recent Posts
-
How to Fix QuickBooks Self-Employed Login Issue Easily?
-
QuickBooks Script Error? Here's How to Fix It Fast
-
How to Migrate from QuickBooks Desktop to Online - Step-by-Step Guide
-
QuickBooks Online Advanced Login, Pricing & Feature Comparison Guide
-
QuickBooks Bookkeeping: The Practical Way to Keep Your Books in Order