How to Safely Upgrade QuickBooks Desktop to the Latest Version?

- By Jonathan Browns
- Apr 06, 2026
- Accounting
- 7 min read
Are you still running on QuickBooks Desktop 2023? If so, it’s time to upgrade QuickBooks Desktop to the latest release. Upgrading your QuickBooks software ensures better security, compatibility with modern operating systems, and access to essential services like bank feeds, payroll, and payment processing.
Another major benefit of upgrading to QuickBooks Desktop 2024 is enhanced performance, bug fixes, and improved search and inventory management.
In this guide, we will walk you through everything you need to know to know about the QuickBooks Desktop upgrade, including system requirements and step-by-step instructions.
Upgrade QuickBooks Desktop to the latest version and use the improved features for better functionality. You can also get the latest security updates to safeguard your accounting data.
Important Considerations Before Upgrading
Before you rush to upgrade QuickBooks Desktop to the latest version, it’s essential to consider the following pointers:
- Always create a backup company file.
- Windows users must back up the company file for Pro Plus, Premier Plus, or Enterprise.
- Mac Users should also back up their company files.
- Temporarily disable any security software to avoid interruptions during installation.
How to Upgrade to QuickBooks Desktop 2024 For Windows In Easy Steps?
Before starting the process, choose your QuickBooks Desktop product that you want to upgrade, and then get the billing for a subscription. After buying the subscription, perform the following steps to upgrade QuickBooks Desktop for Windows.
Method 1: Use the Automatic Prompt
Every time Intuit launches a new QuickBooks Desktop upgrade, a prompt will pop up automatically while opening the software. Then, you must carry on with the following steps to complete the upgrade process.
- Launch the QuickBooks Desktop application and click the Upgrade Now tab.
- Choose your version preference.
- To keep the current version, tap on Keep old version on my computer, and hit the Let’s Go option.
- To delete the current version, leave the option blank and choose the Let’s Go option.
- Now, wait for some time to complete the download, installation, and activation.
- At last, choose the Open QuickBooks option.
Method 2: Use Discovery Hub
Another way for the QuickBooks Desktop Upgrade is to use the Discovery Hub. For that, perform the stepwise instructions outlined below.
- Initially, choose the Discovery Hub beside the Profile icon.
- Move to the Upgrade to QuickBooks 2024 > Proceed to Upgrade > Upgrade Now option.
- Now, pick the version preference.
- To keep the current version, go with the Keep old version on my computer, and hit Let’s Go.
- To delete the current version, leave the option blank and go with the Let’s Go option.
- Once the process is over, choose the Open QuickBooks option.
Method 3: Use the QuickBooks Desktop Manager
Perform the steps written below to access the QuickBooks Desktop Manager for upgrading the software.
- Search for the license information from your Intuit account or purchase confirmation email.
- Now, launch the QuickBooks Desktop Manager.
- Provide the license information correctly whenever asked.
- Finally, do as per the instructions given on the screen to complete the upgrade process.
Method 4: Upgrade For Rightworks Users
- Account owners or admins: You can get the updates installed for yourself or other users.
- Standard Users: You can only install updates for yourself.
- Other Hosting providers: Connect with your provider directly for guidance.
What to Do If the Upgrade prompt doesn’t appear, restore one-time messages?
If you notice that the upgrade prompt doesn’t appear, restore on-time messages, then perform the following steps to fix the issue.
- Move to the Edit menu from the top and click Preferences from the expanded menu list.
- Head to the General tab and hit the My Preferences tab.
- Click the Bring back all one-time messages, and tap on OK.
- Exit and then relaunch QuickBooks to view the upgrade prompt.
How to Upgrade QuickBooks Desktop For Mac Plus?
Before starting the process, verify you are working in single-user mode. If the multi-user mode is enabled below the File menu, hit the Disable Multi-User Mode option.
Method 1: Use the Automatic Prompt
You can upgrade the QuickBooks Desktop for Mac to use the automatic prompt option.
- Launch the QuickBooks Desktop.
- Once the prompt appears, hit the Upgrade for Free option.
- Choose Let’s go to download and then install the new version.
- Hit the Open QuickBooks once the upgrade process is completed.
- Activate or register the new version of the QuickBooks Desktop. Perform the following steps to register it.
- Move to the QuickBooks menu and click the Register QuickBooks.
- Provide the License and Product Numbers, and tap on the Next option.
- You can get the license and product numbers emailed if you won’t be able to find them.
- Afterwards, pick how you want to register:
- Register by Phone-
- Give a call at the number given on the screen.
- Mention the validation code and hit the Next tab.
- Register Online-
- Log in to your Intuit account or create an account.
- Now, create a customer account (or choose an existing one)
- Mention the Company and contact details if you are creating a new customer account.
- Register by Phone-
- Choose the Save & Next option and pick a payment method or Add new to set up auto-renewal.
- Hit the Save and Auto-renew option.
- Check out the Confirmation screen and any additional actions.
- Click the Print or Save as PDF option to keep your Product Information on hand.
- You need to give the ratings for your QuickBooks Desktop activation experience.
- Pick the Start using QuickBooks option to exit from the window.
Important Tip: QuickBooks Desktop for Mac automatically stores the older version on your PC; you don’t have to store it manually.
Method 2: Use the Help Menu
If you couldn’t see the automatic prompt to upgrade QuickBooks Desktop on a Mac device, use the Help menu.
- Initially, move to the Help menu and choose Upgrade QuickBooks.
- Choose the Upgrade For Free option.
- Click the Let’s Go option and then hit the Open QuickBooks once the upgrade process is completed.
- At last, try to activate or register the new version.
How to Upgrade to QuickBooks Desktop 2024 Within the Software?
Important Tip: The following are the steps to upgrade QuickBooks Desktop for single users of QBDT for Windows versions 2022 and 2023. Mac users have to follow the steps for QuickBooks Desktop Mac Plus.
Preparations to Upgrade Your QuickBooks Desktop for Windows
- Visit the QuickBooks Desktop home page.
- After this, launch your company file and choose the Upgrade QuickBooks option.
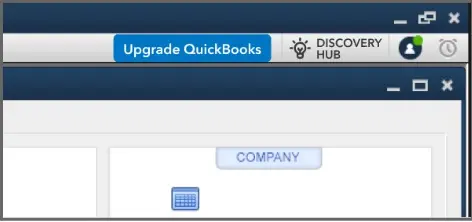
- Choose the Find Out What’s New.
- Look at the latest version of QuickBooks Desktop. Explore the new features and improvements before you upgrade the software.
- At last, see the system requirements of QuickBooks Desktop 2024 to see whether your computer needs to be upgraded.
Upgrade Your QuickBooks Desktop For Windows
Before going further with the upgrade process, consider generating a backup of the company file. There are two different ways through which you can upgrade, and we have described the steps for both of them below.
Method 1: Upgrade Now
- Choose the Upgrade Now option and click Continue. Wait for some time to complete the installation process.
- Now, launch your company file in the older version of QuickBooks and then save the backup file.
- With this, the QuickBooks admin will launch the company file in the new version.
- Once the upgrade process is over, remove the older version.
Method 2: Schedule an Upgrade
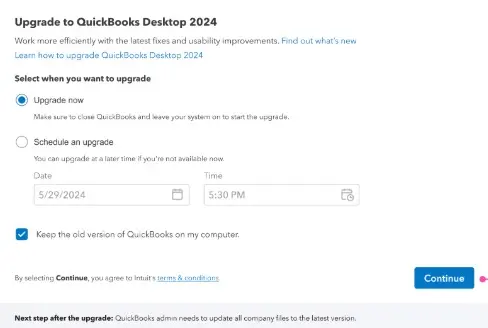
- Choose a suitable date and time for the scheduled upgrade.
- Tap on the Continue option to get a confirmation message on the scheduled upgrade.
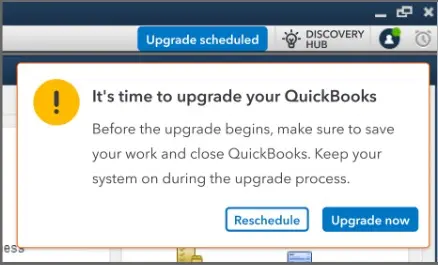
- You will get a prompt that reminds you regarding the scheduled upgrade 7 days prior (if eligible), one day before, or on the day of the upgrade.
- The users may reschedule the update at a later date, when something urgent comes up. To do so;
- Choose the Upgrade Scheduled option.
- Pick a new date and time to reschedule the upgrade.
- Alternatively, you also have the option to cancel the upgrade from the same window.
Important Tip: Choose the “Keep the old version of QuickBooks on my computer” and it will automatically keep the old QuickBooks version in your system.
Find out what happens on the scheduled upgrade
- If your QuickBooks application is open, you will receive a pop-up to upgrade. You have the option to select one of the following:
- Upgrade Now: It will upgrade QuickBooks to the new version available instantly.
- Reschedule: You can schedule the upgrade for a later date.
- If your computer is turned on, but QuickBooks is closed, then the upgrade process will start instantly. You are able to check the progress of the upgrade.
- If the computer is turned off, you will see an option to upgrade now or schedule the upgrade later. The upgrade will happen the next time you launch your company file.
Upgrade Your QuickBooks Desktop Mac Plus
Within the QuickBooks Desktop Mac Plus, you will get the Upgrade QuickBooks window while launching the company file. The following are the stepwise instructions to upgrade the QuickBooks Mac Plus.
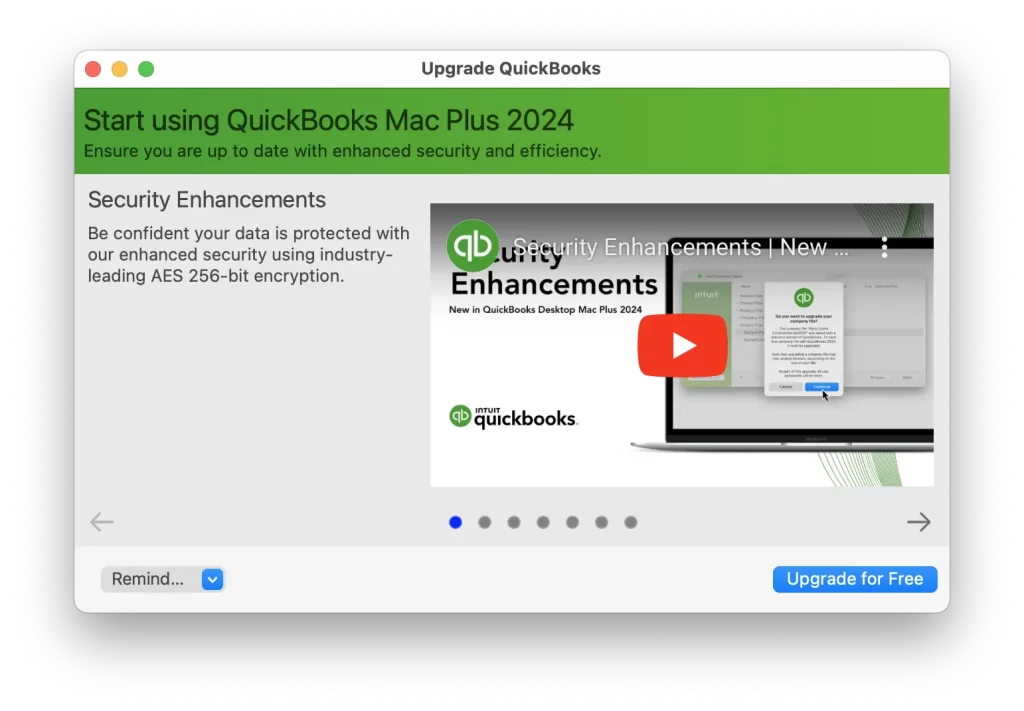
- Choose the Upgrade for Free option.
- After this, click the Let’s Go option, and it will begin to download and install the latest version of QuickBooks.
- When you are all set, choose the Open QuickBooks option.
- Now, register the new version of QuickBooks.
Important Tip: The upgrade process may take some time to complete, which depends on the internet speed and the company file size. The old QuickBooks version will remain on your computer screen.
Use the Upgrade QuickBooks menu to upgrade
If you don’t get a pop-up to upgrade your QuickBooks subscription, you can’t upgrade. Here’s how to upgrade the QuickBooks menu.
- Initially, launch your QuickBooks company file.
- After this, move to the Help menu and click the Upgrade QuickBooks option.
- Choose the Upgrade for Free option and then hit the Let’s go option. It will immediately download and install the latest version of QuickBooks.
- When you are done, tap on the Open QuickBooks option.
- At last, register the latest QuickBooks version.
How to Upgrade QuickBooks Desktop Enterprise?
If you are operating a medium-sized business, then it’s suggested to upgrade QuickBooks Desktop Enterprise after hours or on the weekend. As a result, it will cause less disruption to your normal working hours. Perform the stepwise instructions listed below for the QuickBooks Enterprise upgrade.
First Step: Make sure your computers and server can run QuickBooks Enterprise
Look at the system requirements for QuickBooks Desktop Enterprise. For getting any additional help with your network, connect with an IT expert right away.
Second Step: Install QuickBooks Enterprise
Here’s what to do if you are installing QuickBooks Enterprise for the first time.
Third Step: Move your data from Pro or Premier to Enterprise
Before moving your data to Enterprise, don’t forget to take a backup of the company file. After moving the File to QuickBooks Enterprise, you can’t access it in QuickBooks Pro or Premier.
Step 1: Back up your company file
It’s essential to generate a backup of the company file.
Step 2: Update your company file
After creating the backup company file, it’s high time to update your company file with QuickBooks Desktop Enterprise.
- Launch the QuickBooks Desktop Enterprise and then access your company file.
- Provide the Admin password and hit the OK tab.
- Verify if “I understand that my company file will be updated to this new version of QuickBooks” and hit the update now option.
- Click OK to back up your data and use the on-screen instructions to back up the company file.
- At last, hit the Yes option to update your File.
Fix Update Problems
If you get the errors or run into any problems while updating, here’s what to do.
Fix QuickBooks Enterprise Errors
- Choose the File menu > Utilities > Restore backup for an earlier QuickBooks version.
- After this, hit the three dots (…) beside the Backup filename field.
- Search and then opt for the QuickBooks backup made during the update process. Click the Open tab. The default location is the place where you last saved your backup company files.
- Click on the three dots (…) next to the Restored filename fields.
- When you are in the Save In list, pick the folder where you have restored the company file. It’s highly recommended to save the folder on your desktop, as it’s easy to locate there.
- Provide a unique name for the restored File from the File Name field. With this, it doesn’t overwrite an existing data file and hit the Save option.
- Finally, when the process is complete, tap on OK.
Fix Errors in your previous version of QuickBooks
- Move to the File menu > Open or Restore Company> Open a company file.
- After this, launch the restored File.
- Once again, browse to the File menu > Utilities > Rebuild Data and use the on-screen guidelines.
- After you run the rebuild tool, close your previous version of QuickBooks.
- When you are in QuickBooks Enterprise, hit the File> Open or Restore Company.
- At last, rebuild the company file on your desktop and click OK.
Four Step: Set Permission List
QuickBooks Enterprise has the exact features as in the previous version of QuickBooks.
Configure Lists & User Permissions
Herein, your lists (vendors, items, customers, etc.) will transfer to Enterprise. But you don’t have the same limits on your data. You have the option to edit the permissions you give to each user, with up to 30 simultaneous users.
Fifth Step: Activate QuickBooks
Once you activate the QuickBooks Enterprise Solutions, you can easily access the technical support facility. Here’s what to do to activate QuickBooks Desktop for Windows.
- Launch QuickBooks on your computer.
- Now, go to the Help menu and opt for the Activate QuickBooks Desktop option.
- At last, use the on-screen steps to verify your information.
- Once you are done, QuickBooks will be activated eventually.
Conclusion
Through this blog, you can now easily upgrade QuickBooks Desktop to the latest version. This will let you use the latest security features, online bank feeds, and improved QuickBooks performance. Moreover, you can also enjoy the latest features launched in the upgraded version of QuickBooks Desktop to enhance your business workflow.
If you still have any doubts, then connect with our BizBooksAdvice professionals right away for better assistance.
Frequently Asked Questions (FAQ’s):-
Question 1: What happens if you don’t upgrade QuickBooks Desktop?
Ans. If you don’t upgrade QuickBooks Desktop, you won’t be able to use the following features;
- Payroll updates
- Online backup
- direct bank feeds
- credit card processing
- Add-on services
- loss of technical support
Question 2: Are QuickBooks upgrades free?
Ans. Yes, the QuickBooks upgrade is absolutely free of charge.
Question 3: Do I need to renew my QuickBooks Desktop every year?
Ans. The QuickBooks Desktop (Pro, Plus, Premier Plus, and Enterprise) requires a mandatory annual subscription, and it needs to continue operating.
Question 4: Why should I upgrade to the latest version of QuickBooks Desktop?
Ans. Upgrading QuickBooks Desktop to the latest version can give access to regular security updates, ongoing support, and improved features.
About The Author

Jonathan Browns
Jonathan Brown is a trained QuickBooks professional with 10 years of experience in the accounting sector. Moreover, he is passionate about helping businesses reduce the stress of managing accounts. Also, he is proficient in assisting entrepreneurs and small business owners to use QuickBooks and enhance their accounting experience.

QuickBooks Desktop, Payroll or Enterprise
Advanced Support for QuickBooks Desktop, Payroll & Enterprise Solutions
From payroll tax setup, direct deposit issues to Enterprise performance tuning and Desktop upgrades - our QuickBooks experts provide accurate and stepwise assistance. Get dependable support designed to minimize downtime and maximize efficiency.
Recent Posts
-
QuickBooks Online Advanced Login, Pricing & Feature Comparison Guide
-
QuickBooks Bookkeeping: The Practical Way to Keep Your Books in Order
-
QuickBooks Merchant Services: Everything You Need to Know Before You Sign Up
-
QuickBooks Payroll Assisted: Everything You Need to Know
-
How to Contact QuickBooks Online Customer Service Team 2026