Fixing QuickBooks Script Error (Easy Troubleshooting Guide)

- By Jonathan Browns
- Jul 08, 2026
- Accounting
- 7 min read
If you’re frequently seeing QuickBooks script error on your screen, it’s quite common. This problem typically occurs when QuickBooks tries to connect to the internet, but your computer’s browser blocks the script from loading correctly. One of the main reasons for facing this problem is the incorrect internet settings.
Don’t worry! In this quick guide, we will help you learn about other causes of these errors and how to troubleshoot. Continue reading. For further assistance, contact QuickBooks live experts.
What Does Script Error Mean in QuickBooks?
Typically, a script error in QuickBooks provides no information related to its causes. Users commonly face such errors when the software tries to connect to an online feature, but a browser or internet issue blocks the command. As a result, you will find the following script error messages on your screen:
Script Error: An error has occurred in the script on this page. Line 22 char 2 error…
Script Error: QuickBooks script error for line 7 char 5
Script Error: QuickBooks script error unable to get property length of undefined or null reference.
You may also notice these errors in formats, such as script error, error in script, script error line #### character ## object ####.
Some of the common QuickBooks script errors are:
- QuickBooks Script Error Code 0
- QuickBooks Script Error Windows 11
- QuickBooks Desktop Script Error 2022, 2023, 2024
Common Causes of QuickBooks Desktop Script Error
As discussed above, incorrect internet settings is one of the main reasons for facing a QuickBooks Desktop script error. But, the following factors can also give rise to these script issues:
Corrupt Windows User
QuickBooks script errors are also a result of a corrupt Windows user as it damages the local browser files, registry keys, and cache folders that the QuickBooks relies on to run online features.
Malware Interferes with QuickBooks
QuickBooks uses background Windows browser engines to process its online web-based features, such as online banking, payroll, and dashboard. Unfortunately, malware causes a QuickBooks script error code 0 by disrupting network resources, browser configuration, and fundamental QuickBooks components.
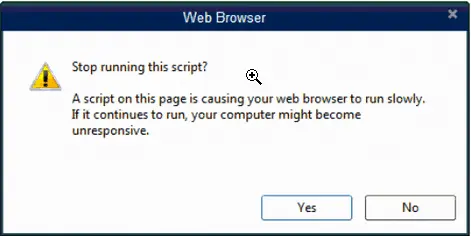
Enabled Script Debugging Feature
If the script debugging feature is enabled, it forces the system to intercept and halt the QuickBooks services, displaying pop-up warnings, such as “A script on this page is causing your web browser to run slowly.”
Damaged QuickBooks Components
QuickBooks components ensure a seamless connection with web-based features. But, if these components are damaged, it can majorly cause a script error QuickBooks.
5 Easy Methods to Troubleshoot QuickBooks Script Error
Now that you know the root causes of the QuickBooks script error, let’s continue to address the issue. Here’s a quick troubleshooting guide that can help you fix it:
Method 1 – Check and Correct Internet Explorer Settings
Correcting internet explorer settings is one of the effective approaches to troubleshoot QuickBooks script error code 0. Let’s see how to do this:
- First of all, open your Internet Explorer browser.
- Make sure no other applications and tabs are running on your Windows.
- Within the Internet Explorer window, click Gear icon, and choose the Tools option.
- Now, click the Compatibility view settings alternative, and select the box next to the Display Internet in compatibility view.
- After this, click Close tab, and then restart your windows. Once done, retry running QuickBooks online services. If you still face the same scrip error QuickBooks message, try another method.
Method 2 – Add Intuit as a Trusted Website in Internet Explorer
First of all, Internet Explorer should be your default web browser. Next, make sure you include Intuit as a trusted website to the restricted list. Perform the steps below to do so:
- Open Internet Explorer and move to the Settings tab.
- Select Security tab, and then go to the Trusted Sites section.
- Now, add Intuit.com as a trusted website and remove the tick-mark from the Require Server Verification (https:) box.
- Close the Trusted Sites window and remove the tick-mark from the Enable Protected Mode box.
- After this, close the Internet Explorer window and retry running QuickBooks Desktop again to access its online features.
- Still facing the same QuickBooks script error message? If yes, try the next method.
Method 3 – Disable Script Debugging Feature
Enabled script debugging feature can mainly bring script errors in QuickBooks. To disable this feature, adjust the built-in Windows internet options settings. Now, follow the below prompts to disable this feature:
- Press the Windows Key on your keyboard, and enter Internet Options.
- Next, press the Enter key, and then click the Advanced tab, which is located on the top.
- After this, go to the Browsing section. Now, look for the Disable script debugging Internet Explorer checkbox.
- Select this checkbox to disable the feature, and remove the tick-mark from the Display a notification about every script error.
- Now, hit Apply, and then click OK button to save your changes. Once done, restart QuickBooks.
Method 4 – Repair QuickBooks Desktop Program
You must run the built-in QuickBooks repair tool to fix the damaged installation components. The tool ensures fixing the issue without affecting your company files. Here’s how to run the tool to repair the program:
- Make sure you create a backup of your company data before restarting your computer.
- Next, press the Windows key, and within the Start menu, type Control Panel.
- Select the option, and then click Programs and Features tab or Uninstall a Program option.
- Now, choose the QuickBooks Desktop version from the given list, and click Uninstall/Change option.
- Afterward, click Next, and then select Repair option.
- Select Next, and choose Finish. Finally, restart your computer. If you again face the same QuickBooks Desktop script error, move to the next method.
Method 5 – Clear the Cache Data Folder of Microsoft Internet Explorer
In this method, we need to clear the cache data folder of the Internet Explorer or your default browser. Carefully, perform the steps below:
- Start this method by first opening your Internet Explorer browser.
- Now, move to the Tools option, and then click the Internet options.
- Next, hit the General tab, and select the Delete option.
- After this, tick-mark the Cookies and website data checkbox.
- Next, select the History & temporary internet files.
- Finally, click Apply and OK options to finish the process.
Preventive Measures to Take to Prevent Script Error QuickBooks
To prevent the script error QuickBooks from occurring in the future, make sure you optimize the computer’s fundamental internet configuration settings. Also, ensure considering the following tips:
- Modify internal QuickBooks preferences and disable protected mode.
- Block specific faulty URLs and maintain software’s performance.
- Keep updating your QuickBooks software.
- Make sure you configure security software settings.
The Final Thoughts
In a nutshell, QuickBooks script error is a common software problem and a result of incorrect Internet settings. Hopefully, the above information has helped you fix this error. Make sure you always run QuickBooks as an administrator, configure IE settings, and disable the script debugging feature. Carefully go through these given methods and for any professional help, contact live QuickBooks experts.
Frequently Asked Questions
What is a script error in QuickBooks?
A script error in QuickBooks is a common issue that occurs when QuickBooks tries to connect to the internet to access an online feature, but something blocks the script.
What causes a QuickBooks Desktop script error?
A script error in QuickBooks desktop usually happens when the software tries to load online content but is blocked by your internet browser’s settings, a poor internet connection, incorrect internet settings, or corrupted temporary files.
Can I safely avoid a script error in QuickBooks?
Yes, you can click “Yes” or “No” on the prompt to avoid it temporarily, but the error message will keep popping up until you fix the main browser issue.
How do I stop script error messages in QuickBooks from appearing?
The quickest fix is to open internet options on your computer, go to the Advanced tab, and check the boxes to “Disable script debugging” for both Internet Explorer and other browsers.
Will a QuickBooks script error code 0 cause data loss in my company file?
No, script errors are purely visual and connectivity-based glitches. They do not damage your company file or cause any data loss.
About The Author

Jonathan Browns
Jonathan Brown is a trained QuickBooks professional with 10 years of experience in the accounting sector. Moreover, he is passionate about helping businesses reduce the stress of managing accounts. Also, he is proficient in assisting entrepreneurs and small business owners to use QuickBooks and enhance their accounting experience.

QuickBooks Desktop, Payroll or Enterprise
Advanced Support for QuickBooks Desktop, Payroll & Enterprise Solutions
From payroll tax setup, direct deposit issues to Enterprise performance tuning and Desktop upgrades - our QuickBooks experts provide accurate and stepwise assistance. Get dependable support designed to minimize downtime and maximize efficiency.
Recent Posts
-
This QuickBooks Company File Needs to Be Updated: A to Z Guide
-
Renew QuickBooks Subscription: Desktop & Online Renewal Guide
-
QuickBooks Online Login: Sign in to Access Your QB account
-
Change EIN in QuickBooks: Complete Guide for Desktop, Online & Payroll
-
How to Fix QuickBooks Error 15241 During Payroll Update