Step-by-Step Guide to Using QuickBooks Condense Data Utility

- By Jonathan Browns
- Oct 09, 2025
- Accounting
- 7 min read
With the growth in the business, the company’s file data also expands, and it becomes a bit challenging to manage it. Therefore, in order to handle all the historical data till the present date, Intuit has designed the QuickBooks Condense Data Utility tool. This utility helps reduce the company’s file size and improve its overall performance. In this post, we have described the proper steps to operate the QuickBooks condense repair tool. Thus, it will help you in managing your company data without any hindrance to speed and performance.
Understand How the Condense Data Utility Works in QuickBooks
Whenever you condense your company files in QuickBooks Desktop, the program will generate two processes. Firstly, it generates a permanent copy of the QuickBooks company file (i.e, archived copy). Secondly, it makes the data file smaller by summarizing the old closed or detailed transactions. Below, we have mentioned what exactly QuickBooks does during the entire process.
- Stores an archive copy of your business data file
- Deletes old closed transactions
- Summarize the old, closed transactions- Condensing the file constructs the summary monthly journal for the old, closed transactions. Then, you can include these summary transactions in the current, working version of the QuickBooks data files.
- Deletes the audit trail- If you clean up a data file and reflect that the data file must be condensed, then QuickBooks will delete all the audit trail before the “removed closed transactions on or before” date.
Here’s How to Condense Data in QuickBooks Using Simple Steps
Below, we have described the complete steps to condense data in QuickBooks so that you can experience better performance of the application.
A. Condense data by storing all transactions
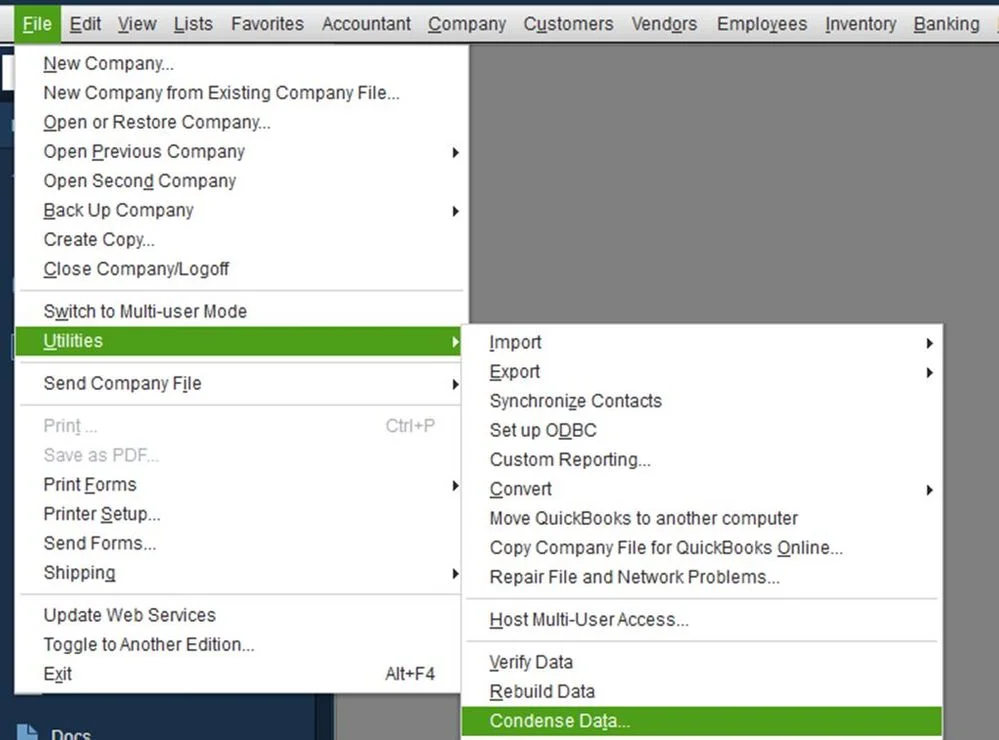
- Begin the process by tapping on the File menu and choosing Utilities.
- After this, pick the Condense Data menu > Keep all transactions tab.
- Thereon, you must erase the audit trail details to date.
- Next, hit the Close tab, and it will complete your entire process.
B. Condense data by erasing selected transactions
- Primarily, head to the File menu and choose Utilities.
- After this, opt for the Condense Data.
- Now, tap on Remove the transactions you select from your company file and hit the Next option.
- Presently, choose the transactions that you don’t require any longer and want to delete, and click Next.
- Now, choose how transactions will be summarized and how inventory will be condensed.
- Following this, choose the suggested transactions that you wish to remove, then tap on Next.
- Verify how transactions will be summarized, then click Next.
- Also, verify how inventory should be condensed and the recommended transactions that you want to delete.
- Furthermore, choose the List Entries that you want to erase and move further.
- At last, hit the Begin Condense tab and hold on for some time unless the condense process is over. Then, click the Close tab to accomplish the task.
Also Read – Verify and Rebuild Data in QuickBooks Desktop
Things You Must Know About Condense Data Utility
The following are some of the considerations you must remember before running the Condense Data Utility in QuickBooks Desktop.
It isn’t reversible
Once you run the condense data utility to shrink the file size, you can undo the changes. The following are the reasons why you can’t undo the changes.
- You carry the large company file.
- Also, when you are near a list limit.
- When you have upgraded your hardware.
- When your accountant and technical support have talked about the other options and want to move further with the condensing.
It may or may not hamper the data file
- It will shrink the size of the data file because it will extract transaction details and list entries.
- Launch transactions that you can’t condense, and it won’t hamper the file size.
- You can’t condense the file unless no mandatory changes are made to the company file size.
It may not fix file damage
If you aren’t able to run the Condense Data Utility for repairing the damaged file, you can do the following.
- Resolve the data damage present within the QuickBooks data file.
- You can restore the backup of the data file.
- Also, you can establish a new data file.
It won’t erase certain transactions.
The Condense QB Data Utility tool helps to delete the audit trail for all time. But, if you need to delete the transactions for a specific time period, then you can utilize the traditional condense feature. Furthermore, you can have a glimpse at the table below to know more about the transactions that will not be removed.
| Transaction | Description/Reason |
| Payroll Transactions | If your Condense data is prior to 12/31, or if an employee’s W-2 form has not been reviewed. |
| Invoices, payments, credit memos, and refund checks. | If you haven’t linked them properly to each other. |
| Payments recorded to Undeposited Funds | Those users who haven’t deposited it into their bank account. |
| Bills, bill credits, and bill payment checks | If they’re not accurately linked with each other. |
| Estimates linked to invoices | Estimates are non-posting entries, and they can’t be condensed into the journal entries, which are the posting transactions. |
| Sales Tax not paid in Pay Sales Tax | Paying sales tax with checks leaves invoices open, which are non-negotiable. |
| Transactions linked to an incondensable transaction | Example: Suppose you have inserted an invoice on 12/15/2015 and a corresponding payment on 1/15/2016, then run the Condense Repair Utility via 12/31/2015. Neither the data will be condensed because the payment is outside the period, and the invoice is linked with a transaction that isn’t covered within the Condense. |
It affects various reports.
The following are the reports that are affected by the QuickBooks Condense Repair Tool.
Learn Also – Move QuickBooks Desktop File to QuickBooks Online
I. Account & Item-Based Reports-
Account-based reports will remain accurate because they won’t affect entries available on accounts.
- Profit and Loss (accrual)
- Balance Sheet (accrual)
- Statement of Cash Flows (accrual)
- Trial Balance (accrual)
II. Item-based reports will remain blank because they will erase all your item data.
- Sales and Purchase reports
- Job Costing reports
- Accounts Receivable and Accounts Payable Aging Report
Cash Basis Reports-
The Cash Basis reports for the condensed period will remain inappropriate. It isn’t linked with cash into income or from cash out to expenses.
Reports Filtered by Class-
Any of the transactions which has been summarized by the QuickBooks Condense Repair tool won’t allot any classes. However, running a Profit & Loss by Class Report will reflect all the amounts within the unclassified column.
Sales Tax Liability Reports-
You will notice that the invoice with sales tax will not be available any longer. Also, you will see that a condensed journal entry consists of an amount credited to income accounts. However, QB will not identify any part of the income that is taxable and non-taxable.
Sales & Purchase Detail Reports-
These reports extract the data from items present on invoices and bills. As there are no more invoices and bills available, there will be no more items, and the reports will remain blank.
A/R Collections Reports-
You will notice that the A/R Collections reports will represent the condensed journal entries beneath the No Names column. Also, you will notice the Journal Entries to A/R, which isn’t linked with closing transactions and is indicated as open. Then, you will notice that the total amount will be reflected as zero because all the invoices in the files are paid.
Audit Trail Reports-
- Herein, you can only erase the edited, voided, and removed transactions from the audit trail report while condensing.
- Condensing the data will not erase the audit trail report.
- You will notice that the Audit Trail Report will still reflect all transaction activity after condensing.
- The Condense Audit Trail Info option is available only if the data file has a particular number of edited, voided, or removed transactions.
Reconciliation
- You will notice that the opening balance for the upcoming reconciliation is appropriate because condensed journal entries contain cleared transactions.
- Also, you won’t notice any checks and deposits, and this will keep your reconciliation reports accurate.
- There might be the possibility that you may see that the statement date is incorrect because the last reconciliation is gone.
Condense Your QuickBooks Desktop File for Importing to QuickBooks Online
Whenever you condense your QuickBooks Desktop file, it will erase the unused or inactive list entries present within it. Doing so will eventually shrink the data file size and allow you to import your file easily to QBO.
Condensing the QB Desktop data for QBO Import
Below, we have provided the step-by-step instructions to condense the company file data according to the QuickBooks version you are using.
I. QuickBooks Desktop Pro/Premier 2012 or Enterprise 12.0 & Higher version
- Head to the QuickBooks File menu, choose Utilities, and then hit the Condense Data.
- After this, choose the Yes option from the message “Budget data may be moved during cleanup. Do you want to continue anyway?”
- Now, when you are on the Condense Data window, pick Transactions before a specific date.
- You must opt for a preferred date from the Date field. With this, QuickBooks will erase the closed transactions on or before the date you choose.
- Important Tip- In case you wish to monitor the inventory, then it’s good to make the date the last day of the month. With this, it will keep your average cost for items appropriate.
- Following this, click Next and pick an appropriate method for summarizing the transactions you wish to remove. If you aren’t sure, then pick the Help me choose option.
- Thereon, you can opt for any of the checkboxes for the dialog boxes that follow and hit the Next tab.
- At last, complete the entire process by hitting the Begin Condense option.

II. QuickBooks Desktop Pro/ Premier 2006 to 2011 or Enterprise Solutions 6.0 to 11.0
- Firstly, access the QuickBooks File menu, head to Utilities > Clean Up Company Data.
- After this, tap on the Yes option from the message reflecting “Budget data may be moved during cleanup. Do you want to continue anyway?”
- Now, pick the Remove Transactions option from a certain date.
- After this, opt for a specific date from the Date field. Doing so, QuickBooks will erase the closed transactions on or before the date you choose.
- Following this, trick any of the checkboxes under Select Additional Criteria for Removing Transactions. Then, hit the Next tab.
- Afterwards, pick any of the checkboxes beneath the Select Unused List Items to Remove, then hit Next.
- Now, browse to the Begin Cleanup option and hit the OK button to make a backup before cleaning up the data file message.
III. QuickBooks For Mac
- Before starting, exit from all your QuickBooks windows.
- Afterwards, head to the File menu, click Utilities, and then choose the Condense Data.
- Important Tip: If you wish to monitor the inventory, it’s good to make the date the last day of the month. In such a way, your average cost for items will remain appropriate.
- Thereon, hit the OK tab. With this, you will receive a message notifying you that QuickBooks will make a backup file before it condenses the transactions.
- At last, tap on OK to generate a backup copy of the data file.
Also See – How to Install & Set Up QuickBooks For Mac?
How to Troubleshoot Issues after importing the condensed file?
You can easily resolve the issue after importing the condensed file by establishing a portable company file and restoring it. Read the steps described below for the process.
Steps to Generate a Portable Company File
- Begin the process by clicking the File menu and then choosing the Create Copy option.
- Afterwards, tap on the Portable Company File, and then click Next.
- Now, all you require is to save the portable company file to your desktop. Otherwise, you can generate a new folder on your computer.
- After this, Intuit prompts you to save the portable company file to a CD, USB flash drive, or other removable storage device.
- Now, you will see that the portable company file is saved with a .qbm extension. With this, it protects your company’s file against data corruption or data loss.
- At last, if asked to exit from the company file, select OK.
Steps to Restore the Portable Company File
Once you generate a portable data file (.qbm), you can save it to your computer. After this, QuickBooks decompresses the file and then rebuilds it, which might consume some time.
- Primarily, head to the File menu, then choose the Open or Restore Company.
- Now, browse to the Restore a portable file option and then click Next.
- You are required to search for the folder where you saved the portable file.
- Soon after this, opt for the portable file and hit the Open tab.
- Now, click the Next tab, and this will redirect you to the Save Company File As window.
- Following this, you must avoid overwriting your existing company file and then rename the company file. For that, you have to mention a new name in the File name field.
- Once you change the name of the file, select Save. With this, QuickBooks will convert the portable file into a regular company file having a .qbw extension.
- Thereon, you will be asked to take a backup of the new data file. You must go through the on-screen instructions to accomplish the backup.
Important Point: You have to review the total targets again.
- If you see that the file crosses the target limit, then resume the process to erase as much data as possible.
- It’s quite normal that the .qbw file generates the portable data file, which is smaller than your condensed .qbw file.
Conclusion
With this, we hope that you can easily run the QuickBooks Condense Data Utility and reduce the file size. Furthermore, if you still require any additional help, then have a conversation with our bizbooksadvice professionals for quick assistance.
Frequently Asked Questions (FAQ’s):-
Question 1: What does it mean to condense data?
Ans. The QuickBooks Condense data usually generates a permanent copy of your QuickBooks company file. However, the file condense copy also generates a smaller data file by summarizing the old and closed transactions.
Question 2: What should you do to consolidate data in QuickBooks Desktop?
Ans. To consolidate data in QuickBooks Desktop, you must perform the following steps.
- Firstly, move to the Combine Reports from Multiple Companies from the QuickBooks Reports menu.
- After this, you must include your company files and pick the reports and date ranges that you want to combine.
- With this, it will export the combined data to an MS Excel spreadsheet for consolidation and analysis.
Question 3: When is the right time to use the QuickBooks condense data utility?
Ans. The QuickBooks condense data utility is used to shrink the company file size that’s causing performance issues.
Question 4: How to check the targets in a QuickBooks company file?
Ans. To review the targets in a QuickBooks company file, perform the steps below.
- First of all, launch the QuickBooks Desktop Company file and access the Product Details.
- After this, hit the Ctrl + 1 keys to access the Product Information window. You will get the Total Targets reflected on the Product screen.
Question 5: What size limit is required to condense QuickBooks data files?
Ans. You can condense the QuickBooks company file, which is around 1 GB or larger.
About The Author

Jonathan Browns
Jonathan Brown is a trained QuickBooks professional with 10 years of experience in the accounting sector. Moreover, he is passionate about helping businesses reduce the stress of managing accounts. Also, he is proficient in assisting entrepreneurs and small business owners to use QuickBooks and enhance their accounting experience.

QuickBooks Desktop, Payroll or Enterprise
Advanced Support for QuickBooks Desktop, Payroll & Enterprise Solutions
From payroll tax setup, direct deposit issues to Enterprise performance tuning and Desktop upgrades - our QuickBooks experts provide accurate and stepwise assistance. Get dependable support designed to minimize downtime and maximize efficiency.
Recent Posts
-
QuickBooks Error PS036: Causes, Fixes, and Prevention
-
Converting from QuickBooks Desktop to QuickBooks Online: A Complete Guide
-
Tried Everything? Here’s How to Fix QuickBooks Error Code 80070057
-
This QuickBooks Company File Needs to Be Updated: A to Z Guide
-
Renew QuickBooks Subscription: Desktop & Online Renewal Guide