How to Set Up QuickBooks Time Login & Fix Sign-In Issues?

- By Jonathan Browns
- Dec 17, 2025
- Accounting
- 7 min read
Are you facing a QuickBooks Time login issue and unable to track the employees’ working hours? Well, this issue may arise if you enter the incorrect login credentials to access the QuickBooks Time account. Other factors causing this issue include excessive browsing history, lost password, or browser-related problems. So, it’s essential to address this issue asap to regain access to the QuickBooks Time log in account. Continue reading this post and explore all the possible solutions to rectify the Intuit QuickBooks Time Login problem.
What is QuickBooks Time?
QuickBooks Time is a web-based time tracking software that makes the process of monitoring employee working hours. No matter whether you are working remotely, in the office, or while travelling, you don’t have to worry much about managing timesheets. Once you set up your company name, time tracking options, and then send an invitation to your team, you can easily access the employee’s total working hours.
Moreover, this portal also lets you manage the timesheets and then run the reports to get the accurate data. Thus, it eliminates the stress of maintaining the timesheets manually.
How to Setup QuickBooks Time Tracker Login in Easy Steps?
Herein, we have provided the step-by-step instructions to setup QuickBooks Time Tracker login.
First Step: Set Up Your Company
Software Integration
It’s essential to integrate your account with your payroll or accounting software.
Company Details
- Initially, log in to QuickBooks Online and choose the Company Info option.
- After this, either add or update your company details, such as Company Name, Company Website, and the Company’s Street address.
- Choose the Admin Contact > Custom Options and then upload a custom company logo.
- Now, add a company logo and from the QuickBooks Time, select the Company Settings option.
- Pick the Company Details tab and then select an image. Later on, hit the Open tab.
- Recommended File Type: Transparent png
- Recommended File Size: 150 X 150 pixels.
- Thereon, drag the image and then adjust its placement.
- You must use the slider and then scale the image accordingly.
- Finally, choose the Upload option.
Account & Billing
- Initially, choose the Manage Subscription option.
- Again, click on the Manage Billing & Subscription from the QuickBooks Time.
- Now, log in to QuickBooks as a primary admin and tap on Profile to choose Billing & Subscription.
- Select the Edit tab beside the payment method and launch the Wallet List.
- Herein, you can make changes to your payment method, consisting of expiration date, billing address, and account holder name.
- Furthermore, provide the new payment details and return to the QuickBooks Time Billing to the previously stored payment method.
- Finally, save the changes made and then review the payment method on the Billing & Subscription page.
Accountant Access
The users must have full admin access to run the QuickBooks Time Account.
Payroll & Overtime
Pay Schedule: Herein, you must setup your company’s payment schedule.
- Once you log in to QuickBooks Time, head to the Company Settings menu.
- Choose the Payroll & Overtime option.
- Afterwards, head to the Pay Schedule and hit the Save tab.
Payroll Period Options
The payroll depends upon the following:
- Monthly
- Custom
- Twice a month
- Every 2 weeks
- Every 4 weeks
- Weekly
Explore How to Read GPS Data Using QuickBooks Time
- Open the QuickBooks Time application and choose the Time Entries > Intuit Timesheets option.
- After this, look for the correct time sheet and hit the Display Map option.
- If you have more than one Intuit timesheet for the particular day in the Map, pick the start and end times to move between the timesheets.
- When you are in the Timesheet Timeline, browse for the timeline and date stamps.
- Herein, you can check any flagged timestamps (when any of your team members were not under a geofence radar). For this, you can set the geofencing.
- Furthermore, hit the Play option to verify the playback of the team member’s location.
- Later on, pick a point and verify the date and time.
Overtime Settings in QuickBooks Time
- In the QuickBooks Time app, move to the Company Settings tab and click the Payroll & Overtime option.
- Choose the Overtime option and then pick any one of the options according to your requirements.
- Daily Overtime calculation
- California overtime rules
- Calculate an employee’s weekly overtime
- calculate daily double time-tracking
Set up Overtime Customizations in Intuit QuickBooks Time Login
- Choose the Overtime option and pick the Use Pay Rate Engine option.
- Afterwards, opt for the Manage Pay Rates and then click the Add Setting option.
- Thereon, you must assign a new name and assign your team employee to the setting.
- Head to the Default Setting option to assign it to all the team members.
- If you wish to assign to the individual team members, browse to the No team members assigned and hit the OK tab.
- Afterwards, click the Add option and then pick the setting that was created in the previous step.
- Now, browse to the Add Rule option and insert a Rule Name.
- You are supposed to pick a type, say Day, Week, Pay Period, Holiday, or Time of Day.
- Furthermore, mention the required settings for the rule you chose.
- Ensure whether the rate is a Fixed rate.
- Otherwise, go with the Rate Multiplier.
Time Off
- Under this process, move to the Company Settings option.
- You must choose the Notifications option and hit the Time Off menu.
Set Up Time Off Codes
- Initially, choose the Feature Add-Ons and click the Time Off Codes tab.
- After that, tap on the ” Add New option and then assign a name to the time off code. Also, you need to choose whether it is a paid or an unpaid code.
- Thereon, browse to the Assign to Individuals or Groups to allot the code to team members.
- Once you have made the selections, hit the Save tab.
Update the Notifications Individually
- Initially, hit the My Team option and then pick a new member.
- After this, choose the Notifications option.
- You are supposed to pick either Web, Mobile, or Email for:
- When an individual marks time off (admin)
- When any team member enters time off (Managers)
- When time off is approved, edited, denied, or cancelled (all)
Second Step: Set Up Time Tracking Feature
In this step, we are going to help you set up the QuickBooks Time Tracking login. However, there are numerous ways for time tracking, which are as follows:
- Mobile Time Tracking
- Clock-In and Clock-Out reminders
- Web Browser Time Tracking
- QuickBooks Time Kiosk on devices like an iOS device, an Android tablet, or a PC web browser.
QuickBooks Time App Login on Mobile
Enable the Mobile Time Entry for all Team Members
- Under this process, tap on the Company Settings option.
- After that, click the Time Operations and then the Time Entry.
Choose any one of these options:
1. If you allow the mobile time entry permissions
- Choose the Allow team members to track time on the mobile app.
- After this, hit the Save option.
2. If you want your team members to sign in from any location
- Initially, click Allow team members to manage their own timesheets.
- Thereon, choose the Save option.
Turn on the QuickBooks Time Employee login on mobile.
- Firstly, choose the Company Settings tab and hit the Time Options > Time Entry option.
- After this, verify that you have unmarked the Allow team members to manage their own timesheets and Allow team members to track time on the mobile app.
- When the changes are done, hit the Save option.
- Thereon, browse to the Permissions option and click the Mobile Time Entry option.
- At last, hit the Save tab and then resume the steps for each team member.
Third Step: Add Up Your Team
Now that you have set up an account, you can proceed by adding your team. For that, you must perform these steps.
Add your team members to QuickBooks Time
- Primarily, hit the Time option and then choose the Overview tab.
- After that, browse to the Classic QuickBooks Time option and hit the My Team tab.
- Choose the My Team option and go to the Add Team Members, followed by the Add Manually option.
- Provide the accurate details and then pick a role.
- Now, you can send an invitation to the team members. Herein, you need to provide the email address and then hit the Send an email invitation option.
- Otherwise, you can also send a text message invitation.
- Finally, go with the Add Team Members option.
Fourth Step: Manage the Time & Run Your Reports
- Launch QuickBooks Time, and from there, hit the Schedule option.
- Move to the Settings option from the calendar and tap on Edit view settings.
- You can now make the selections and hit the Save tab.
- At last, click the Settings option and browse to the Schedule Preferences option.
QuickBooks Time Kiosk Login
Add the Kiosk Feature
- Initially, log in to QuickBooks Time as an admin and go to the Company Settings option.
- After this, click the Time Options and then hit the Date & Time menu.
- You need to confirm the time zone by clicking on the drop-down menu list of Time Zone.
- Now, select the Save option and exit from the window.
- Thereon, hit the Feature Add-Ons and browse to the Manage Add-Ons option.
- At last, look for the Time Clock Kiosk option and choose the Install tab.
Steps to install the Kiosk app on your computer
You can run the Kiosk application in the new versions of Chrome, Firefox, and Safari, including the mobile versions like Android and iOS.
- Initially, choose the Add Device option and then click the Use this computer option.
- After this, you must provide the Kiosk name.
- Now, you also have the option to set your Kiosk preferences according to your choice.
- When all the changes are done, hit the Save or Save & Launch Kiosk.
Reasons Why QuickBooks Time Online Login /sign in Issue Emerges
Herein, we have explained the most prominent causes that may trigger the QuickBooks Online Login issue. So, let’s have a look at them to find the right solution.
1. Browser-Related Issues:
Users often experience the QuickBooks Time sign-in issue while accessing the unsupported or outdated web browser.
2. Lost Login Password:
You may have lost or forgotten the password required to access the QuickBooks Time app login account.
3. Excessive storage of browsing history, cookies, and cache files:
At times, the excessive browsing history, cache files, or cookies may interrupt the users from accessing the Time Login account.
4. Problem With the Browser Extensions:
At times, some browser extensions might interfere with the web applications, and as a result, they may create issues while accessing the QuickBooks Time Login account.
How To Fix Intuit QuickBooks Time Tracker Login Problem?
In this blog section, we have described the possible troubleshooting solutions to address the QuickBooks Time Tracker login problem.
Solution 1: Cross-Check Your Login Credentials
The major reason behind the occurrence of QuickBooks Time Online Login is using the incorrect username and password. So, to prevent this issue from occurring in the future, ensure that the login credentials are correct and associated with the QuickBooks Workforce account.
Solution 2: Login With a One-Time Code
If you have forgotten your password, you will receive a code on the registered number or email address.
From Your Computer
- Visit the QuickBooks Time login page and insert the email or User ID linked with your email.
- After this, tap on the Sign In option and then click the Text a Code to [phone number]. Otherwise, opt for the Sign in a different way link and then select to receive a code by text or email to the contact info.
- Finally, provide the code that you have received for signing in.
From Your Mobile Device
- Initially, launch the QuickBooks Workforce application and then click the Sign In tab.
- Insert the email or User ID linked with QuickBooks and hit the Sign In tab.
- Choose the Sign in a different way option and select to get a code on your mobile or email.
- Finally, mention the code for successfully signing in to QuickBooks Workforce.
Solution 3: Update Your QuickBooks Time Login Password While Signed In
In case you have previously signed in to the QuickBooks Workforce but want to edit the login details, use these steps.
On Your Computer
- When you are in QuickBooks Time, launch your profile drop-down and click on the Profile tab.
- After this, tap on Manage User ID/Password and then hit the Sign in & Security option.
- Choose the User ID, Email address, password, or Phone section.
- Thereon, apply the necessary changes and click Save to restore the changes.
On your Mobile Device
- Firstly, log in to the QuickBooks Workforce app and then click on the Profile menu.
- Choose your name and then head to the Manage your Intuit account option.
- When asked, verify your account using the password or a one-time code.
- Tap on the Sign In & Security option and click the User ID, Email address, Password, or Phone section.
- Finally, when all the changes are done, choose the Save tab.
Solution 4: Recover Your Intuit Account
If you couldn’t remember which information is linked to your QuickBooks Time account, then you need to recover your Intuit account.
- Visit the QuickBooks login page and then add your account’s phone number. Otherwise, if you have created the account with the email address, then enter it.
- Now, click on password, then hit the Forgot Password or Text a Code to [your number].
- Look for the text messages or the email regarding the message along with the code.
- Note: You must access the email inbox in a new tab, but you won’t exit the original tab from the sign-in page.
- Thereon, carry on with the rest of the instructions to send for signing into your Intuit account. When asked, you may also reset your password, or you can also skip it.
Solution 5: Delete the Browsing History, Cache Files & Cookies
Even after performing the above solutions, you are still receiving QuickBooks Workforce Time Login issues, so try deleting the browsing history.
Chrome Web Browser
- Open the Chrome browser and hit the three vertically placed dots.
- Head to the More Tools tab from the list of options and head to the Clear Browsing Data tab.
- Choose the date range from the top or pick the All Time checkbox to delete everything.
- Mark the checkbox of Cookies and other site data, cached images, and files.
- Select the Clear Data option to complete the entire process.
Safari Browser
- Initially, open the Safari web browser and click on the History option.
- Now, choose the History option by clicking on the drop-down menu list.
- Thereon, select the time duration up to when you want to delete the history.
Microsoft Edge Browser
- Open the Microsoft Edge browser and head to the Settings icon.
- After this, tap on the Settings option > Privacy, search, and then the Services option.
- Thereon, go to the Under browsing data and click the Choose what to clear option.
- After choosing the Time range drop-down menu, pick a suitable time range.
- Finally, choose the data type you want to clear and click Clear Now.
Solution 6: Sign In Through the Private Window
As you all know, your web browser saves the browsing history, cookies, and cache files, which might interrupt the QuickBooks Time sign in issues. So, to fix the issue, you must access the QuickBooks Time login using an incognito window. The following are the shortcut keys for opening the Time login portal in a private window within different web browsers.
- For the Chrome browser, press Ctrl + Shift + N
- Mozilla Firefox & Microsoft Edge browsers have to hit Ctrl + Shift + P
- Whereas, the Safari browser must press Command + Shift + N
Solution 7: Run a Different Web Browser for QuickBooks Time sign in
You can also try fixing the QuickBooks Time sign in issue by running different web browsers. It is suggested that you try the supported web browsers in QuickBooks, like Chrome, Safari, Firefox, and Internet Explorer.
Conclusion
QuickBooks Time Login is a complex issue that might prevent users from monitoring the employees’ login hours. We hope that by applying the solutions discussed above, you can easily fix the problem and regain access to the account. Furthermore, if you still need any help, then connect with our BizBooksAdvice professionals for help.
Frequently Asked Questions (FAQ’s):-
Question 1: What devices support QuickBooks Time?
Ans. The QuickBooks Time application works well on any tablet, desktop, or laptop with a good internet connection.
Question 2: How does QuickBooks Time work?
Ans. QuickBooks Time is a mobile portal that helps in extracting employee data for payroll and invoicing. Moreover, it also allows you to monitor employee tasks, schedules, and automatically remind employees to clock in or out.
Question 3: How to connect QuickBooks Time to QuickBooks Online?
Ans. To connect QuickBooks Time with QuickBooks Online, you must perform these steps.
- Firstly, access your account, tap on the Settings icon, and choose the Subscriptions and Billings tab.
- Choose the client account you wish to add within QuickBooks Time.
- After this, tap on the Clients’ actions drop-down arrow and hit the Add QuickBooks Time option.
Question 4: How do I reset my QuickBooks Time Login /sign in password?
Ans. To reset the QuickBooks Time login /sign in password, do as follows:
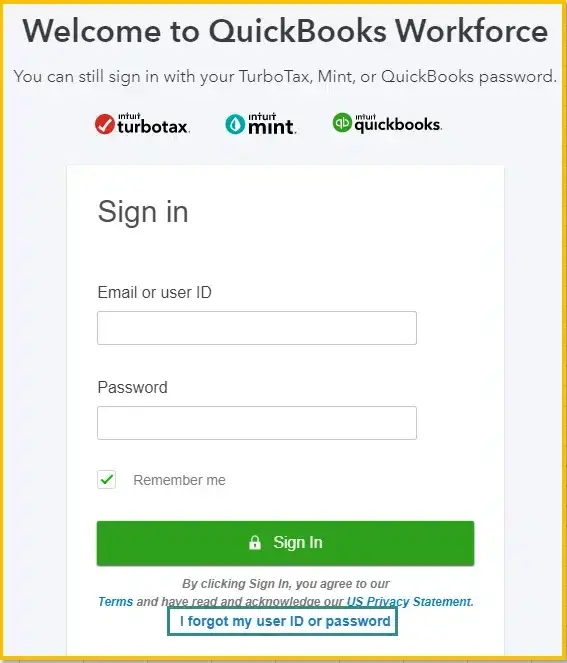
- Tap on I forgot my password on the sign-in screen.
- After this, pick an email and click on the Next option.
- Thereon, you will receive a token at your email address for resetting the password.
- Then, follow the rest of the instructions given on the screen to complete the process.
Question 5: How do I manually import time in QuickBooks Time?
Ans. To manually import time in QuickBooks Time, move to the Features, Add-Ons, and click the Punch Time Import or Manual Time Import option. After this, choose the Help tab and verify that all the details are entered properly.
About The Author

Jonathan Browns
Jonathan Brown is a trained QuickBooks professional with 10 years of experience in the accounting sector. Moreover, he is passionate about helping businesses reduce the stress of managing accounts. Also, he is proficient in assisting entrepreneurs and small business owners to use QuickBooks and enhance their accounting experience.

QuickBooks Desktop, Payroll or Enterprise
Advanced Support for QuickBooks Desktop, Payroll & Enterprise Solutions
From payroll tax setup, direct deposit issues to Enterprise performance tuning and Desktop upgrades - our QuickBooks experts provide accurate and stepwise assistance. Get dependable support designed to minimize downtime and maximize efficiency.
Recent Posts
-
Tried Everything? Here’s How to Fix QuickBooks Error Code 80070057
-
This QuickBooks Company File Needs to Be Updated: A to Z Guide
-
Renew QuickBooks Subscription: Desktop & Online Renewal Guide
-
QuickBooks Online Login: Sign in to Access Your QB account
-
Change EIN in QuickBooks: Complete Guide for Desktop, Online & Payroll