Fix QuickBooks Error 1334: Complete Guide

- By Jonathan Browns
- May 18, 2026
- Accounting
- 7 min read
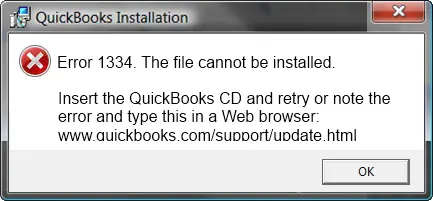
QuickBooks Error 1334 usually occurs while installing, updating, repairing, or uninstalling QuickBooks Desktop. This error mainly appears due to damaged installation files, corrupted Windows components, or issues with the Microsoft .NET Framework. If it isn’t resolved quickly, it may cause issues with QuickBooks installation and prevent the software from functioning properly.
In this guide, we’ll explain the causes of QuickBooks Install Error Code 1334 and provide step-by-step troubleshooting solutions to fix the issue efficiently.
Reasons Why Error Code 1334 in QuickBooks Desktop Occurs
Several factors can trigger QuickBooks Error Code 1334 in QuickBooks Desktop. Understanding these causes can help you fix the issue efficiently.
- Incomplete or improper installation of QuickBooks Desktop.
- Corrupted or damaged Windows registry files.
- Damaged QuickBooks program files.
- Accidental deletion of important QuickBooks-related files.
- Issues with the Microsoft .NET Framework installation.
- Insufficient User Account Control (UAC) permissions are blocking QuickBooks updates.
- Interference from Windows Firewall or third-party security software.
Things You Require While Updating or Repairing QuickBooks
- Keep your QuickBooks license number readily available.
- You need to have the installer file for your version of QuickBooks.
5 Solutions to Fix the QuickBooks Desktop Error 1334
Solution 1: Remove and then re-install QuickBooks Desktop
If you run into issues when you uninstall QuickBooks, there might be something going on with your PC.
Step 1: Remove QuickBooks application from your PC
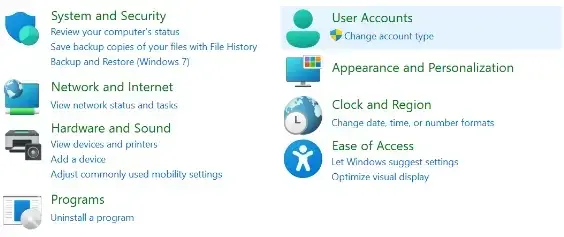
- Click on the Windows Start menu and search for Control Panel.
- Open the Control Panel and click on Programs and Features or Uninstall a Program.
- Choose the version of your QuickBooks Desktop you want to remove from the list of programs.
- Click on Uninstall/Change, Remove, and then Next.
Step 2: Re-install QuickBooks Desktop
Once you successfully remove QuickBooks Desktop, it is the right time to install QuickBooks Desktop again. Now, QuickBooks will install new folders and rename your old ones.
Check and confirm if the QB Error Code 1334 is fixed or not.
Solution 2: Uninstall QuickBooks manually and rename the installation folders.
- Remove the QuickBooks application again.
- Click on the Windows Start menu and search for File Explorer.
- Now, open the File Explorer.
- You need to find and open the folder that contains your QB company files.
- Usually, it is your QuickBooks Folder with one of the locations:
- C:\ProgramData\Intuit\QuickBooks (year)
- C:\Users\(current user)\AppData\Local\Intuit\QuickBooks (year)
- C:\Program Files\Intuit\QuickBooks (year)
- 64-bit version C:\Program Files (x86)\Intuit\QuickBooks (year)
- Right-click the folder and rename it by adding extension .old to the folder name. Doing so would prevent the QuickBooks program from opening when you reinstall.
- Now, reinstall QuickBooks Desktop.
In case you faced an access error message while trying to rename the folder:
- Right-click on the Windows Taskbar.
- Now, choose Task Manager.
- Click on the Process tab.
- Select the Name column header.
- QBDBMgrN.exe,
- QBDBMgr.exe,
- QBCFMonitorService.exe,
- Qbw32.exe.
- Click Yes if a message pop-up: “WARNING: Terminating a process can cause undesired resulsts”.
Solution 3: Repair .NET Framework
Windows 10 and newer
- Close all open programs and open the Windows Start menu.
- Type Control Panel in the search field and open Control Panel.
- Go to Programs and Features and click on Uninstall a Program.
Note:- You do not need to worry since we are not uninstalling anything.
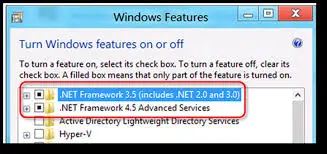
- Select Turn Windows features ON or OFF.
- Find .NET Framework on the list. Note:- Confirm and verify the settings for both:
- .NET Framework 4.5 and .NET Framework 3.5 SP1.
- We recommend that you follow the same steps to fix .NET. Framework 4.5, 4.6, 4.7, and 4.8.
- Check NET Framework 4.5.
If the .NET Framework 4.5 checkbox is not marked as checked:
- Tick the checkbox to turn ON .NET Framework 4.5.
- Click on OK and save your changes.
- Restart your PC.
If the .NET Framework 4.5 checkbox is already marked as checked:
- Click on the checkbox to turn off .NET Framework 4.5.
Note:- Do not turn it back ON.
- Click on OK and save your changes.
- Now, restart your PC.
- When you are signed back into Windows, you need to follow the steps to turn ON .NET Framework 4.5 again.
- Check NET Framework 3.5 SP1
If the .NET Framework 3.5 SP1 checkbox is not checked:
- Click on the checkbox and turn it ON .NET Framework 3.5 SP1.
- Click on OK and save your changes.
- Restart your PC.
If the .NET Framework 3.5 SP1 checkbox is already checked:
- Click on the checkbox to turn OFF .NET Framework 3.5 SP1. Make sure to keep it in the OFF mode.
- Click OK and save your changes.
- Restart your computer.
- When you need to sign back in to your Windows, simply follow the steps to turn .NET Framework 3.5 SP1 on again.
Note:- In case you see any error while turning the .NET Framework ON or OFF, you need to reach out to an IT professional or Microsoft support. Error 1334 QuickBooks desktop is not a QuickBooks issue; rather, it is a Windows issue.
Solution 4: Run QuickBooks File Doctor
- Within the QuickBooks Tool Hub, click on Company File Issues.
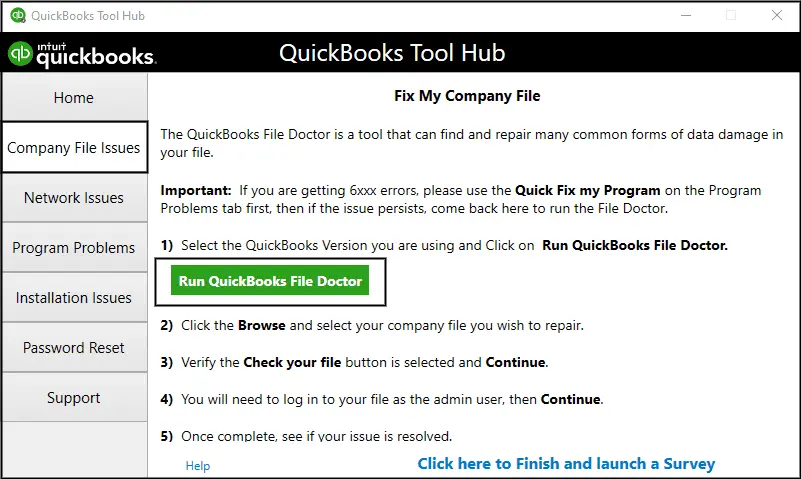
- Click on Run QuickBooks File Doctor.
- In the application of File Doctor, choose your company file from the drop-down menu. In case you do not find any file, use the Browse and search option to get the file.
- Click on Check your file and hit Continue
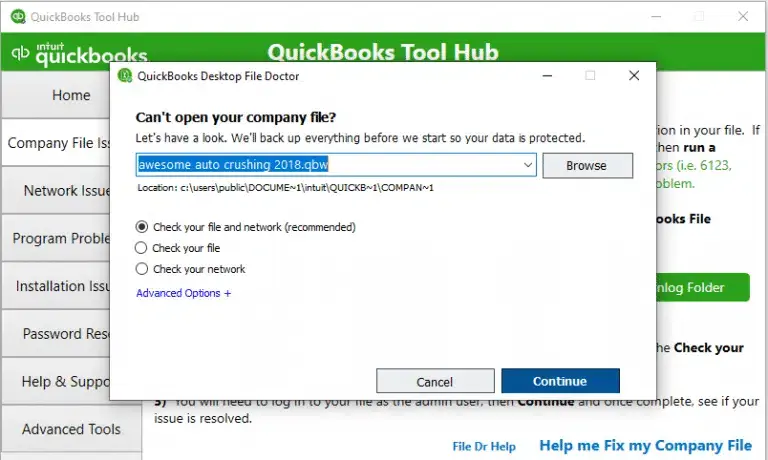
- Log in to the QuickBooks application and click Next.
Run QuickBooks Install Diagnostic Tool
- Exit from the QuickBooks application.
- Since you have already installed the QuickBooks Tool Hub, click on Installation issues.
- Select the QuickBooks Install Diagnostic Tool.
- Now, the tool has started its repairing process and may take 15 minutes to complete the process.
- Finally, restart your workstation and try to install the QuickBooks application again.
Check if the QuickBooks installation error 1334 is fixed or if it still requires another solution. If it is fixed, create an antivirus exclusion.
Solution 5: Create Antivirus Exclusion
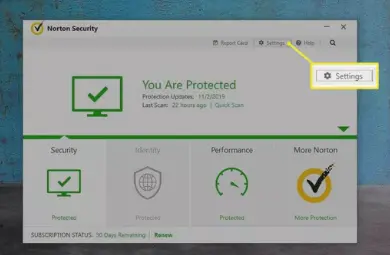
1. Norton
- Open the Norton application and click on “Settings”.
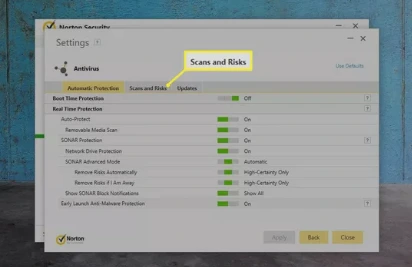
- Right-click on Norton Shortcut on the Desktop and choose the section “Scan and Risks.”
- There will be an option of “Configure” adjacent to “Items to Exclude”.
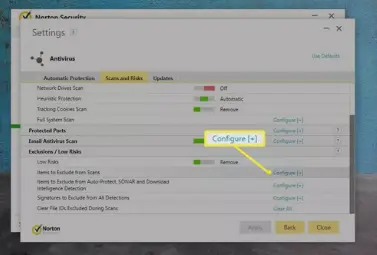
- Lastly, add the respective QuickBooks file and folders.
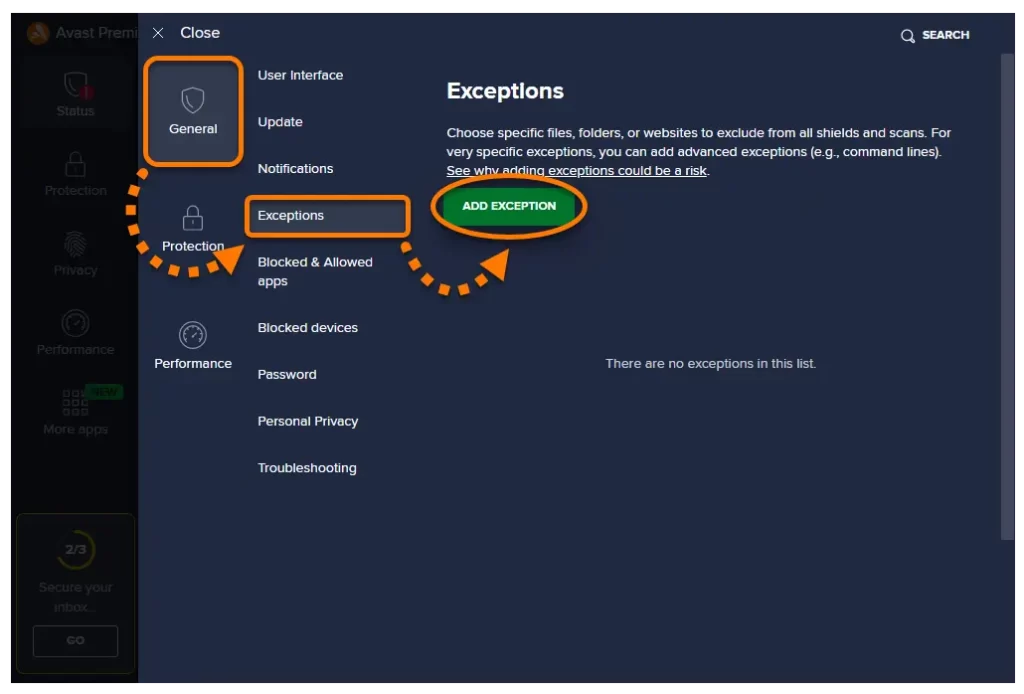
2. Avast
- Launch the Avast Antivirus and click on Menu.
- Move to the Settings section and click on the General Tab > Exceptions.
- To exclude QuickBooks, click Add Exception.
- Finally, browse for the QuickBooks path, add it, and then save it.
3. Windows Defender
- Open Windows Security and click on the section “Virus and threat protection”.
- Then choose “Manage Settings” and scroll to “Exclusion”.
- Now, you can add the exclusion of QuickBooks files via the “Add an exclusion” option.
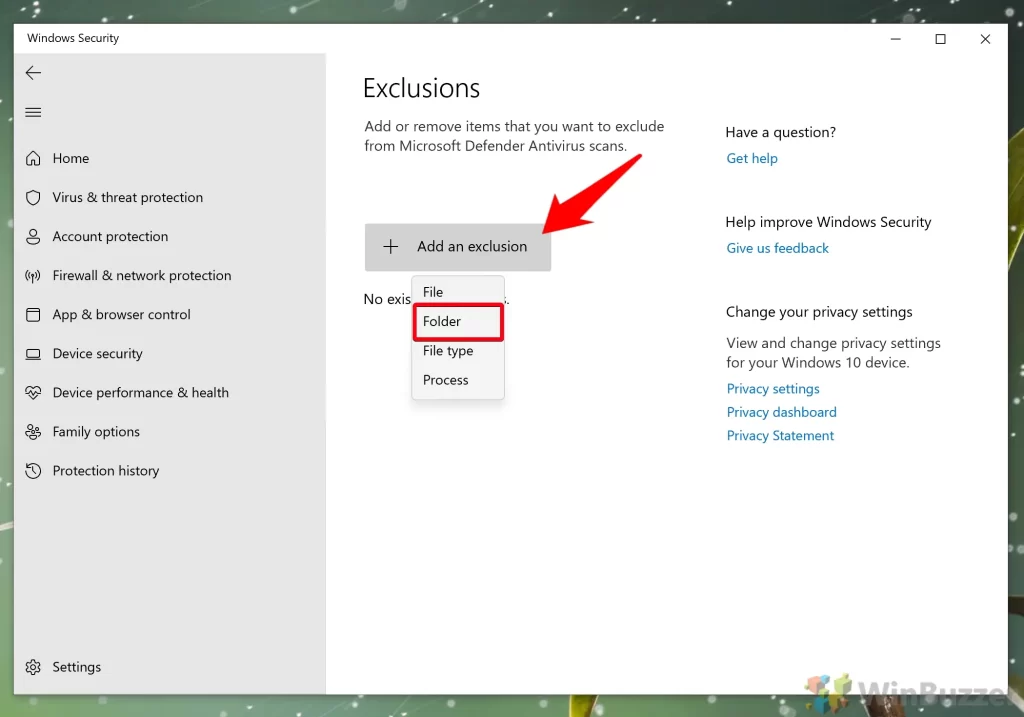
- The last step is to browse for the QB directory and confirm it.
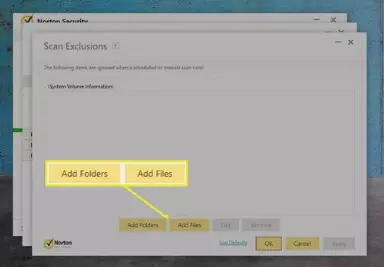
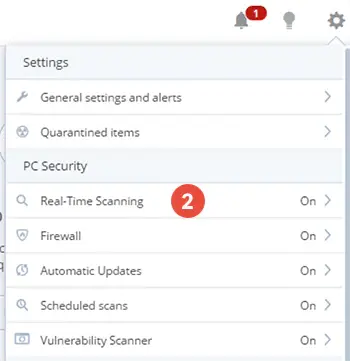
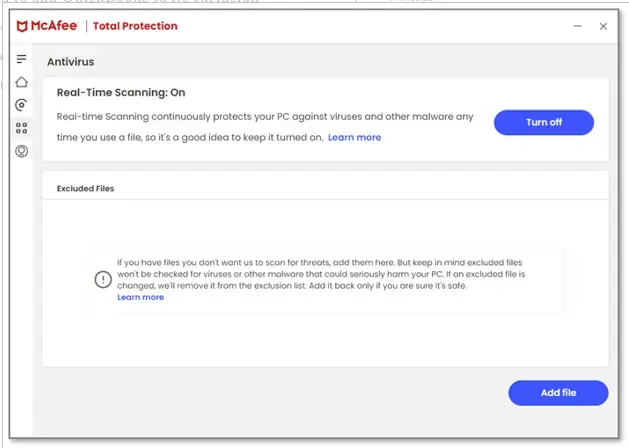
4. McAfee
- Open McAfee and take the cursor to “Settings”. In Settings, choose the option “Real-Time Scanning.”
- Now, click on “Excluded files” and choose “Add file/folders”.
- Search for the QuickBooks files and folders to add them and in last step “Save” the changes.
5. Sophos
- Start the Sophos software and click on the “Protection” tab.
- In your next move, click “General > Exceptions.”
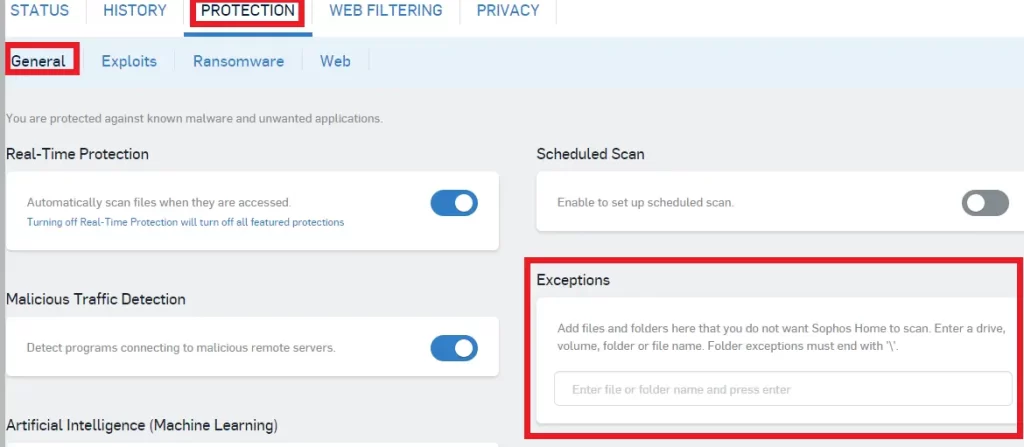
- In the Exceptions, add your QB files and folders.
- Now, save this setting and operate QuickBooks with no QuickBooks update error 1334.
Conclusion
QuickBooks Error 1334 is an installation issue that occurs because of damaged installation files, corrupted Windows components, or .NET Framework issues. By following the troubleshooting solutions above, you can successfully repair QuickBooks Desktop and restore normal installation functionality. Keeping QuickBooks and Windows updated can also help prevent similar errors in the future.
Frequently Asked Questions (FAQ’s):-
1. What is QuickBooks Error 1334?
QuickBooks Error 1334 is a company file error or a damaged .NET Framework issue.
2. How can I resolve QuickBooks Error Code 1334?
You can resolve the QuickBooks Error 1334 code by reinstalling the QuickBooks application on your computer. The second method is by repairing the .NET Framework.
3. Do I need to disable antivirus for the QuickBooks 1334 fix?
Temporarily disable antivirus/firewall during install, then re-enable after the process completes.
4. Should I use a different installation media to fix QuickBooks Error Message Codes 1334?
Yes, use a verified QuickBooks installer file from Intuit, not a copied or damaged disc/ISO.
5. How can QuickBooks Tool Hub help with QuickBooks Repair Error 1334?
It provides specific repair tools for installation issues and misbehaving Windows components.
6. What role do .NET Framework or Redistributables play in 1334?
Missing/corrupted redistributables can trigger 1334, and the solution is to install/repair the required components.
7. How do I perform a clean install of QuickBooks install 1334 on Windows?
Uninstall QuickBooks, run a registry/file clean-up, restart, then install the current version from Intuit.
8. Is there an Error 1334 fix for Windows 11/10 users?
Yes, follow the Clean Install steps, update Windows, and ensure compatibility mode is not misconfigured.
About The Author

Jonathan Browns
Jonathan Brown is a trained QuickBooks professional with 10 years of experience in the accounting sector. Moreover, he is passionate about helping businesses reduce the stress of managing accounts. Also, he is proficient in assisting entrepreneurs and small business owners to use QuickBooks and enhance their accounting experience.

QuickBooks Desktop, Payroll or Enterprise
Advanced Support for QuickBooks Desktop, Payroll & Enterprise Solutions
From payroll tax setup, direct deposit issues to Enterprise performance tuning and Desktop upgrades - our QuickBooks experts provide accurate and stepwise assistance. Get dependable support designed to minimize downtime and maximize efficiency.
Recent Posts
-
QuickBooks Bookkeeping: The Practical Way to Keep Your Books in Order
-
QuickBooks Merchant Services: Everything You Need to Know Before You Sign Up
-
QuickBooks Payroll Assisted: Everything You Need to Know
-
How to Contact QuickBooks Online Customer Service Team 2026
-
QuickBooks Online Login: Sign in to Access your QB account