


Converting from QuickBooks Desktop to QuickBooks Online: A Complete Guide

- By Jonathan Browns
- Jul 28, 2026
- Business
- 7 min read
Converting from QuickBooks Desktop to QuickBooks Online is one of the most common transitions small business owners and accounting teams have to make today in the West. Whether you’re switching because Intuit is phasing out certain Desktop plans, because your team needs remote access, or because you want the flexibility of cloud accounting, the process is more structured than it might seem at first glance.
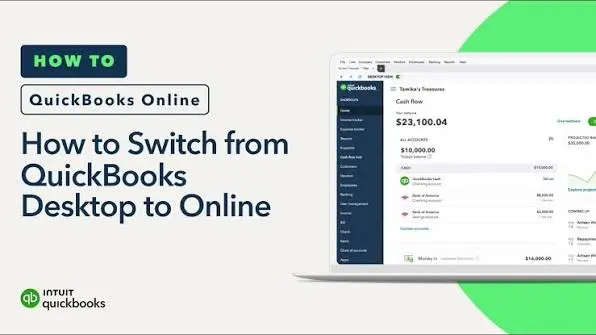
This guide will walk you through everything involved in converting from QuickBooks Desktop to QuickBooks Online. This includes what to check before you start, how the built-in migration tool works, what data actually transfers, what you’ll need to rebuild manually, and how to confirm your new QuickBooks Online company is accurate before you close your old file for good.
A Quick Overview on Conversion from QuickBooks Desktop to Online
The table below provides condensed information on what we cover in this article.
| Step | What You Do | Where It Happens |
| Check eligibility | Confirm your Desktop version and company file size (Total Targets) qualify | QuickBooks Desktop |
| Prep your file | Update Desktop, switch to single-user mode, run a data verification | QuickBooks Desktop |
| Back up your company file | Create a backup (.QBB) before making any changes | QuickBooks Desktop |
| Start the migration | Use the built-in export tool or the online migration tool | QuickBooks Desktop or browser |
| Choose what to bring over | Select date range, lists, and transaction history | Migration wizard |
| Wait for the confirmation email | Intuit processes the file and emails you when it’s ready | |
| Review your QuickBooks Online company | Check balances, lists, and reports against your old file | QuickBooks Online |
| Reconnect banking and finish setup | Add bank feeds, users, payroll, and apps | QuickBooks Online |
Before You Begin: Is Your Company File Ready to Move?
Before you open the migration tool, it’s worth spending time on preparation. A rushed migration is the most common reason people end up with mismatched balances or missing data afterward.
1. Confirm Your QuickBooks Desktop Version
You can start migration from within QB Desktop if you’re on a supported version. The exact menu path differs product by product:
- QuickBooks Desktop Pro or Premier (2022 or later)
Go to Company, select Migrate this company file to QuickBooks Online, then select Export Your Company File to QuickBooks Online.
- QuickBooks Desktop Enterprise (2024 or later)
Go to Company, then choose Migrate to QuickBooks Online.
- QuickBooks Desktop Enterprise (2022 or 2023)
Press Ctrl + 1 to open the Product Information window, then press Ctrl + B + Q and select OK to reveal the migration option.
- Older versions (2011–2021)
You won’t have the in-product wizard, but you can still move your data using Intuit’s web-based migration tool by uploading your company file directly.
If you’re not sure which version you’re running, open QuickBooks Desktop, press F2 (or Ctrl + 1), and the Product Information window will show your product and release year.
2. Check Your “Total Targets”
Intuit measures the complexity of a company file using a metric called Total Targets, which reflects the combined volume of your lists and transactions. This number determines whether a full migration is even possible.
- Open the Product Information window (F2 or Ctrl + 1).
- Look for Total Targets in the File Information section.
- Your file generally needs to be under 4,000,000 targets for a standard migration to succeed. Files that exceed this threshold, or that exceed regional limits in Canada, the UK, or South Africa, may only qualify for a lists-and-balances-only conversion rather than a full transaction history move.
If your file is close to or over the limit, consider condensing your data in Desktop first, or speak with your accountant about which transactions you actually need in the new file versus what can stay archived in the old one.
3. Update QuickBooks Desktop
Migrations are more reliable when you’re running the latest release. To update:
- If you’re in multi-user mode, go to File, then select Switch to Single-user Mode.
- Select Help, then Update QuickBooks Desktop.
- Select Update Now, then Get Updates.
- Select Close, then go to File and select Exit.
- Restart QuickBooks Desktop so the update finishes installing.
4. Run Payroll and Close Out Pending Items First
If you use QuickBooks Desktop Payroll, run any pending payroll before you migrate. Payroll year-to-date details are handled differently between the two products, so it’s cleaner to have payroll fully processed and reconciled before the switch.
It’s also a good idea to clear any pending sales transactions. QuickBooks Online doesn’t support marking a transaction as “Pending,” so anything left in that status in Desktop won’t carry over.
5. Back Up Your Company File
Even though QuickBooks Online stores your data securely in the cloud, you still want a local backup of your Desktop file before you touch anything.
- If you’re in multi-user mode, switch to single-user mode first (File > Switch to Single-user Mode).
- Go to File, then select Back Up Company, then Create Local Backup.
- Save the backup (.QBB file) somewhere you can find it later, separate from your live company file.
This backup becomes your safety net. If anything looks off after migration, you can always return to your original Desktop file, since migrating doesn’t delete or alter it.
What You’ll Need Before Starting the Migration
You must keep handy what’s needed before you begin with the migration.
| Requirement | Why It Matters |
| Admin access to the company file | Only a company administrator can initiate a migration |
| A QuickBooks Online subscription (new or existing) | Migration exports data into an Online company; you need a destination account |
| Company file version 2011 or later | Older files aren’t compatible with the migration tool |
| Under the Total Targets threshold | Files over the limit can only do a partial (list and balance) conversion |
| A recent local backup | Protects your original data regardless of what happens during migration |
60 days from QuickBooks Online account creation:
Intuit gives you a 60-day window from when your QBO account is created to complete the data move
How to Convert from QuickBooks Desktop to QuickBooks Online: 3 Different Methods
Once your file is prepped, you have three different ways for converting from QuickBooks Desktop to QuickBooks Online, depending on your setup.
Option A: Migrate from Within QuickBooks Desktop (Most Common)
- Open QuickBooks Desktop and sign in as the company administrator.
- Go to Company, then select Migrate this company file to QuickBooks Online (or the Enterprise equivalent described earlier).
- Select Get started. You’ll see a personalized checklist covering the tasks needed to prepare your file.
- Sign in with your Intuit account, or create one if this is a new QuickBooks Online subscription.
- Choose which company to migrate into, if you have more than one QuickBooks Online account.
- Select how much transaction history you want to bring over. You can typically choose a specific number of recent years of transactions, or lists and balances only.
- Select Continue, then let the tool run.
While the migration is processing, don’t use your QuickBooks Desktop file. Making changes to the file mid-migration can cause the export to fail or produce inconsistent data. You’ll receive an email from Intuit once the migration is complete.
Option B: Use the Online Migration Tool (No Local Install, or Accountant-Assisted)
If you don’t have QuickBooks Desktop installed on the machine you’re working from, or an accountant is handling the move on your behalf, Intuit’s browser-based migration tool accepts uploaded files directly.
- .QBW (your live company file)
- .QBM (portable company file)
- .QBB (backup company file)
You’ll sign in with your Intuit account, upload the file, choose the destination QuickBooks Online company, and follow the same checklist-style prompts as the in-product version.
Option C: Accountant Batch Migration Tool (For Firms Managing Multiple Clients)
If you’re an accountant or bookkeeper managing several clients’ files, QuickBooks Desktop Accountant (2021 R17 or later releases, including 2022 R15, 2023 R12, and 2024 R6) includes a Batch Migration Tool. It can move up to 50 client company files to QuickBooks Online in one workflow:
- Go to the Company menu.
- Select Migrate to QuickBooks Online.
- Review the pre-migration checklist for each client file to confirm it’s ready.
- Work through the batch list, assigning each file to its corresponding QuickBooks Online company.
This is worth knowing about even if you’re not an accountant, since your bookkeeper may use this exact tool if they’re the one handling your migration.
What Transfers to QuickBooks Online and What Doesn’t
This is the part to care about most, and it’s also where expectations need to be realistic. QuickBooks Online and QuickBooks Desktop aren’t identical products, so not everything maps cleanly.
Data That Generally Converts
| Data Type | Notes |
| Chart of accounts | Transfers, including sub-accounts in most cases |
| Customer and vendor lists | Transfers, though display and full names may be shortened due to character limits |
| Products and services (items) | Transfers as items, with some caveats (bundles, for example, don’t convert) |
| Account balances | Transfers so your books stay balanced |
| Transaction history | Transfers based on the date range you select during migration |
| Open invoices and bills | Transfers so you can continue collecting and paying them in QBO |
| Recurring transactions (most types) | Transfers, except recurring credit card charges |
| Sales rep names/initials | Maintained within converted transactions |
Data That Does Not Convert or Needs Manual Setup
| Data Type | What Happens Instead |
| Company settings (name, address, preferences) | You’ll re-enter these in QuickBooks Online |
| Bank and credit card connections | You’ll reconnect these manually inside QuickBooks Online |
| Custom form templates | You’ll need to recreate custom invoice, estimate, or sales receipt templates |
| Detailed payroll history | Payroll transactions convert as regular checks; you’ll enter year-to-date payroll totals manually |
| Pending sales transactions | QuickBooks Online has no “Pending” status, so these don’t carry over |
| Reconciliation reports | Save these from Desktop as PDFs for your records; reconciling continues going forward in QBO |
| Recurring credit card charges | Cancel these in your Merchant Center and recreate them as recurring sales in QBO |
| Report customizations | QBO has its own reporting engine; similar reports exist but need to be rebuilt |
| Memorized transaction groups | These don’t transfer the same way and typically need to be rebuilt in QBO |
A Note on Payroll
If payroll is a meaningful part of your Desktop usage, budget extra time for this step. QuickBooks Online requires you to complete a payroll setup interview after the data import, and you’ll need each employee’s year-to-date payroll totals on hand since detailed pay type and item-level breakdowns generally don’t survive the conversion.
A Note on Reports
Your accrual-basis reports should match reasonably well between the two products once migration is complete. Cash-basis reports are more likely to show small differences, since QuickBooks Online and QuickBooks Desktop calculate “paid” status somewhat differently under the hood. This is a known and expected discrepancy rather than a sign that something went wrong.
After Migration: What to Check Before You Trust the New File
Once you get the “migration complete” email, the heavier work, verification, begins.
Compare balance sheets
Run a Balance Sheet report in both QuickBooks Desktop and QuickBooks Online as of the same date, and confirm the totals match.
Compare profit and loss reports
Do the same comparison for a Profit & Loss report over a matching period.
Spot-check customer and vendor balances. Pick a handful of accounts and confirm open balances match what you had in Desktop.
Review your chart of accounts
Confirm account names, types, and sub-account relationships came across as expected.
Check inventory, if applicable
Confirm quantities on hand and item costs match your Desktop records.
Look for duplicate or missing transactions, especially around the cutoff date you selected during migration.
If numbers don’t match, you can close the company in QuickBooks Online, re-run the migration tool, and import again. Migrating doesn’t delete your original Desktop file.
If discrepancies persist after a second attempt, enter manual adjusting entries in QuickBooks Online. It is a normal and accepted way to resolve small variances.
Finishing Setup in QuickBooks Online
Once your data checks out, there are a few more things to complete before your team relies on the new file day to day:
- Reconnect bank and credit card feeds so transactions download automatically going forward.
- Set up users and permissions for anyone who needs access, including your accountant.
- Recreate custom templates for invoices, estimates, and sales receipts.
- Reconnect any third-party apps you used with Desktop; most have separate QuickBooks Online integrations that need to be set up again.
- Turn on relevant features, such as classes, locations, or project tracking, since these aren’t always enabled by default in a new company.
- Set your company preferences, including fiscal year, sales tax settings, and invoice numbering.
If you like the feel of a locally installed program, QuickBooks Online also offers a downloadable desktop app for Windows and Mac that gives you a native window experience while still running on the QuickBooks Online platform and data.
Timing Considerations
You have 60 days from the date you create your QBO account to complete the data migration. If you’re not ready to move data immediately, keep this window in mind so you don’t need to start your subscription over.
Migration time varies based on how large and complex your company file is. A small file with a short transaction history can finish in minutes. A large file with years of data and heavy customer or item lists can take considerably longer.
Common Mistakes to Avoid When Converting QuickBooks Desktop to Online
Here are some common mistakes you must avoid when converting from QuickBooks Desktop to QuickBooks Online.
| Mistake | Why It Causes Problems |
| Continuing to use QuickBooks Desktop while migration is running | Can cause the export to fail or create mismatched data |
| Skipping the backup step | Leaves you without a fallback if something goes wrong |
| Not checking Total Targets first | Can lead to a failed migration partway through |
| Assuming all history will transfer automatically | You choose a date range; anything outside it won’t be included |
| Not reviewing reports after migration | Small errors are easiest to fix immediately, not months later |
| Forgetting to reconnect bank feeds | New transactions won’t download until feeds are reconnected |
| Not backing up reconciliation reports | These don’t carry over and are easy to lose track of |
Final Thoughts
Converting from QuickBooks Desktop to QuickBooks Online is a tool-driven process, not a manual re-entry project. It needs to be prepared properly beforehand. Check your Total Targets, back up your file, choose the right transaction date range, and thoroughly review your new company afterward. These are the steps that make the biggest difference in how smooth the transition feels.
Once your data is verified and your bank feeds, users, and templates are set back up, you’ll have the same financial history you relied on in Desktop. With QuickBooks Online, however, it will be accessible from anywhere your business takes you.
Frequently Asked Questions
How long does it take to convert from QuickBooks Desktop to QuickBooks Online?
It depends on the size of your company file. Small files with limited transaction history can migrate in under an hour, while larger files with years of transactions, extensive customer or vendor lists, and inventory can take considerably longer. You’ll receive an email once the process finishes.
Will I lose my QuickBooks Desktop data after I migrate?
No. Migrating creates a copy of your data inside QuickBooks Online; it doesn’t delete or alter your original Desktop company file. You can keep your Desktop file as a historical reference even after you’ve fully switched over.
Can I choose how much transaction history moves over?
Yes. During the migration setup, you’ll be able to select how many years of transaction history to bring into QuickBooks Online, or opt for a lists-and-balances-only conversion if your file is large or you only need current balances going forward.
What happens if my company file exceeds the Total Targets limit?
Files above the threshold (generally 4,000,000 targets in the US, with lower regional limits in some countries) typically can’t complete a full transaction migration. In that case, you may only be able to convert lists and current balances, with historical transactions staying in your archived Desktop file.
Does payroll transfer during migration?
Payroll transactions convert as regular checks rather than detailed payroll entries, and specific payroll item breakdowns generally don’t carry over. You’ll need to complete a payroll setup interview in QuickBooks Online and enter year-to-date totals for each employee manually.
Can my accountant handle the migration for me?
Yes. Accountants using QuickBooks Desktop Accountant can use the Accountant Batch Migration Tool to move multiple client files to QuickBooks Online. They can also use the standard migration tool for a single file on your behalf.
Do I need to cancel my QuickBooks Desktop subscription right away?
Not necessarily. Many people run both products in parallel for a short period while they verify their new QuickBooks Online company and get comfortable with the new interface, before fully retiring the Desktop subscription.
Will my reports look the same in QuickBooks Online?
Your accrual-basis reports should closely match. Cash-basis reports may show small differences because the two products calculate what counts as “paid” slightly differently. QuickBooks Online also has its own report library, so some familiar Desktop reports will need to be recreated using the closest equivalent.
What if my numbers don’t match after migration?
First, compare Balance Sheet and Profit & Loss reports in both products for the same date range to identify where the discrepancy starts. If needed, you can close the QuickBooks Online company and re-run the migration. If small differences remain, entering manual adjusting entries in QuickBooks Online is a standard way to reconcile the two files.
Is there a limit on how many customers, vendors, or items can migrate?
Very large lists can be affected by the same Total Targets threshold that governs transactions. If your combined list sizes are unusually large, check your Total Targets before starting and consider cleaning up inactive names first.
About The Author

Jonathan Browns
Jonathan Brown is a trained QuickBooks professional with 10 years of experience in the accounting sector. Moreover, he is passionate about helping businesses reduce the stress of managing accounts. Also, he is proficient in assisting entrepreneurs and small business owners to use QuickBooks and enhance their accounting experience.
Recent Posts
-
9 DIY Troubleshooting Methods to Fix QuickBooks Error 15270
-
QuickBooks Data Conversion Services: Everything to Know
-
QuickBooks Point of Sale: Features, Setup, Pricing & Best Alternatives
-
QuickBooks Scheduled Backup Not Working: Common Causes & Easy Fixes
-
QuickBooks Credit Card Processing: How It Works, Fees & Benefits