How to Fix QuickBooks Error Code 6143 – Complete Step Guide

- By Jonathan Browns
- Oct 09, 2025
- Accounting
- 7 min read
Being a QuickBooks user, confronting the QuickBooks company file error is a bit challenging, as it prevents users from accessing the file. Thus, it causes a sudden shutdown of the system. QuickBooks Error Code 6143 mainly appears while trying to generate the backup or access the data file, but fails to do so. This issue mainly occurs because of the data damage or improper configuration settings.
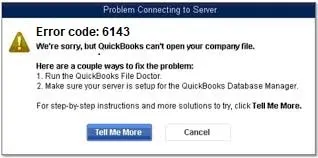
However, the QuickBooks Error 6143 is displayed with a message stating “We’re sorry, but QuickBooks can’t open your company file.” This blog will walk you through all the possible causes along with the quick methods to fix this company file error.
Why QuickBooks Error 6143 Shows Up and How It Happens
QuickBooks Error 6143 is often experienced while generating the backup of the data file. However, several factors might be responsible for this error. So, let’s understand all the root causes to obtain the right solution to address the issue.
- The existence of data damage or corruption within your QuickBooks data file.
- Accessing the incorrect company file path.
- The users often experience this issue because of network issues caused while launching a data file in multi-user mode.
- Opening or restoring the data file by running the old QuickBooks version.
- Sometimes, the missing or damaged components while installing QuickBooks may cause this issue.
Troubleshooting QuickBooks Company File Error 6143 Successfully
After finding the major causes, let’s know the troubleshooting solutions to resolve QuickBooks Company File Error Code 6143. So, we suggest that you perform the troubleshooting methods in the same sequence as given below.
Solution 1: Verify & Rebuild Data Utility
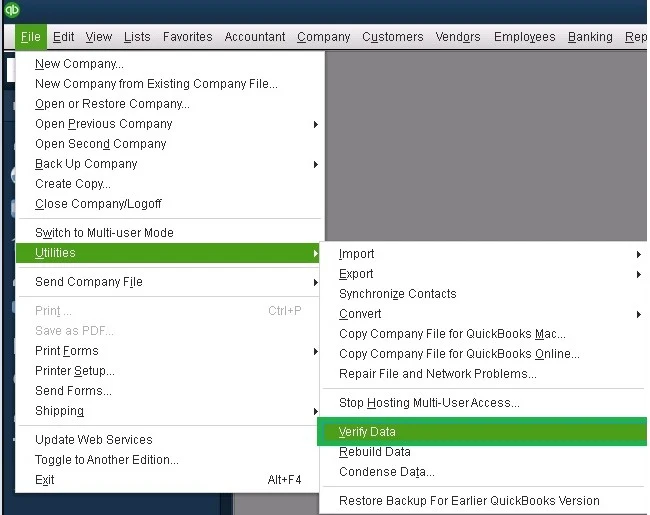
The QuickBooks Error 6143 occurs due to damage or corruption in the company file data. So, it is essential to run the Verify and rebuild data utility to scan and resolve the issue.
Solution 2: Rename the.ND and TLG Files
To modify the network data and transaction log file, you must follow the instructions outlined below.
- Primarily, access the QuickBooks Data folder that carries your company file.
- Afterwards, start looking for the file having the same name as the data file but with a different extension. You will get the file names as shown below.
- company_file.qbw.nd
- company_file.qbw.tlg
- Now, you must right-click on the.ND and then.TLG files one after the other. Then, pick the Rename option.
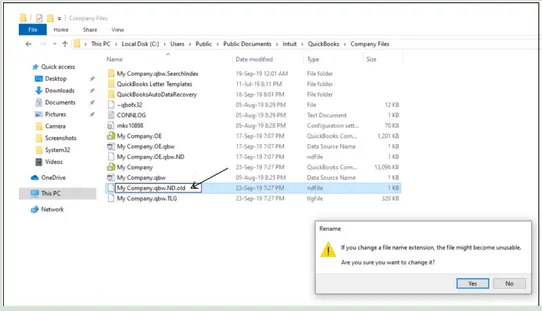
- Next, all you require is to edit the name of the data file by inserting.OLD at the end of the file names.
- Complete the process by launching the QuickBooks application and then your data file.
Solution 3: Update QuickBooks To the Recently Launched Version
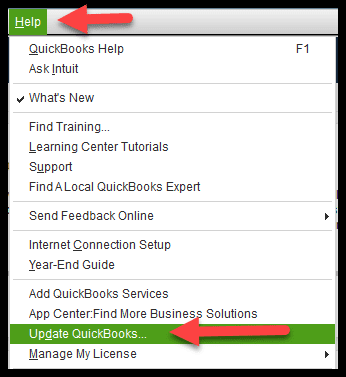
Sometimes, working on an old QuickBooks version might prevents users from accessing the data file. In such a scenario, it is mandatory to update QuickBooks Desktop to the newly launched version.
Solution 4: Run QuickBooks File Doctor To Resolve the Issue
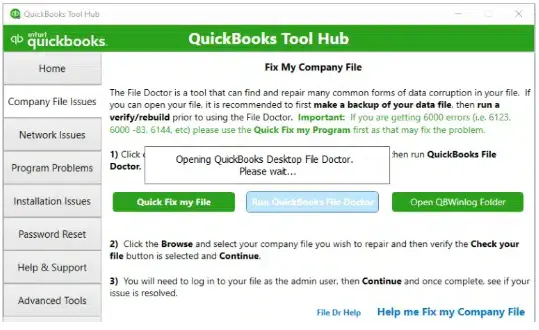
You can easily address the issues with the company file. By running the QB File Doctor tool from the Tool Hub. Perform the steps written below to run the File Doctor Tool quickly.
- Start the process by launching the QuickBooks Tool Hub (1.6.0.8) version.
- After this, access the Company File Issues tab, followed by the Run QuickBooks File Doctor. Then, you have to hold on for a while unless the process is complete.
- Next, you must choose the data file and tap on Browse and Search Options to get the file.
- Thereon, move on to the Check Your File tab and then hit the Continue tab.
- Complete the process by mentioning the QuickBooks password and hitting the Next tab.
Solution 5: Delete Extra Spaces From Your Company File Names
At times, the excessive space in your data file name may give rise to the QuickBooks Error Code 6143. Therefore, to fix the issue, you must delete extra spaces from your data file by performing the steps illustrated below.
- Start the process by exiting from QuickBooks on every workstation and server within the network.
- Afterwards, launch the QuickBooks installation folder on the server that carries the QuickBooks company file.
- Now, you will see that the file is present in the following location: “C: \ Users \ Public\ Public Documents\ Intuit \ QuickBooks \ Company Files.”
- Thereon, you must right-click on the data file and then hit the Rename option.
- Moving onwards, delete any extra spaces from the file name and the company file extension.
- Next, launch the QuickBooks application and try accessing the QB data file to see if the error still exists.
Solution 6: Restoring Company File Backup
If the above solutions won’t help you resolve QuickBooks Error 6143, then try restoring the company file backup. This will help you regain access to your company file so that you can carry on with your ongoing task smoothly.
Solution 7: Create & Launch Portable Company File
If you won’t be able to restore your backup version, then create and open a portable data file. With the help of a portable data file, it gets easier to detect whether the issue lies with the company file or with the QuickBooks program itself.
Step 1: Start Updating the QuickBooks Desktop
To begin the process, you must verify that you have updated QuickBooks Desktop to the new version.
Step 2: Try to Establish a Backup File
Portable data files are one of the safest and convenient ways to shift or share the accounting data when you don’t have a full backup. However, the portable company file isn’t a replacement for your full backup. This is so because it won’t carry the message templates, logos, and images. Besides this, it also doesn’t contain the .tlg or .log files., Loan Manager, Statement Writer, or Fixed Asset Manager files.
However, to complete the backup of your data files, you must prepare a backup company file.
Step 3: Construct a Portable Company File
- For generating the portable company file, launch the QuickBooks application and sign in as an administrator.
- After this, browse to the File menu > Create Copy > Portable Company File > Next tab.
- Now, you must allot a distinct name to your portable company file. With this, it makes it easier to identify that it is distinct from the regular data files.
- Presently, look for a preferred location to save your portable company file from where you can get the file conveniently.
- Click on the Save and then the OK tab after doing the necessary changes.
Step 4: Launch a Portable Company File
Herein, we have described the stepwise instructions to access a portable company file.
- Launch the QuickBooks application and then sign in using the administrative credentials.
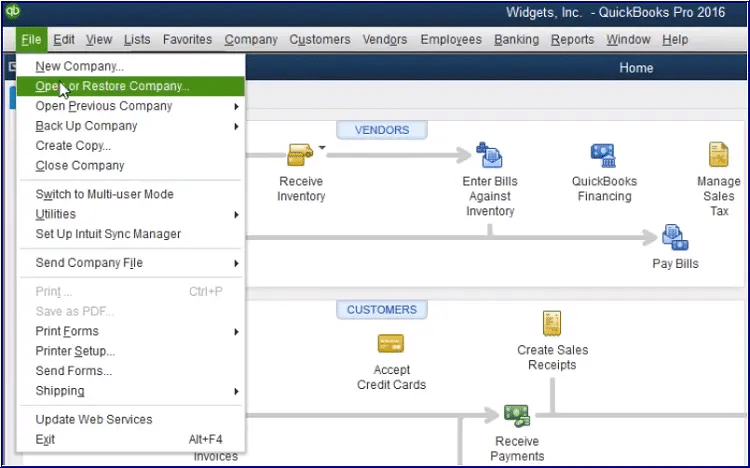
- Afterwards, move to the File menu, hit the Open or Restore Company file tab.
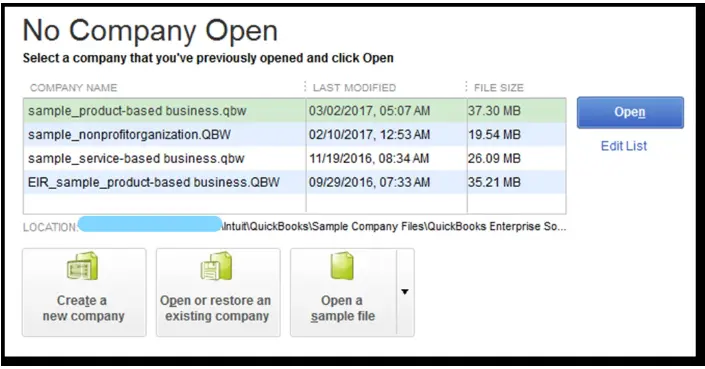
- Now, choose the Restore a Portable file and click the Next tab.
- Proceeding further, you must pick your portable data file. With this, you will notice that the file name will be reflected as [Unique company file name].qbm and hit the Open tab.
- Next, you must review the notes on Where do you want to restore the file page and tap on Next.
- Once you are all set to access your data file, hit the Save tab to complete the process.
Solution 8: Signing In to QuickBooks With Proper Admin Rights
Sometimes, insufficient admin rights might obstruct users from accessing the data file. Perform the steps below to sign in to QuickBooks with proper steps.
- Initially, tap on the Start menu and type QuickBooks in the search console.
- After this, start looking for the QuickBooks icon, right-click on it to hit the Run as Administrator option.
- Thereon, you will receive a permission pop-up to give permission to modify the changes.
- At last, relaunch your Windows PC and access the QuickBooks Desktop to see if the issue is resolved.
Solution 9: Make Use of the Auto Data Recovery Tool to Recover Data
You can also run the QuickBooks Auto Data Recovery Tool to recover your old company file data. With this, you can regain access to the data file and resolve QuickBooks Error Code 6143.
Conclusion
Hopefully, we have ensured that the solutions illustrated in this post have shown you the right path to overcome QuickBooks Error Code 6143. Thus, it will let you access the company file without any interference. If you still have any trouble accessing the file, then you must connect with our QB professionals for quick resolution.
Frequently Asked Questions (FAQ’s):-
Question 1: From where do I find my QuickBooks company file?
Ans. You can locate your QuickBooks company file by browsing through the following path: “C:\Users\Public\Public Documents\Intuit\QuickBooks\Company Files.”
Question 2: What should you do to get the hidden files in QuickBooks?
Ans. For locating the hidden files in QuickBooks, use the steps below.
- Initially, right-click on the Windows logo, hit the Windows Explorer, and click the Organize tab.
- Afterwards, choose the Folder Options > View tab > Show hidden files, folders, and drives beneath the Advanced Settings.
- Now, keep the ” Hide Protected system operating files box unmarked.
- At last, hit the Yes tab from the message appearing on the screen.
Question 3: Why can’t I locate my QuickBooks data file?
Ans. The users won’t be able to locate their QuickBooks data file if the file is either moved to another location or the file name is changed. In other instances, this issue may arise when your PC is disconnected from the path that holds your data files.
Question 4: Is it possible to delete the company file in QuickBooks?
Ans. Once you have generated the backup copy of the data file in QuickBooks, you can delete it. For that, launch the company file and then hit the Delete option within the QuickBooks application to completely remove the outdated file.
Question 5: What is the size limit for the QuickBooks data file?
Ans. The Pro & Premier edition users must have a data file size that shouldn’t exceed 250 MB. Whereas, for the Enterprise edition, the file size must be increased up to 1.5 GB.
About The Author

Jonathan Browns
Jonathan Brown is a trained QuickBooks professional with 10 years of experience in the accounting sector. Moreover, he is passionate about helping businesses reduce the stress of managing accounts. Also, he is proficient in assisting entrepreneurs and small business owners to use QuickBooks and enhance their accounting experience.

QuickBooks Desktop, Payroll or Enterprise
Advanced Support for QuickBooks Desktop, Payroll & Enterprise Solutions
From payroll tax setup, direct deposit issues to Enterprise performance tuning and Desktop upgrades - our QuickBooks experts provide accurate and stepwise assistance. Get dependable support designed to minimize downtime and maximize efficiency.
Recent Posts
-
Fix QuickBooks Error PS032 | QB Payroll Update Error
-
How to Fix QuickBooks Error 12031 (Network Timeout Issue)
-
QuickBooks Error PS036: Causes, Fixes, and Prevention
-
Converting from QuickBooks Desktop to QuickBooks Online: A Complete Guide
-
Tried Everything? Here’s How to Fix QuickBooks Error Code 80070057