Change QuickBooks License Number with Simple Steps

- By Jonathan Browns
- Nov 22, 2025
- Accounting
- 7 min read
Entered the wrong license number in QuickBooks and can’t use the app? No worries! You can easily change the license number in QuickBooks Desktop. Once updated, you’ll be able to activate your QuickBooks product and continue your accounting tasks. In this post, we’ll walk you through step-by-step instructions on how to change QuickBooks license number, plus what to do if you’re having trouble. Let’s dive in!
How to Find Your QuickBooks License Number, Product Number in QuickBooks?
Here, we have described the complete procedure for locating your QuickBooks Desktop Product details.
QuickBooks Desktop (Pro, Premier, or Enterprise)
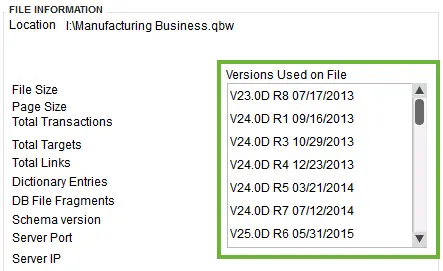
- Launch the QuickBooks Desktop application and then hit the F2 key.
- Now, start searching for the product name, number, and license number into the Product Information window.
- Afterwards, browse for your release at the end of the product name.

- Now, begin searching for your version within the Version Used on File section. You will see that the list is sorted according to date, with the older version at the top and the latest version at the bottom.
QuickBooks Payroll (For Desktop)
- Launch the QuickBooks Desktop application.
- Choose the Employees menu and then opt for the Payroll Centre.
- Now, head to the Payroll tab. Then, you will get the status of your subscription.
How to Change License Number In QuickBooks Desktop?
You have the option to change the license number in QuickBooks Desktop without uninstalling or reinstalling it.
QuickBooks Desktop For Windows
- Launch the QuickBooks Desktop application and then head to the File menu.
- Choose the Manage My License and then click the Change My License Number option.
- Insert a new license number and hit the Next option, followed by Finish.
QuickBooks Desktop For Mac
- Access the QuickBooks menu and tap on the Manage My License option.
- Choose the Deauthorize This Computer tab.
- Once you see the pop-up, click the Deauthorize and Quit option.
- Finally, relaunch the QuickBooks application and then carry on with the registration process. With this, it will allow you to insert a different license.
Learn More:- How to Install & Set Up QuickBooks For Mac?
How to Change Product Number in QuickBooks Desktop?
There are times when users feel the need to change the product number in QuickBooks Desktop if it’s entered incorrectly.
1. Remove & Then Reinstall the QuickBooks Application
If you are using the Pro, Premier, or Enterprise in five or fewer PC’s for your business, then you must perform the steps below to change the product code.
- Uninstall and then reinstall QuickBooks Desktop.
- Now, you must activate QuickBooks Desktop by performing the steps below.
- Launch the QuickBooks application and hit the Help menu.
- Choose the Activate QuickBooks Desktop option.
- Carry on with the instructions given on the screen to verify your information.
- Once QuickBooks is activated, you are all set to go.
2. Change the Name of Your QBregistration.dat file (for QuickBooks Enterprise)
If you are a user who has installed QuickBooks Enterprise on five or fewer PC’s, then choose the reinstallation process. So, if you are running an Enterprise version on more than five computers, then using the reinstall process might be a bit challenging. So, for that, you can update the product code by editing the qbregistration.dat file.
First Step: Launch Your Qbregistration.dat file Via QuickBooks
- Open the QuickBooks Desktop application and press the F2 key + F3.
- By this, it launches a Tech Help window on the screen.
- Choose the QBREGISTRATION>DAT from the Open File tab and opt for the Open File tab. This will launch the file within Notepad.
- Next, generate the backup of the qbregistartion.dat. file. You will notice that QuickBooks won’t launch correctly if there are any typos within the file. So, this step is very important to perform.
- Move to the Notepad File menu and from there choose the Save As option.
- Tap on the Desktop option from the Save As Window and click Save.
- Shut down the file.
- Next, relaunch the file from the Tech Help window.
- Finally, exit from QuickBooks, but make sure to keep the qbregistration.dat file open in your Notepad.
Second Step: Modify Your QBregistration.dat File
- Launch the Notepad and then click the Edit menu > Replace option. Otherwise, you can press the Ctrl + H keys within the qbregistration.dat file.
- Mention the old product number in the Find What column and replace it with the new one in the Replace With column. While entering, make sure that you are using the format XXX-XXX while inserting the product number.
- Thereon, choose the Replace All tab.
- Finally, click the File > Save tab and exit from the file.
Third Step: Review Your Product Code
- Launch the QuickBooks Desktop application.
- After this, hit the F2 key to access the Product Information window.
- Look for the Product Number field to verify that the product code is now updated.
What to Do if You Can’t Change QuickBooks License Number?
If you fail to change the QuickBooks License Number, then you must perform the following troubleshooting methods.
Resolve Error: Entered Incorrect license/product numbers errors
If you face issues while making changes to your license number.
- In case you have purchased the QuickBooks Desktop through the website, then verify your Purchase Confirmation email to get the license number and product code. If you fail to receive the product information, then log in to your Customer Account Management Portal to find it.
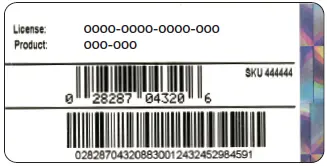
- Whereas, if you purchased QuickBooks from a retail store. You must search for the sticker present on the original CD envelope.
Fixing Other Activation or Registration Errors
Solution 1: Use the Quick Fix My Program to Rectify the Issue
Sometimes, the users fail to activate the QuickBooks Desktop due to the background running processes. Therefore, to address the issue, you must get the QuickBooks Tool Hub and then run the Quick Fix My Program tool to exit from the background processes.
Step 1: Get the Latest Version of QuickBooks Tool Hub
Before running the Quick Fix My Program, you need to download and install QuickBooks Tool Hub (1.6.0.8).
Step 2: Access the Quick Fix My Program Tool
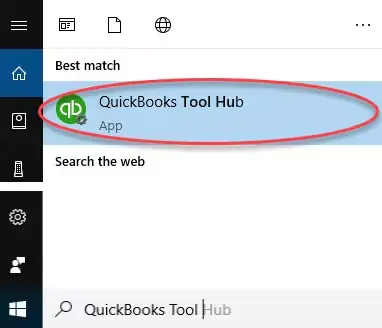
- Go to the desktop, double-tap on the QuickBooks Tool Hub icon to open it.
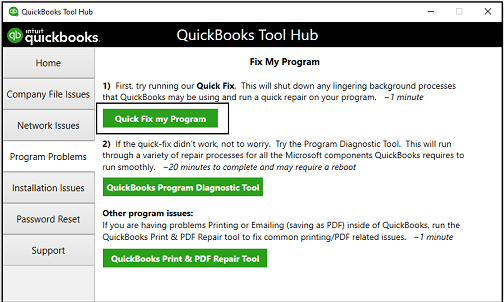
- Now, choose the Program Problems tab and click the Quick Fix My Program tab.
- Once the tool repairs the issue, launch QuickBooks Desktop. Then, access your company file and try to activate the QuickBooks license key.
Solution 2: Utilize the 3371 Error Fix Via QB Tool Hub
- Exit from the QuickBooks Desktop application.
- Launch the QuickBooks Tool Hub on your screen and choose the Installation Issues tab.
- Now, head to the 3371 Error Fix tab and click on OK.
- Finally, launch the QuickBooks Desktop and then access your company file.
Solution 3: Access the QuickBooks Install Diagnostic Tool
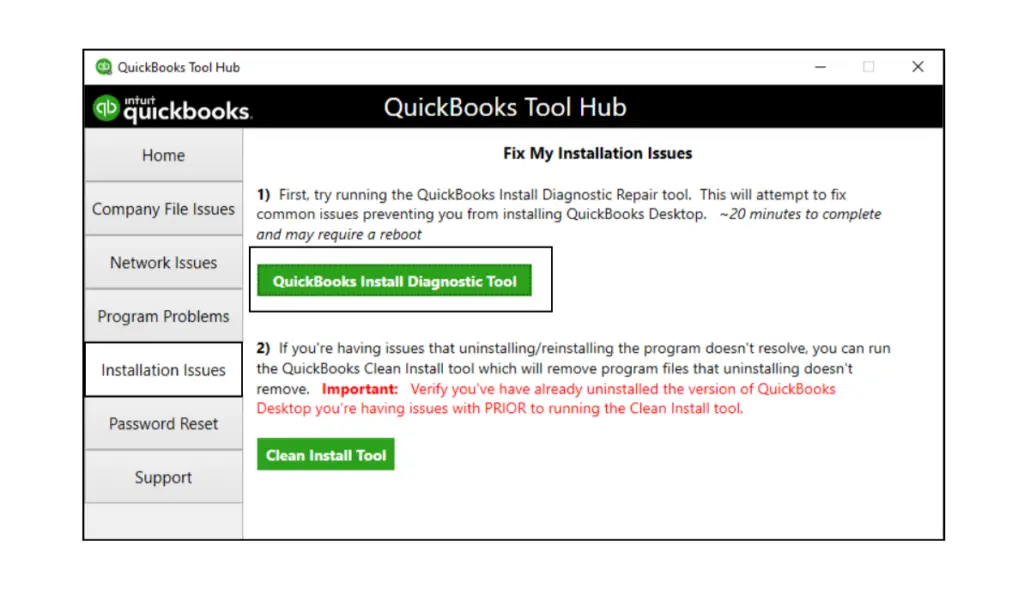
The QuickBooks Install Diagnostic tool is used to deal with the problems encountered during the QuickBooks installation. So, to rectify the issue, it is necessary to run the latest version of the QuickBooks Install Diagnostic Tool.
Solution 4: Generate a New Windows User With Admin Rights
- Initially, press the Windows logo key to access the Start menu and head to the Settings tab.
- Now, head to the Accounts and then choose the Family & Other Users tab.
- Next, hit the Add Account option beneath the Other Users section.
- When you see the Microsoft Account window open, opt for “I don’t have this person’s sign-in information” and tap on “Add a user without a Microsoft Account.”
- Provide a username and password for the new account. Then, provide the answers to the security questions asked.
- Finally, hit the Next tab, and it will generate a new user account in Windows.
- Once generating the new user account, log out of Windows and then sign back in as the new user.
Solution 5: Reinstall QuickBooks Desktop
If you are still facing the issue, then try to uninstall and reinstall QuickBooks Desktop.
Solution 6: Try Reactivating MSXML Components
Perform the following instructions to repair the damage to the MSXML components.
64-bit Computer
- Press the Windows logo key to launch the Start menu, then type cmd.
- Now, right-click the CMD, then choose the ” Run as Administrator option.
- When the Command Prompt window appears, insert “cdwindowssyswow64” and press Enter key.
- Following this, type “regsvr32 MSXML4.dll”, then press Enter.
- Also, you must type “regsvr32 MSXML6.dll”, then press Enter.
32-bit Computer
- Launch the Run window and type cmd in the search console.
- In the Command Prompt screen, type regsvr32 MSXML4.dl and press the Enter key.
- Thereon, type regsvr32 MSXML6.dll and press the Enter key again.
Rectify Error: The validation code is incorrect, or This service is temporarily unavailable.
Solution 1: Update Your System’s Date and Time
- Firstly, right-click on the time displayed on the Windows taskbar.
- Choose the Adjust Date/Time option.
- Now, verify if the date and time on your system are correct. If not, click on the Date & Time tab and set the date for the current year.
- Next, hit the Apply and then the OK tab.
- Launch the QuickBooks Desktop application again and click on the Help menu.
- Choose the Activate QuickBooks and then click on Begin Registration.
- Provide the correct Validation Code in the text box and hit the Next tab.
Solution 2: Manage Your QuickBooks License
For managing the QuickBooks License number, you must perform the following steps.
- Initially, take your cursor to the Help menu and click on Manage my license.
- Choose the Change my license number option.
- Now, provide the correct license number as all 0s and click Next.
- Make sure not to insert a Validation code here and then tap on Finish.
Fix error: You see a blank screen when you try to activate
Sometimes, the users might get a blank screen while activating the QuickBooks Desktop due to the interruption of antivirus software. So, to address the issue, you must disable the antivirus software for some time and then try again later.
You may also consult with the antivirus provider if you require any guidance to work with QuickBooks.
Fix Error: Validation Code Screen Doesn’t Appear
If you fail to get the Validation Code Screen in front of you, then try performing the solutions below.
Solution 1: Activate QuickBooks Manually
- In QuickBooks Desktop, press the Ctrl + P keys. It will launch a manual activation window.
- Herein, you must provide the validation code.
Solution 2: Manage Your License
- Firstly, move to the Help, Manage my license, then click Change my license number.
- Now, insert the license number as all 0s.
- Make sure you won’t enter the validation code and then select Finish.
Conclusion
By now, we hope that you can easily change the QuickBooks License Number in QuickBooks Desktop. Thus, it will help you work with your QuickBooks application without any interference. Furthermore, if you still require any additional guidance, then connect with our BizBooksAdvice professionals for help. You can connect with the professionals via Live Chat or by dialing the +1-866-408-0444.
Frequently Asked Questions (FAQ’s):-
Question 1: How to upgrade a QuickBooks license?
Ans. For upgrading the QuickBooks license, you must log in to QBO as a primary or company admin. After this, choose the Subscriptions and billings option. Then, verify that your payment info is up-to-date. Furthermore, when you are in the QBO section, choose Upgrade your plan.
Question 2: Where is the QuickBooks license stored?
Ans. Your QuickBooks license is present in the qbregistration.dat file. Whenever you activate the subscription, QuickBooks retrieves and validates it. In case the file is missing or broken, QB Desktop fails to open, and then you need to recreate QBRegistration.
Question 3: How to sync the license in QuickBooks Desktop?
Ans. To sync the license in QuickBooks Desktop, you must go to the Help menu. Choose the Manage My License option and hit the Sync License Data Online.
Question 4: How do I add another license to QuickBooks?
Ans. To add another license to QuickBooks, you must use these steps.
- Launch the QuickBooks Desktop application and click the Help menu.
- Choose the Manage my License option and opt for Buy Additional User License.
- Now, click the Add Seats Online to check the current pricing.
Question 5: Do you need a license for QuickBooks?
Ans. Yes, you require at least one license seat for every person in the network who wants to access the QuickBooks Desktop.
About The Author

Jonathan Browns
Jonathan Brown is a trained QuickBooks professional with 10 years of experience in the accounting sector. Moreover, he is passionate about helping businesses reduce the stress of managing accounts. Also, he is proficient in assisting entrepreneurs and small business owners to use QuickBooks and enhance their accounting experience.

QuickBooks Desktop, Payroll or Enterprise
Advanced Support for QuickBooks Desktop, Payroll & Enterprise Solutions
From payroll tax setup, direct deposit issues to Enterprise performance tuning and Desktop upgrades - our QuickBooks experts provide accurate and stepwise assistance. Get dependable support designed to minimize downtime and maximize efficiency.
Recent Posts
-
QuickBooks Enterprise Latest Version (2026): Everything You Need to Know
-
How to Troubleshoot QuickBooks Error PS038 During an Update?
-
Troubleshooting QuickBooks TLS Security Portal Errors Instantly
-
Fixing QuickBooks Script Error (Easy Troubleshooting Guide)
-
How to Create QuickBooks Portable Company File Easily?