QuickBooks Update Stuck? Here’s How to Fix It Fast

- By Jonathan Browns
- Dec 17, 2025
- Accounting
- 7 min read
Most often, the users may experience QuickBooks Update Stuck at 20-30% when it’s “Writing System Registry Values”. This may happen due to Microsoft Defender or an interruption of the antivirus program. As a result, it may slow down the installation of the latest QuickBooks update and prevent you from accessing the latest features. If you are also struggling with the QuickBooks Desktop update stuck issue, then this is the post that you are looking for. Herein, we have elaborated on all the causes behind the Update stuck issue and the troubleshooting methods to resolve them.

What are the Major Causes Behind the QuickBooks Stuck Updating Issue?
QuickBooks is Stuck Updating when the user doesn’t have enough admin rights to get the updates, or when there are problems with the internet connection. However, this may also arise due to the numerous other factors, which are explained below.
- The date and time on the system aren’t set up properly.
- Installation of multiple versions of the QuickBooks application.
- Misconfigured settings of Internet security and Windows Firewall.
- Problems generated with the installation of QuickBooks or due to damaged program files.
- Accessing the outdated QuickBooks Desktop or the Windows operating system.
- Your system doesn’t have enough storage space to install the QuickBooks updates.
How to Address the QuickBooks Update Stuck on Registry Values Error?
After knowing the causes behind the QuickBooks Update Stuck on Registry Values error, let’s look at the solutions to fix the issue. Herein, we have listed all the troubleshooting methods. Let’s look at them.
Method 1: Create a Microsoft Defender Exclusion for QuickBooks Files
At times, by adding some specific QuickBooks files to an exclusion list, Microsoft Defender will not consider them as a scam and will not stop you from installing the updates. Thus, it will resume your update process to carry on at its expected speed without any hindrance. Therefore, to use this feature, perform the step-by-step instructions written below.
Important Tip: Make sure that you log in as an admin user in Windows to add the Exclusions. If not, the Add Defender Exclusion option will be grayed out, and you have to ask your admin to add it as an exclusion on your behalf.
- Initially, tap on the Cancel option to stop the update and then exit from QuickBooks.
- After this, launch the QuickBooks Tool Hub application. If not, then first set up the QuickBooks Tool Hub.
- Now, head to the Installation Issues tab and click the Add Defender Exclusion option.
- Thereon, relaunch your PC and restart your QuickBooks application.
- Finally, begin the update process again and see if the QuickBooks update gets stuck on registry values.
Method 2: Disable the Windows Defender Antivirus Protection
- Firstly, hit the Cancel tab to stop the update and then exit from the QuickBooks application.
- After that, turn off the Windows Defender antivirus protection from Windows Security.
- You must launch the Run window and type “gpedit.msc” in the search column.
- Thereon, carry on with the following path: Computer Configuration → Administrative Templates → Windows Components → Microsoft Defender Antivirus.
- Choose the Turn off Microsoft Defender antivirus, double-tap on it, and hit the Enabled option.
- Hit the OK tab and then relaunch your PC to apply these changes.
- Now, launch your QuickBooks application and then try to update it once again.
- When you are done with the update, turn on Windows Defender antivirus security to protect your system.
Method 3: Access the QuickBooks Desktop in Admin Mode
At times, users might face the QuickBooks update stuck on registry values issue while trying to install the updates without admin rights. So, it’s essential to update QuickBooks with proper admin rights. For that, you must perform the step-by-step instructions written below.
- Initially, log in to Windows with an administrator profile and then look for the QuickBooks Desktop application.
- After this, right-click on the QuickBooks Desktop icon and tap on the Run as Administrator option.
- Thereon, if asked, then provide the admin password and click the Next or OK option. Once the QuickBooks application opens up, try to install the update again.
Method 4: Check the Date & Time On Your System
Most often, the users might get an update stuck issue in QuickBooks due to incorrect date and time settings in the system. As a result, it may interrupt the update process. So, to address the issue, you need to correct the system’s date and time by performing these steps.
- Exit from the QuickBooks application and right-click the digital clock from the bottom right corner of the taskbar.
- After this, pick the Adjust Date/Time option and then hit the Change Date and Time.
- Now, mention the accurate date and time as per the region you are staying in and tap on the OK tab.
- At last, relaunch QuickBooks and then try downloading the updates once again.
Method 5: Review the Internet Connection & Settings
Unstable or incorrect internet settings are one of the possible reason that causes the QuickBooks update stuck in reboot loop issue. So, to resolve the issue, you have to test the internet connection by applying the following steps.
- To begin with, click on the Help menu and tap on the Internet Connection Setup option.
- After this, select Use my computer’s internet connection settings to establish a connection when this application accesses the internet.
- Thereon, tap on the Advanced Connection Settings option and then hit the Restore Advanced Settings tab.
- Later on, choose the OK and then the Done option.
- Finally, try to get the QuickBooks updates and see if you are still getting the same error.
Method 6: Try to Update Microsoft Windows
Using an incompatible version of the Windows operating system may trigger the QuickBooks update 34.0 stuck issue. Therefore, to fix the issue, you must keep the Windows operating system up-to-date by following these steps.
- To begin with, access the Start menu and type Settings into the search panel.
- After that, pick the Windows Update from the left pane and browse to the Check For Windows Update tab.
- Now, if the updates are available, hit the Download & Install option.
- Next, you need to wait unless the updates are installed.
- At last, if prompted, then relaunch your computer to apply the necessary updates.
Method 7: Multiple Installation of QuickBooks Desktop Of the Same Version
If you have multiple versions of QuickBooks Desktop installed on your PC, then you might encounter update errors. It may happen due to the confusion created by the installation of multiple versions of QuickBooks. Therefore, to address the issue, you must download and install a manual update for each affected version of QuickBooks Desktop. As a result, it may ensure that everything is running appropriately.
Method 8: Review the Internet Security & Firewall Settings
The users must check the specific port configuration of the Internet security and personal firewall settings. Herein, make sure that ports 80 and 443 are turned on. Also, verify that you have access to the following files.
- AutoBackupExe.exe
- Dbmlsync.exe
- DBManagerExe.exe
- FileManagement.exe
- FileMovementExe.exe
- IntuitSyncManager.exe
- QBCFMonitorService.exe
- QBDBMgr.exe
- QBDBMgrN.exe
- QBGDSPlugin.exe
- QBLaunch.exe
- QBServerUtilityMgr.exe
- QBW32.exe
- QuickBooksMessaging.exe
In case other processes are accessing these ports, the QuickBooks Database Server will access a fallback port, i.e, 56719.
Method 9: Utilize the QuickBooks Install Diagnostic Tool
Any discrepancies with the installation of the QuickBooks Desktop updates might be a QuickBooks update stuck on writing system registry values issue. So, to fix the issue, you must run the QuickBooks Install Diagnostic Tool.
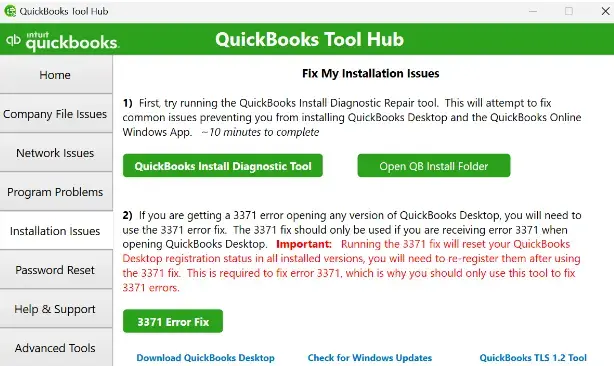
- Start the process by launching the latest version of QuickBooks Tool Hub.
- After this, head to the Installation Issues tab and click the QuickBooks Install Diagnostic Tool.
- Now, wait for some time unless the Install Diagnostic tool scan and run a repair on the program.
- Next, relaunch your PC and then open the QuickBooks Desktop application. Later on, access your data file.
- Make sure that QuickBooks is up-to-date so that you can access to the latest fixes and security patches.
Method 10: Reinstall QuickBooks Desktop Using Full Version Installer
If you have applied all the above solutions and still nothing works, try reinstall QuickBooks Desktop. Doing so will remove all the damaged or technical glitches in the QuickBooks program. Thus, it will provide you with a new version of QuickBooks, which you can use to perform your daily business operations.
Final Thoughts
QuickBooks Update stuck is a challenging issue that might prevent users from getting the new releases, features, and improvements in the application. But we ensure that by implementing the above-given solutions, you can easily address the issue. If you still find any issues with the installation of the QuickBooks updates, then connect with our BizBooksAdvice professionals for better assistance.
Frequently Asked Questions (FAQ’s):-
Question 1: Why is QuickBooks taking so long to update?
Ans. At times, QuickBooks takes too long to update because of Microsoft Defender or interference from the antivirus program, which may hamper the installation process.
Question 2: Why does QuickBooks keep updating?
Ans. The QuickBooks application keeps releasing updates, and it notifies you whenever they’re available. However, it is an in-built feature that ensures that your system is getting the latest security patches and new features for the application.
Question 3: What happens if you don’t update QuickBooks?
Ans. If you don’t update QuickBooks, then you won’t be able to obtain the security patches and online services. Moreover, it also restricts you from accessing the QuickBooks Desktop live support facility.
Question 4: How to auto update QuickBooks?
Ans. You can auto-update QuickBooks by clicking the Account and Settings tab. After this, choose the Update Options from the left menu and mark the checkbox of Let QuickBooks automatically install updates. Thereon, you must pick the preferred update window.
Question 5: How do I reset the QuickBooks update?
Ans. To reset the QuickBooks update, you must perform the instructions below.
- Firstly, you must launch the QuickBooks Desktop application and click the Help menu.
- After this, choose the Update QuickBooks Desktop option and hit the update Now tab.
- Thereon, tick-mark the Reset Update checkbox.
About The Author

Jonathan Browns
Jonathan Brown is a trained QuickBooks professional with 10 years of experience in the accounting sector. Moreover, he is passionate about helping businesses reduce the stress of managing accounts. Also, he is proficient in assisting entrepreneurs and small business owners to use QuickBooks and enhance their accounting experience.

QuickBooks Desktop, Payroll or Enterprise
Advanced Support for QuickBooks Desktop, Payroll & Enterprise Solutions
From payroll tax setup, direct deposit issues to Enterprise performance tuning and Desktop upgrades - our QuickBooks experts provide accurate and stepwise assistance. Get dependable support designed to minimize downtime and maximize efficiency.
Recent Posts
-
How to Fix QuickBooks Self-Employed Login Issue Easily?
-
QuickBooks Script Error? Here's How to Fix It Fast
-
How to Migrate from QuickBooks Desktop to Online - Step-by-Step Guide
-
QuickBooks Online Advanced Login, Pricing & Feature Comparison Guide
-
QuickBooks Bookkeeping: The Practical Way to Keep Your Books in Order