QuickBooks Detected that a Component Required to Create PDF – Here’s What to do Now

- By Jonathan Browns
- Jan 07, 2026
- Accounting
- 7 min read
Sometimes, QuickBooks users experience difficulties when attempting to convert their files to PDFs or print them. A common error message that may appear is:
“QuickBooks detected that a component required to create PDF is missing.”
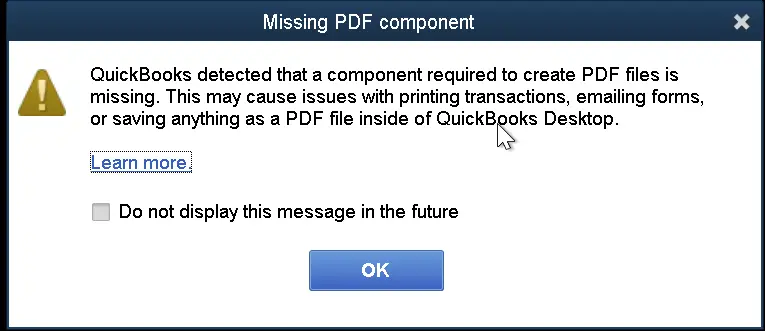
This error message can cause frustration among users as it does not specify which component is missing or why it is important to create the PDF. In this blog, we will help you understand the reasons why the error QuickBooks Detected that a Component Required to Create PDF takes place.
QuickBooks Detected that a Component Required to Create PDF – What’s It?
QuickBooks might be trying to print PDFs, but it might encounter an error message that says, “QuickBooks can’t complete the Current Action due to a Missing Component PDF.”
This error signifies that QuickBooks can’t save the file as a PDF, and it is inaccessible to the user because of a missing component.
It might not be specified which component is missing, so you will need to dig in deeper to find out what the actual problem is.
Causes of QuickBooks Detected that a Component Required to Create PDF
In this section of the blog, we will see the causes that could lead to this error. The causes are as follows-
- Damaged, missing, or outdated Adobe Reader, when you try to create a PDF, can also be one of the prominent causes of this error.
- The version of the QuickBooks application you are using is outdated.
- Microsoft XPS Document Writer (MXDW) is not turned on in Windows.
- The version of the QuickBooks application you are using is not compatible with your Windows or Vice versa.
- The firewall software installed on your computer system is considering the QuickBooks application as malware, and hence, is not letting it carry out the required operation.
- Issues while running the Printer Spooler Service can also lead to this error.
- If your QuickBooks Desktop is not installed correctly, it can also lead to this specific error.
- Lastly, a damaged or corrupted QBPrint.qbp file can affect the printer setup, leading to this issue.
Consequences of QuickBooks Detected that a Component Required to Create PDF Error
In this section of the blog, we will look at the signs and symptoms that hint towards this particular error. The signs and symptoms are as follows-
- There might be an issue with the printer itself.
- Users might be unable to print, create, or email a pay stub or payroll report due to the error.
- The QuickBooks application might close suddenly and not open correctly.
- The screen goes blank or turns grey.
- An error message that says, “QuickBooks detected that a Component Required to create PDF” flashes on the screen.
- The application of QuickBooks might perform in a sluggish manner.
- Users find it difficult to open PDF files on the computer.
- The QuickBooks application can freeze at any point while the user is working.
- Windows may crash out of nowhere due to this error.
Other Possible PDF-Related Issues That Can Occur in QuickBooks
Several other error messages might accompany QuickBooks not being able to complete the current action due to a missing component PDF message. These include:
- Unable to save as PDF file.
- There is a problem connecting to your chosen printer, Microsoft XPS Document Writer, on the XPS port.
- QuickBooks error 1722 or 1801 might arise when installing PDF Converter.
- It could not print to the printer.
- Problems printing invoices, transactions, or reports.
- Printing directly to the QuickBooks PDF Converter is not possible.
- QuickBooks unrecoverable error.
- Print Driver Host for 32-bit Applications is not working.
Ways to Fix the QuickBooks Missing PDF Component Error?
In this section of the blog, we will look at multiple ways or solutions to fix this error. Let us look at the solutions one by one. Let us start.
Solution 1. Update the QuickBooks Application
Update QuickBooks application to eliminate this error. Updating the application could help you troubleshoot the error.
Solution 2. Install and Repair Adobe Acrobat Reader
Issues with your Adobe Acrobat Reader, if it is outdated or damaged, can lead to the occurrence of this error. You should update the application, and if that does not work out for you, consider following the steps below.
Steps to install Adobe Acrobat Reader
The steps to install Adobe Acrobat Reader are as follows-
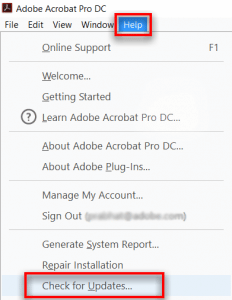
- Start by pressing the Start button on your desktop, typing Adobe in the Search Programs and Files search box, and then opening the application.
- In the application itself, hover over the Help tab and look for the Check for Updates option.
- You can also visit the Adobe Product Download Page to download the setup file for installation manually.
- Follow the instructions in the Adobe installation guide to complete the installation process.
Steps to Repair Adobe Reader
The steps for repairing the Adobe Reader are as follows-
- In the first step, exit all the open windows and web browsers on your computer.
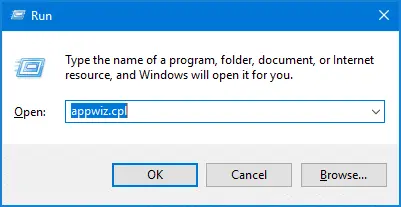
- Now, you have to enter or type appwiz.cpl through the Run window, which can be accessed by using the Windows + R keys simultaneously.
- Now, double-click Adobe Reader from the list and select the option Uninstall / Change.
- Now, click on Next, and furthermore, click on Repair.
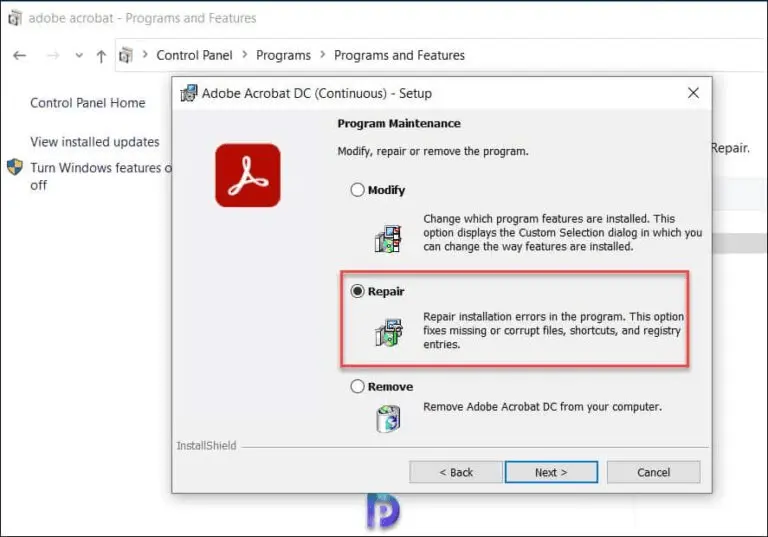
- Hit the Next button again, and then choose the Install option.
- Click the Finish button after the installation and restart Windows.
Learn More – How to Print W-2 And W-3 Forms in QuickBooks
Solution 3. Turn On Microsoft XPS Document Writer
Many users might face this error as their Microsoft XPS Document Writer is not turned on. The steps to enable it are as follows-
- In the first step, you have to enter or type appwiz.cpl through the Run window, which can be accessed by using the Windows + R keys simultaneously.
- Now, press the Enter key and click Turn Windows features on or off from the left side panel.
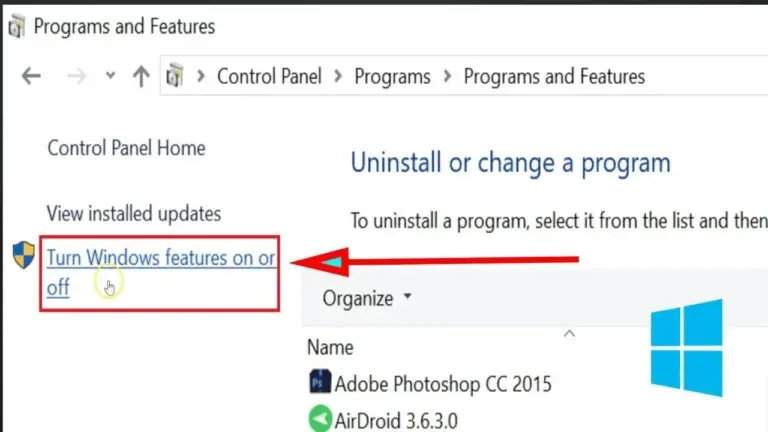
- Check if the checkbox beside the Microsoft XPS Document Writer is ticked off or not. If no, select the box and try to print the PDF from QuickBooks again.
After the XPS Document Writer is enabled, try to open the QuickBooks application once again.
Solution 4. Test XPS Document Writer
The steps to test the XPS Document Writer and Print Outside QuickBooks are as follows.
- Go to the File menu and choose Print.
- Choose the Microsoft XPS Document Writer from the printer list in the print window. Hit the Print option.
- Now, save the file with the .xps extension to the computer’s desktop.
- Navigate to the desktop and find the .xps file:
- When you find the .xps file, try opening it. If an error emerges when you open the file or it doesn’t appear suitable, you must reinstall the XPS Document Writer.
- If there’s no file and no error appears while saving, there may be an issue with the security settings. You may be unable to print, and it might have deleted the .xps file after creation.
- When you see a problem when you try printing or don’t see the XPS Document writer, you’ll have to install the printer again.
Please note – Intuit doesn’t support Microsoft apps. So, they are not responsible for these tools if they cause QuickBooks to be unable to complete the action due to a missing component error.
- When you cannot perform these tasks yourself, consider consulting QB professionals. Test the XPS Document Writer and Print Outside QuickBooks
Solution 5. Download and Install the Tool Hub & Use the Print & PDF Tool
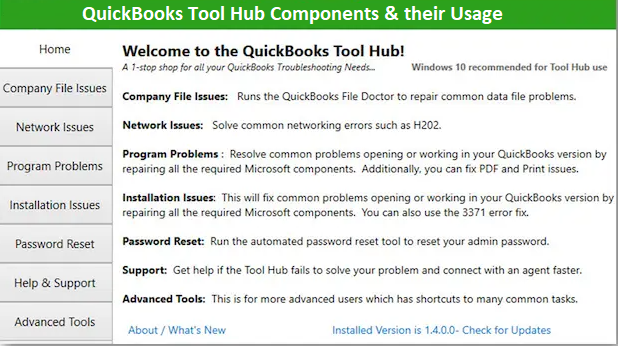
In this step, you have to download and install the QuickBooks Tool Hub. The QuickBooks tool hub is of great use when it comes to fixing issues within the QuickBooks application. Within the QuickBooks Tool Hub, you will find the Print & PDF Tool. Use it to fix the “QuickBooks Detected that a Component Required to Create PDF error.
Solution 6. Use the Clean Install QuickBooks Tool
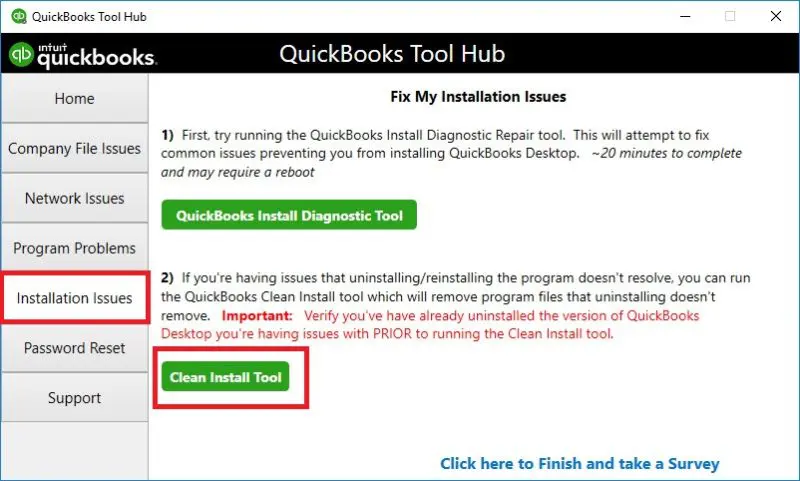
If you have already installed the QuickBooks Tool, you need to use the QuickBooks Clean Install Tool to fix this QuickBooks error. If you have not installed the QB tool hub yet, refer to Solution 5 to understand how you can download and install the QuickBooks Tool Hub.
Solution 7. Ensure the Email Feature is Active
If none of the above given solutions have helped you to resolve the QuickBooks missing PDF component issue, consider reviewing the email feature and make sure that it is enabled. To activate the email feature, if it is not enabled yet, follow the steps below. The steps are as follows-
- Open the QuickBooks Desktop application on your computer system and then move to the Edit menu, choose the option Preferences, and now, hit the Send Forms menu.
- Now move to the My Preferences tab, then go to the Send email section, and choose one of the following: Web-mail for Gmail, Yahoo, or similar email services, as per your preference.
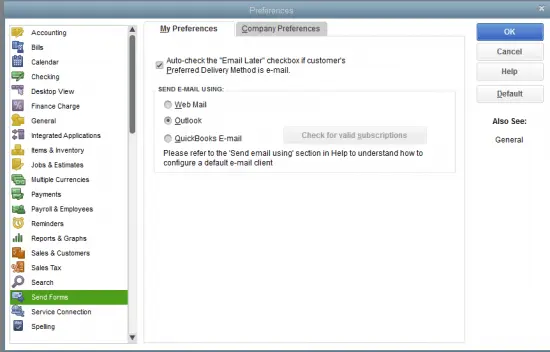
- If you use Microsoft Outlook, click Outlook, then run the QuickBooks email service and select QuickBooks Email.
- If not set up, follow the steps shown on the computer screen to set up the email service, and when finished, click OK.
After the process ends, check the status of the issue, but if the QuickBooks PDF component remains missing, use the steps in the next solution.
Learn Also – QuickBooks Email Not Working
Solution 8. Rename the QBPrint.qbp File
The QBPrint.qbp file contains information about customizing your forms and the printer setup; thus, damage of any kind in this file can be a reason why QuickBooks cannot complete the current action. To resolve the QuickBooks detected that a component required to create PDF files is missing error, you must rename the *.qbp file using the extensive steps below –
- In the first step, open the Windows File Explorer and then move to the C Drive, then navigate to this folder path – ProgramData\Intuit\QuickBooks 20XX folder and find the *.qbp file.
- The folder year depends on what version of QuickBooks Desktop you are using, and if you can’t locate the folder or the file, ensure the hidden files and folders are enabled in your Windows OS.
- After you have found the file, right-click the QBPrint.qbp file, now select the Rename option, then add *.old at the end of the file name, and then hit Enter to save the modifications.
- Here in this step, open the QuickBooks Desktop application, select the option Printer Setup from the File menu, and choose any transaction from the Form Name list.
- In the last step, hit the OK button, and QuickBooks will be prompted to create a new QBPrint.qbp file.
Solution 9. Reset the Temp Folder Permissions
If the temp folder permissions are incorrectly set or configured, you must reset the Temp folder permissions. The steps to do so are given below.
Step 1: Reset your temp folder permissions
Try to reboot or restart your device when you encounter the QuickBooks detected that a component required to create PDF files is missing. If it doesn’t work, you’ll have to reset the permissions for your TEMP folder by following the steps below.
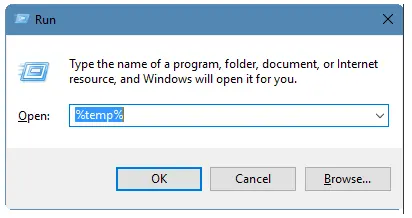
- In the first and foremost step, launch the Run command by pressing the Windows and R keys together.
- Now, you have to type the words %TEMP% in the run search field and hit the Enter button.
- Right-click and click on the Properties option in the empty area of the temp folder.
- Now, navigate to the Security tab.
- Now, set all user names and groups on the Security tab with Full Control.
- After setting the permissions to Full Control, save it as a PDF within the QuickBooks application.
Step 2: Validate that you can print to XPS (for issues with PDF and Email)
You need to confirm that you can print it for your XPS Document Writer. QuickBooks utilizes parts of the XPS Document Writer to save as PDF.
- Go to your Notepad when you see QuickBooks Desktop missing the PDF component.
- Type anything, go to file, and choose the option Print.
- Choose the XPS Document Writer and click on the Print option.
- Now, name the file and save it to the desktop.
- Return to your desktop and see the XPS document you printed from the Notepad.
Please Note!
- Test the print issues by printing to your printer. Verify if the Print is successful outside QuickBooks.
- If you are finding it challenging to print to the XPS printer outside QuickBooks, you’ll need to contact professionals for help. The XPS printer is not a QB product.
Solution 10. Try to Run QuickBooks Online in Incognito Mode
If you are struggling with the error QuickBooks detected that a component required to create PDF files is missing, try running the QuickBooks application in incognito mode. The shortcuts to do so are as follows-
- If you use Google Chrome, press Ctrl + Shift + N to run it in incognito (private) mode.
- If you use Microsoft Edge and Mozilla as your default browsers, access the private mode by using the Ctrl + Shift + P shortcut combination.
- The Command + Shift + N keys will help you run QuickBooks in incognito mode in the Safari Browser.
Final Words
We have come to the end of this blog. This blog has thoroughly covered how to troubleshoot the error QuickBooks Detected that a Component Required to Create PDF. In case you have not understood how to fix the QuickBooks Missing PDF Component Error or you have queries about anything in general about the QuickBooks application, consider calling our BizBooksAdvice experts at our toll-free number. We would be beyond pleased to help you.
Frequently Asked Questions (FAQ’s)
1. Is this a QuickBooks problem or a Windows issue?
It’s typically a QuickBooks component issue, but a missing or corrupted Windows PDF driver can contribute.
2. Can I still use QuickBooks without fixing this right away?
You can view PDFs, but you won’t be able to create new PDFs from QuickBooks until the component is restored.
3. How can I prevent this in the future?
Keep QuickBooks and Windows updated, avoid partial uninstallations, and regularly perform maintenance using the QuickBooks Tool Hub.
4. What should I do if I still get the error after fixes?
Check event logs, ensure no anti-virus/quarantine is blocking the component, and contact QuickBooks support for advanced diagnostics.
5. If repair doesn’t help, what’s next?
Do a clean reinstall of QuickBooks Desktop:
- Uninstall QuickBooks.
- Rename the installation folder if prompted.
- Reinstall QuickBooks from the original installer or download.
About The Author

Jonathan Browns
Jonathan Brown is a trained QuickBooks professional with 10 years of experience in the accounting sector. Moreover, he is passionate about helping businesses reduce the stress of managing accounts. Also, he is proficient in assisting entrepreneurs and small business owners to use QuickBooks and enhance their accounting experience.

QuickBooks Desktop, Payroll or Enterprise
Advanced Support for QuickBooks Desktop, Payroll & Enterprise Solutions
From payroll tax setup, direct deposit issues to Enterprise performance tuning and Desktop upgrades - our QuickBooks experts provide accurate and stepwise assistance. Get dependable support designed to minimize downtime and maximize efficiency.
Recent Posts
-
QuickBooks Bookkeeping: The Practical Way to Keep Your Books in Order
-
QuickBooks Merchant Services: Everything You Need to Know Before You Sign Up
-
QuickBooks Payroll Assisted: Everything You Need to Know
-
How to Contact QuickBooks Online Customer Service Team 2026
-
QuickBooks Online Login: Sign in to Access your QB account